Pyle PWD250 User Guide - Page 12
Installation Instructions
 |
View all Pyle PWD250 manuals
Add to My Manuals
Save this manual to your list of manuals |
Page 12 highlights
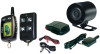
VEHICLE SECURITY SYSTEM Optional Remote Start Module and 2-way Transmitter Instructions Included INSTALLATION INSTRUCTIONS BEFORE INSTALLING THIS PRODUCT PLEASE READ THE INSTALLATION DIRECTIONS THOROUGHLY!! BEFORE YOU BEGIN This system is compatible with electronic fuel injected engines only! Not intended for use with carbureted engines. • This product must be installed by qualified personnel according to these instructions and and observing all safety features. • Check to see if the vehicle is equipped with any type of factory security system. • Check to see if there is a pin switch for the hood, if not one must be installed. • Verify that the vehicle starts and idles properly before beginning the installation. • Always use a multi-meter to verify wiring. • Before mounting the product, verify with the customer the desired location for the valet switch and LED. MOUNTING SYSTEM COMPONENTS Mounting Siren Mount the siren in a suitable place under the hood, away from hot and moving engine parts such as manifolds, fan belts, etc. Make sure the siren cannot be accessed from underneath the vehicle or through the grill. Face the siren down so that water cannot accumulate inside the siren bell. Protect wires running through the firewall using either tape or split loom tubing. If a new hole is needed, protect the wire from chaffing by installing a proper size grommet. Mounting System Modules Mount the security and optional remote start module under the dash where it will be difficult for a potential thief to locate them, and away from moving parts such as brake pedals, etc. Mounting LED Mount the LED in an area that is easily seen from outside either side of the vehicle. Consult with the vehicle's owner to verify placement before drilling. Mounting Override Switch Mount the override switch in an area that is not easily seen yet within reach of the driver from the seated position. Consult with the vehicle's owner to verify placement before drilling. Mounting Extended Range Receiver Mount the extended range receiver (or transceiver on 2-way equipped systems) to the inside of the windshield using the supplied double-sided tape. Make sure the chosen location does not obscure the driver's view. Mounting Shock Sensor Mount the shock sensor to an under dash brace or similar support structure using a tiewrap or the supplied double-sided tape. Higher sensitivity may be found in some vehicles by tiewrapping the sensor to a wire loom. 12
-
 1
1 -
2
-
3
-
4
-
5
-
6
-
 7
7 -
 8
8 -
 9
9 -
 10
10 -
 11
11 -
 12
12 -
 13
13 -
 14
14 -
 15
15 -
 16
16 -
 17
17 -
18
-
19
-
20
-
21
-
22
-
23
-
24
 |
 |
