RCA RD1000 User Manual - Page 43
Transfer the audio files to the k@zoo player - will not eject with button
 |
UPC - 044319002560
View all RCA RD1000 manuals
Add to My Manuals
Save this manual to your list of manuals |
Page 43 highlights
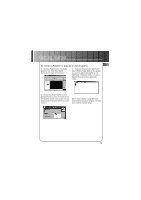
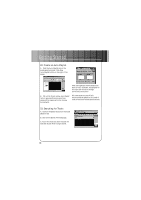
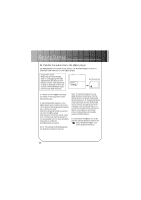
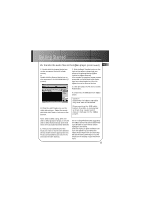
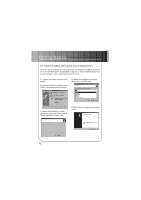
Getting Started 25. Transfer the audio files to the k@zoo player (continued) EN C. Double click the Internal device icon to view contents of the built-in flash memory or Double click the External device icon to view contents of the MultiMediaCard (if present). F. Click the Begin Transfer button on the right of the screen to download your songs to the selected device (k@zoo Internal or k@zoo External) After transfer is complete, repeat process as needed until all desired music tracks have been downloaded to either the k@zoo Internal or External devices G. Click Exit under the File menu to close RealJukebox. H. Disconnect the USB cable from k@zoo player. D. Click the Add Tracks icon on the right side column. Select the music and click Add Track>> button on the bottom. Caution Disconnect the k@zoo USB cable only after data is transferred. Disconnecting the USB cable before the data is completely written may cause loss of data or damage to the k@zoo player. Note: Click to select a song, Shift and click to select groups of songs, or Ctrl and click to select multiple songs. Click Close when all music tracks have been selected. E. After you have selected all of the music you want to record to the selected device, double click the appropriate icon. File size and availability are listed in the status and window displays. Note: If using Windows 2000, must stop the k@zoo device first before disconnecting USB cable to avoid loss of data ar damage to the device. Click the Unplug or Eject Hardware icon from the system tray and select the k@zoo Audio Player item and click Stop. See the Windows 2000 Help for further details on the Unplug or Eject Hardware topic. 35
-
 1
1 -
2
-
3
-
4
-
5
-
6
-
7
-
8
-
9
-
10
-
11
-
12
-
13
-
14
-
15
-
16
-
17
-
18
-
19
-
20
-
21
-
22
-
23
-
24
-
25
-
26
-
27
-
28
-
29
-
30
-
31
-
32
-
33
-
34
-
35
-
36
-
37
-
 38
38 -
 39
39 -
 40
40 -
 41
41 -
 42
42 -
 43
43 -
 44
44 -
 45
45 -
 46
46 -
 47
47 -
 48
48 -
49
-
50
-
51
-
52
-
53
-
54
-
55
 |
 |
