Ricoh IM C3510 Operating Instructions - Page 7
Registration to Universal Print
 |
View all Ricoh IM C3510 manuals
Add to My Manuals
Save this manual to your list of manuals |
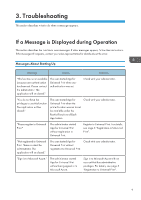
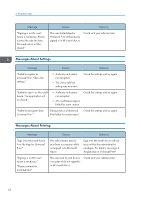
Page 7 highlights
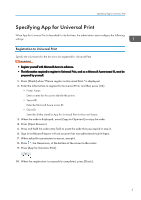
Specifying App for Universal Print Specifying App for Universal Print When App for Universal Print is launched for the first time, the administrator must configure the following settings: Registration to Universal Print Specify the information for the device to be registered for Universal Print. • Register yourself with Microsoft Azure in advance. • The information required to register to Universal Print, such as a Microsoft Azure tenant ID, must be prepared by yourself. 1. Press [Check] when "Please register to Universal Print." is displayed. 2. Enter the information to register for Universal Print, and then press [OK]. • Printer Name Enter a name for the user to identify the printer. • Tenant ID Enter the Microsoft Azure tenant ID. • Client ID Enter the ID that identifies App for Universal Print in Microsoft Azure. 3. When the code is displayed, press [Copy to Clipboard] to copy the code. 4. Press [Open Browser]. 5. Press and hold the code entry field to paste the code that you copied in step 3. 6. Sign in to Microsoft Azure with an account that has administrative privileges. 7. When asked for permission to access, accept it. 8. Press , the Home icon, at the bottom of the screen in the center. 9. Press [App for Universal Print]. 10. When the registration is successfully completed, press [Check]. 5
-
 1
1 -
 2
2 -
 3
3 -
 4
4 -
 5
5 -
 6
6 -
 7
7 -
 8
8 -
 9
9 -
 10
10 -
 11
11 -
 12
12 -
13
-
14
-
15
-
16
-
17
-
18
-
19
-
20
 |
 |