Ricoh SP C352DN Driver Installation Guide - Page 14
Quick Installation via a USB Connection
 |
View all Ricoh SP C352DN manuals
Add to My Manuals
Save this manual to your list of manuals |
Page 14 highlights
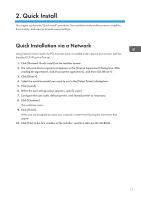
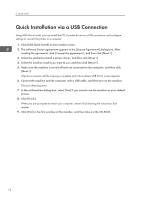
2. Quick Install Quick Installation via a USB Connection Using USB Quick Install, you can install the PCL 6 printer driver via a USB connection, and configure settings to connect the printer to a computer. 1. Click [USB Quick Install] on the installer screen. 2. The software license agreement appears in the [License Agreement] dialog box. After reading the agreement, click [I accept the agreement.], and then click [Next >]. 3. Select the method to install a printer driver, and then click [Next >]. 4. Select the machine model you want to use, and then click [Next >]. 5. Make sure the machine is turned off and not connected to the computer, and then click [Next >]. Wait for a moment until file copying is complete and [] screen appears. 6. Connect the machine and the computer with a USB cable, and then turn on the machine. The auto-detecting starts. 7. In the confirmation dialog box, select [Yes] if you want to use the machine as your default printer. 8. Click [Finish]. When you are prompted to restart your computer, restart it by following the instructions that appear. 9. Click [Exit] in the first window of the installer, and then take out the CD-ROM. 12
-
 1
1 -
2
-
3
-
4
-
5
-
6
-
7
-
8
-
 9
9 -
 10
10 -
 11
11 -
 12
12 -
 13
13 -
 14
14 -
 15
15 -
 16
16 -
 17
17 -
 18
18 -
 19
19 -
20
-
21
-
22
-
23
-
24
-
25
-
26
-
27
-
28
-
29
-
30
-
31
-
32
-
33
-
34
-
35
-
36
-
37
-
38
-
39
-
40
-
41
-
42
-
43
-
44
-
45
-
46
-
47
-
48
 |
 |