Ricoh SP C352DN Driver Installation Guide - Page 36
Registering the Printer, USB Connection
 |
View all Ricoh SP C352DN manuals
Add to My Manuals
Save this manual to your list of manuals |
Page 36 highlights
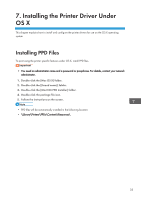
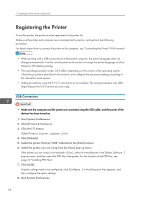
7. Installing the Printer Driver Under OS X Registering the Printer To use the printer, the printer must be registered in the printer list. Make sure the printer and computer are connected and turned on, and perform the following procedure. For details about how to connect the printer to the computer, see "Connecting the Printer" HTML manual. • When printing with a USB connection to a Macintosh computer, the printer language does not change automatically. Use the control panel on the printer to change the printer language to [Auto Detect] or [PS] before printing. • The operating procedure under OS X differs depending on the version of the operating system. Check the procedure described in this manual, and configure the necessary settings according to the manual for each version. • Setting procedures using OS X 10.11 are shown as an example. The actual procedure may differ depending on the OS X version you are using. USB Connection • Make sure the computer and the printer are connected using the USB cable, and the power of the devices has been turned on. 1. Start System Preferences. 2. Click [Printers & Scanners]. 3. Click the [ ] button. If [Add Printer or Scanner...] appears, click it. 4. Click [Default]. 5. Select the printer that has "USB" indicated in the [Kind] column. 6. Select the printer you are using from the [Use:] pop-up menu. If the printer you are using is not selected in [Use:], select its manufacturer in the [Select Software...] pop-up menu, and then select the PPD file of the printer. For the location of the PPD files, see page 33 "Installing PPD Files". 7. Click [Add]. If option settings need to be configured, click [Configure...] in the dialog box that appears, and then configure the option settings. 8. Quit System Preferences. 34
-
 1
1 -
2
-
3
-
4
-
5
-
6
-
7
-
8
-
9
-
10
-
11
-
12
-
13
-
14
-
15
-
16
-
17
-
18
-
19
-
20
-
21
-
22
-
23
-
24
-
25
-
26
-
27
-
28
-
29
-
30
-
 31
31 -
 32
32 -
 33
33 -
 34
34 -
 35
35 -
 36
36 -
 37
37 -
 38
38 -
 39
39 -
 40
40 -
 41
41 -
42
-
43
-
44
-
45
-
46
-
47
-
48
 |
 |