Samsung CLP 610ND SyncThru 5.0 Guide (ENGLISH) - Page 30
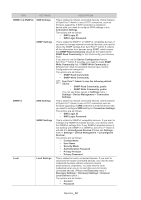
Group Summary, Main Device List - toner for
 |
UPC - 635753720587
View all Samsung CLP 610ND manuals
Add to My Manuals
Save this manual to your list of manuals |
Page 30 highlights
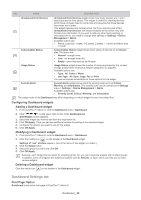
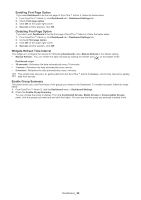
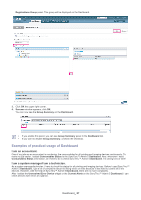
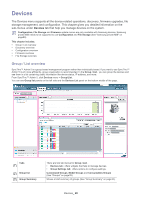
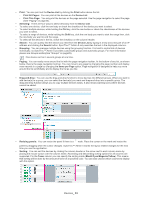
Automatic groups SyncThru™ Admin 5 provides two Automatic groups. You can expand the panel by clicking on the panel header. These groups are managed automatically by the system and you cannot change them. The following two groups are set as defaults: • Model groups: devices are categorized by model. • Consumables groups: devices are categorized by Color and Mono. Group Summary One of the basic concepts of SyncThru™ Admin 5 is monitoring. You can see statistical information of a selected group with this Group Summary panel. If you do not want to see this Summary panel, you can collapse it. Main Device List The toner information in the Device List is estimated value. Remaining will vary depending on type of documents printed. The Device List shows devices that have been added to SyncThru™ Admin 5. The Device List provides the convenient functionality of browsing, sorting, searching, and grouping thousands of devices, as well as many more functions. For page navigation information, please see the tips for using SyncThru™ Admin 5 (See "Page navigation" on page 15). • Columns management: Columns in the Device List contain device information and properties. You can also customize the column header (See "Column header" on page 30). Most of the properties displayed in these columns are obtained by queries to the devices themselves while the Local column header is specific to SyncThru™ Admin 5. • Column header: For every column header, there's a hidden arrow. The arrow shows when you place the mouse cursor over the column. You can use the drop-down menu to sort items (See "Sorting" on page 33) or choose which columns to display by selecting Custom. Devices_ 30
-
 1
1 -
2
-
3
-
4
-
5
-
6
-
7
-
8
-
9
-
10
-
11
-
12
-
13
-
14
-
15
-
16
-
17
-
18
-
19
-
20
-
21
-
22
-
23
-
24
-
 25
25 -
 26
26 -
 27
27 -
 28
28 -
 29
29 -
 30
30 -
 31
31 -
 32
32 -
 33
33 -
 34
34 -
 35
35 -
36
-
37
-
38
-
39
-
40
-
41
-
42
-
43
-
44
-
45
-
46
-
47
-
48
-
49
-
50
-
51
-
52
-
53
-
54
-
55
-
56
-
57
-
58
-
59
-
60
-
61
-
62
-
63
-
64
-
65
-
66
-
67
-
68
-
69
-
70
-
71
-
72
-
73
-
74
-
75
-
76
-
77
-
78
-
79
-
80
-
81
-
82
-
83
-
84
-
85
-
86
-
87
-
88
-
89
-
90
-
91
-
92
-
93
-
94
-
95
-
96
-
97
-
98
-
99
-
100
-
101
-
102
-
103
-
104
-
105
-
106
-
107
-
108
-
109
-
110
-
111
 |
 |
