Samsung CLP 610ND SyncThru 5.0 Guide (ENGLISH) - Page 72
SyncThru Management - driver download
 |
UPC - 635753720587
View all Samsung CLP 610ND manuals
Add to My Manuals
Save this manual to your list of manuals |
Page 72 highlights
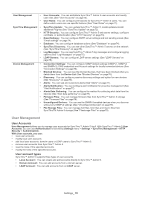
Deleting user roles 1. From SyncThru™ Admin 5, click Settings menu > Settings > User Management > User Roles. 2. Select the role(s) you want to remove. 3. Click the button in the Role List. Please make sure that the Admin role cannot be deleted. Modifying user roles 1. From SyncThru™ Admin 5, click Settings menu > Settings > User Management > User Roles. 2. Select the user account you want to modify. 3. Click the Modify button in the Role List. The Modify Permission window appears. If you can't see the Modify button, resize the panel or use the horizontal scroll bar to find it (See "Resizing panels" on page 15). 4. Check or uncheck the permissions you want. 5. You can see the configured permissions within the window. Change permissions and click OK/Apply. Please make sure that the Admin role cannot be modified. It has all the permissions and if any account has this Admin role, it has all the ability to do anything within SyncThru™ Admin 5. SyncThru Management SyncThru Update SyncThru™ Admin 5 provides additional features as plug-ins. From SyncThru™ Admin 5, click Settings menu > Settings > SyncThru Management > SyncThru Update. If you only install SyncThru™ Admin 5, Core Plug-in is displayed in the list on the right. You can also get the version information here. Available Plug-ins SyncThru™ Admin 5 provides the following plug-ins: • Driver Management Plug-in: You can install printer drivers to PC from SyncThru™ Admin 5 and configure driver settings. • Job Accounting Plug-in: You can control user access to the devices and manage user permissions for each job, copy/print/scan/fax. • Device Map Plug-in: You can manage devices with location information. Installing Plug-ins 1. From SyncThru™ Admin 5, click Settings menu > Settings > SyncThru Management > SyncThru Update. 2. Click the button in the SyncThru Update panel. The Upload Plug-in window appears. 3. Find the plug-in by clicking the Browse button and click the Upload button to install. Updating Plug-ins 1. Open SyncThru™ Admin 5 with your web browser. 2. From SyncThru™ Admin 5, click Settings menu > Settings > SyncThru Management > SyncThru Update. 3. Click the button in the SyncThru Update panel. 4. Upload the plug-in file you have downloaded. Uninstalling Plug-ins 1. From SyncThru™ Admin 5, click Settings menu > Settings > SyncThru Management > SyncThru Update. 2. Select the plug-in you want to remove. 3. Click the button in the SyncThru Update panel. You cannot remove coreplugin (SyncThru™ Admin 5) here. If you want to uninstall SyncThru™ Admin 5, please see the uninstalling section (See "Installing SyncThru™ Admin 5" on page 18). Settings_ 72
-
 1
1 -
2
-
3
-
4
-
5
-
6
-
7
-
8
-
9
-
10
-
11
-
12
-
13
-
14
-
15
-
16
-
17
-
18
-
19
-
20
-
21
-
22
-
23
-
24
-
25
-
26
-
27
-
28
-
29
-
30
-
31
-
32
-
33
-
34
-
35
-
36
-
37
-
38
-
39
-
40
-
41
-
42
-
43
-
44
-
45
-
46
-
47
-
48
-
49
-
50
-
51
-
52
-
53
-
54
-
55
-
56
-
57
-
58
-
59
-
60
-
61
-
62
-
63
-
64
-
65
-
66
-
 67
67 -
 68
68 -
 69
69 -
 70
70 -
 71
71 -
 72
72 -
 73
73 -
 74
74 -
 75
75 -
 76
76 -
 77
77 -
78
-
79
-
80
-
81
-
82
-
83
-
84
-
85
-
86
-
87
-
88
-
89
-
90
-
91
-
92
-
93
-
94
-
95
-
96
-
97
-
98
-
99
-
100
-
101
-
102
-
103
-
104
-
105
-
106
-
107
-
108
-
109
-
110
-
111
 |
 |
