Samsung DVD-R120 Quick Guide (easy Manual) (ver.1.0) (English) - Page 28
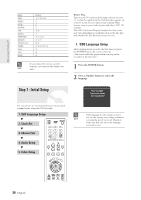
Step 7 : Initial Setup, 1. OSD Language Setup - remote code
 |
View all Samsung DVD-R120 manuals
Add to My Manuals
Save this manual to your list of manuals |
Page 28 highlights
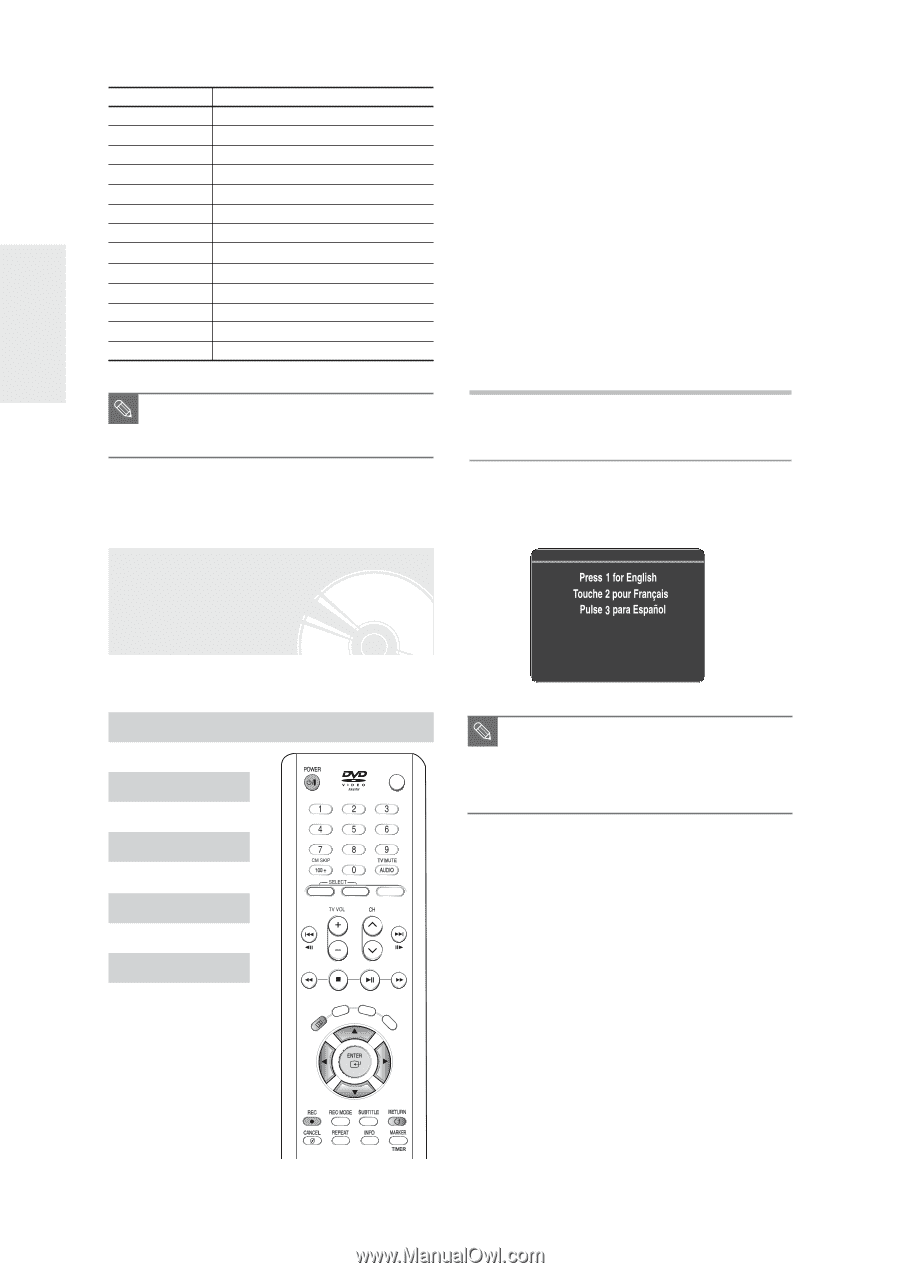
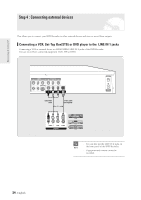
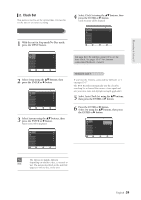
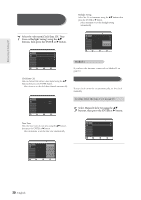
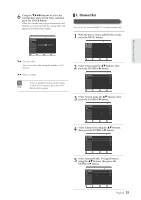
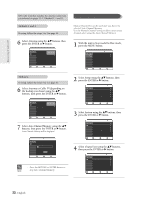
Connecting & Setting UP ME BRAND SHARP SIEMENS SINGER SINUDYNE SONY TELEAVA TELEFUNKEN THOMSON THOMSON ASIA TOSHIBA WEGA YOKO ZENITH BUTTON 36, 37, 38, 39, 48 71 57 57 35, 48 73 67, 73, 75, 76 72, 73, 75 80, 81 47, 48, 49, 50, 51, 52 57 06 63 s If you replace the remote control's batteries, you must set the brand code NOTE again. Step 7 : Initial Setup Before Play, Turn on your TV and switch the input selector on your TV so that the signal from the DVD Recorder appears on your TV screen. If you connected an external Audio System, turn on your Audio System and select AUX, CD or DVD. The OSD (On-Screen Display) displayed on the screen may vary depending on conditions such as the disc type and whether the disc has been inserted or not. 1. OSD Language Setup After plugging in the recorder, the first time you press the POWER button, this screen comes up. (This screen will only appear when you plug in the recorder for the first time.) 1 Press the POWER button. 2 Press a Number button to select the language. For ease of use, we recommend that you set up initial settings before using the DVD Recorder. 1. OSD Language Setup † 2. Clock Set OPEN / CLOSE † 3. Channel Set † 4. Audio Setup † DVD TV INPUT 5. Video Setup TITLE LIST PLAY LIST NU ANY DISC MENU TITLE MENU KEY s If the language for the startup screen is not set, the settings may change whenever NOTE you turn the power on or off. Therefore, make sure that you select the language you want to use. 28- English
-
 1
1 -
2
-
3
-
4
-
5
-
6
-
7
-
8
-
9
-
10
-
11
-
12
-
13
-
14
-
15
-
16
-
17
-
18
-
19
-
20
-
21
-
22
-
 23
23 -
 24
24 -
 25
25 -
 26
26 -
 27
27 -
 28
28 -
 29
29 -
 30
30 -
 31
31 -
 32
32 -
 33
33 -
34
-
35
-
36
-
37
-
38
-
39
-
40
-
41
-
42
-
43
-
44
-
45
-
46
-
47
-
48
-
49
-
50
-
51
-
52
-
53
-
54
-
55
-
56
-
57
-
58
-
59
-
60
-
61
-
62
-
63
-
64
-
65
-
66
-
67
-
68
-
69
-
70
-
71
-
72
-
73
-
74
-
75
-
76
-
77
-
78
-
79
-
80
-
81
-
82
-
83
-
84
-
85
-
86
-
87
-
88
-
89
-
90
-
91
-
92
-
93
-
94
-
95
-
96
-
97
-
98
 |
 |