Samsung DVD-R120 Quick Guide (easy Manual) (ver.1.0) (English) - Page 29
Clock Set, Select Clock Set using - dvd recorder manual
 |
View all Samsung DVD-R120 manuals
Add to My Manuals
Save this manual to your list of manuals |
Page 29 highlights
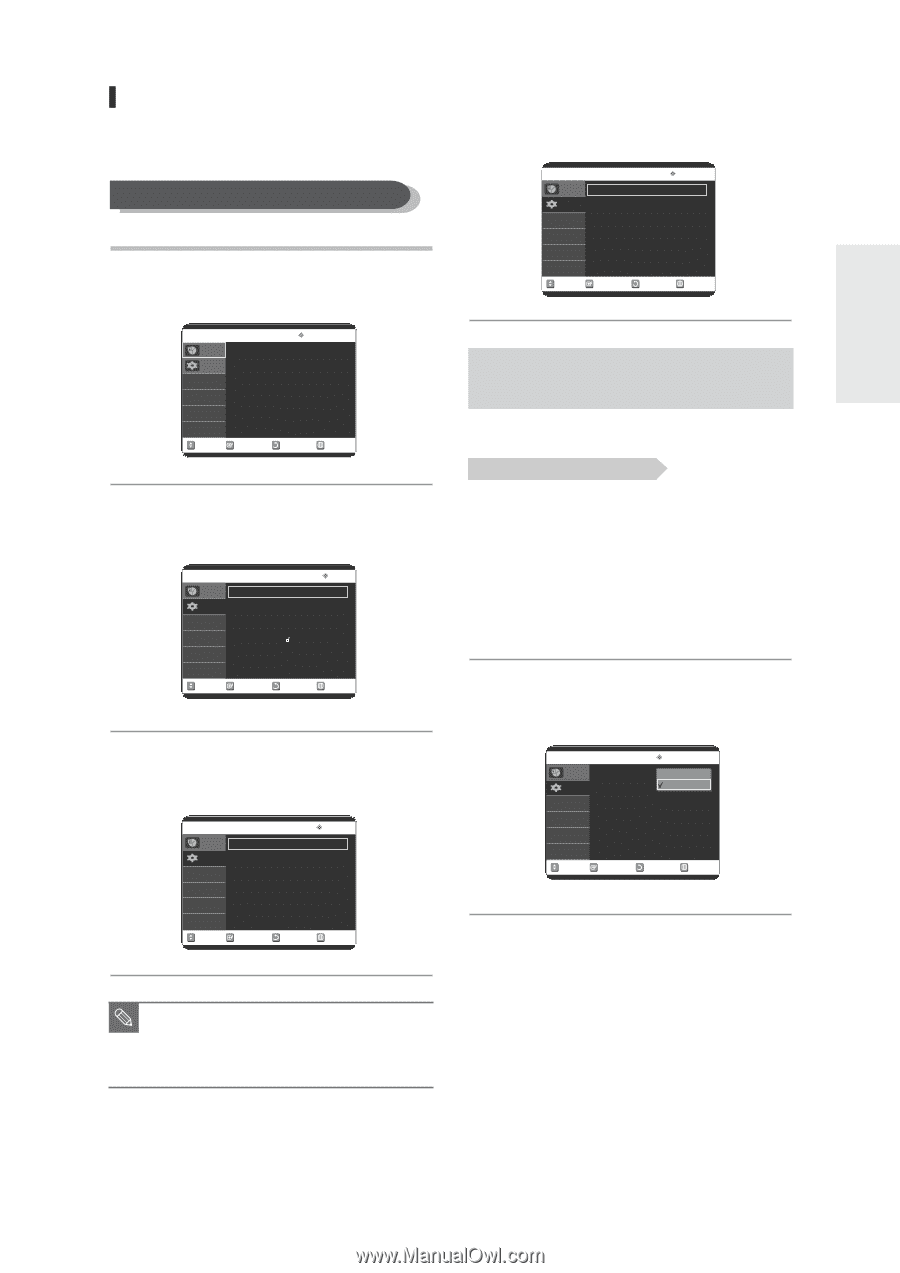
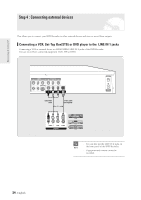
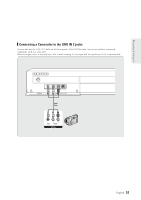
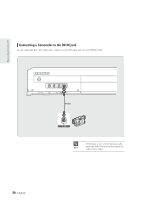
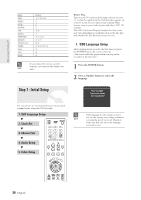
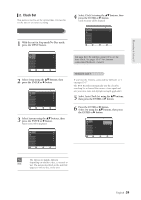
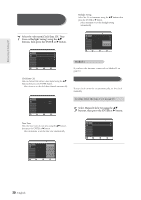
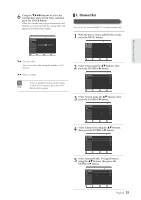
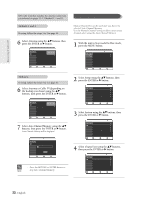
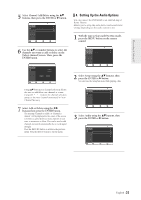
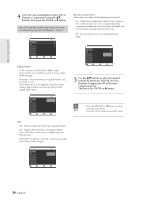
Connecting & Setting UP 2. Clock Set This menu is used to set the current time. You need to set the time to use timer recording. Auto Clock Set 4 Select Clock Set using the ...† buttons, then press the ENTER or √ button. Clock Set menu will be displayed. No Disc Timer Rec. Auto Clock Set Setup Manual Clock Set Clock Set √ √ 1 With the unit in Stop mode/No Disc mode, press the MENU button. No Disc Timer Record Timer Rec. Timer Record √ Setup Scheduled Record List √ MOVE SELECT RETURN EXIT 2 Select Setup using the ...† buttons, then press the ENTER or √ button. No Disc Timer Rec. Setup System Language Audio Video Parental Control Setup MOVE SELECT RETURN EXIT 3 Select System using the ...† buttons, then press the ENTER or √ button. System menu will be displayed. No Disc Timer Rec. Setup Clock Set Channel Set CM Skip Time EP Mode Time Chapter Creator System √ √ : 15 Sec √ : 6Hours √ : Off √ MOVE SELECT RETURN EXIT MOVE SELECT RETURN EXIT You must have the antenna connected to set the Auto Clock. See pages 15~17 for Antenna connections(Method 1, 2 and 3). Method 1 and 3 If you have the Antenna connected via Method 1 or 3 on pages 15-17. The DVD Recorder automatically sets the clock by searching for a channel that carries a time signal and sets your time zone and daylight saving(if applicable). 5 Select Auto Clock Set using the ...† buttons, then press the ENTER or √ button. 6 Press the ENTER or √ button. Select On using the ...† buttons, then press the ENTER or √ button. No Disc Timer Rec. Setup Auto Clock Set Clock Data CH Time Zone Daylight Saving Auto Clock Set : Onff √ : AOuntomatic √ : Automatic √ : Automatic √ MOVE SELECT RETURN EXIT s The Menus are slightly different NOTE depending on whether a disc is inserted or not. The menus described on the next few pages are with no disc in the unit. English -29
-
 1
1 -
2
-
3
-
4
-
5
-
6
-
7
-
8
-
9
-
10
-
11
-
12
-
13
-
14
-
15
-
16
-
17
-
18
-
19
-
20
-
21
-
22
-
23
-
 24
24 -
 25
25 -
 26
26 -
 27
27 -
 28
28 -
 29
29 -
 30
30 -
 31
31 -
 32
32 -
 33
33 -
 34
34 -
35
-
36
-
37
-
38
-
39
-
40
-
41
-
42
-
43
-
44
-
45
-
46
-
47
-
48
-
49
-
50
-
51
-
52
-
53
-
54
-
55
-
56
-
57
-
58
-
59
-
60
-
61
-
62
-
63
-
64
-
65
-
66
-
67
-
68
-
69
-
70
-
71
-
72
-
73
-
74
-
75
-
76
-
77
-
78
-
79
-
80
-
81
-
82
-
83
-
84
-
85
-
86
-
87
-
88
-
89
-
90
-
91
-
92
-
93
-
94
-
95
-
96
-
97
-
98
 |
 |