Samsung HLP5085W User Manual (ENGLISH) - Page 25
Selecting the Color Tone, Changing the Picture Size, Alternate method - 1080i or 720p
 |
View all Samsung HLP5085W manuals
Add to My Manuals
Save this manual to your list of manuals |
Page 25 highlights
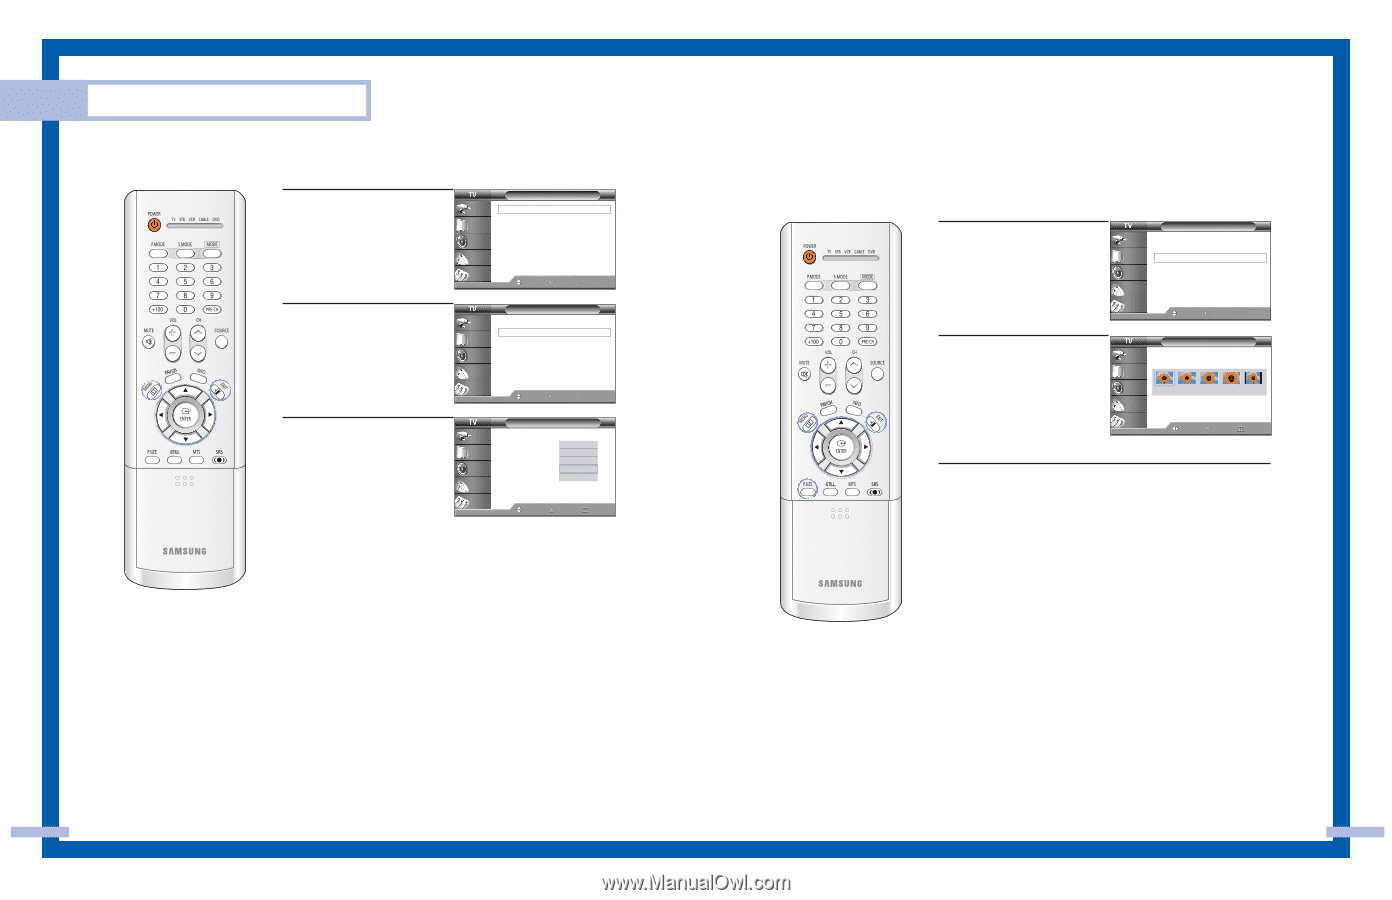
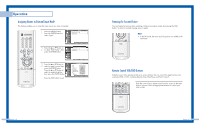
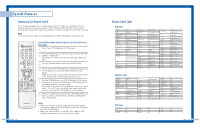
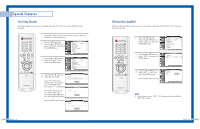
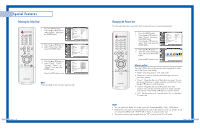
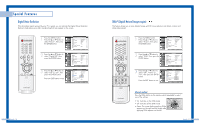
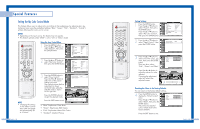
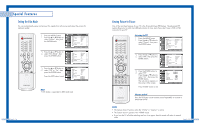
Special Features Selecting the Color Tone 1 Press the MENU button. Press the ... or † button to select "Picture", then press the ENTER button. Input Picture Sound Channel Setup Picture Mode : Standard √ Color Tone : Warm1 √ Size : Wide √ Digital NR : Off √ DNIe : On √ My Color Control √ Film Mode : Off √ PIP √ Move Enter Return 2 Press the ... or † button to select "Color Tone", then press the ENTER button. Input Picture Sound Channel Setup Picture Mode : Standard √ Color Tone : Warm1 √ Size : Wide √ Digital NR : Off √ DNIe : On √ My Color Control √ Film Mode : Off √ PIP √ Move Enter Return 3 Press the ... or † button to select "Cool2", "Cool1", "Normal", "Warm1" or "Warm2", then press the ENTER button. Press the EXIT button to exit. Input Picture Sound Channel Setup Picture Mode : Standard Color Tone : WaCromol12 Size : WiCdoeol1 Digital NR : ONfformal DNIe : OnWarm1 My Color Control Warm2 Film Mode : Off PIP Move Enter Return NOTE • Not available in the "Cinema" picture mode. English - 48 Changing the Picture Size You can select the picture size which best corresponds to your viewing requirements. 1 Press the MENU button. Press the ... or † button to select "Picture", then press the ENTER button. Press the ... or † button to select "Size", then press the ENTER button. Input Picture Sound Channel Setup Picture Mode : Standard √ Color Tone : Warm1 √ Size : Wide √ Digital NR : Off √ DNIe : On √ My Color Control √ Film Mode : Off √ PIP √ Move Enter Return 2 Press the œ or √ button to select the screen format you want, then press the ENTER button. Press the EXIT button to exit. Input Picture Sound Channel Setup Size Wide Panorama Zoom1 Zoom2 4:3 Move Enter Return Alternate method Press the P.SIZE button on the remote control repeatedly to select one of the picture size settings. • "Wide": Sets the picture to 16:9 wide mode. • "Panorama": Use this mode for the wide aspect ratio of a panoramic picture. • "Zoom1": Magnifies the size of the picture on screen. You can also move the picture on screen using the scroll function. Press the ... or † button to scroll the picture. • "Zoom2": Magnifies the size of the picture more than "Zoom1". You can also move the picture on screen using the scroll function. Press the ... or † button to scroll the picture. • "4:3": Sets the picture to 4:3 normal mode. This is a standard TV screen size. NOTES • You can select only Wide, 4:3 screen size in the Component(480p, 720p, 1080i) Mode. • With PIP On, the screen automatically becomes wide in the Antenna, AV (1~3), S-Video (1~3) or Component (480i) mode. With PIP Off, it returns to original screen size. • The picture size can't be changed when the "PIP" is active in the TV or AV mode. English - 49
-
 1
1 -
2
-
3
-
4
-
5
-
6
-
7
-
8
-
9
-
10
-
11
-
12
-
13
-
14
-
15
-
16
-
17
-
18
-
19
-
 20
20 -
 21
21 -
 22
22 -
 23
23 -
 24
24 -
 25
25 -
 26
26 -
 27
27 -
 28
28 -
 29
29 -
 30
30 -
31
-
32
-
33
-
34
-
35
-
36
-
37
-
38
-
39
-
40
-
41
-
42
-
43
-
44
-
45
-
46
-
47
-
48
 |
 |