Samsung ML-4551N User Manual (ENGLISH) - Page 64
Using the hard disk - review
 |
UPC - 635753624113
View all Samsung ML-4551N manuals
Add to My Manuals
Save this manual to your list of manuals |
Page 64 highlights
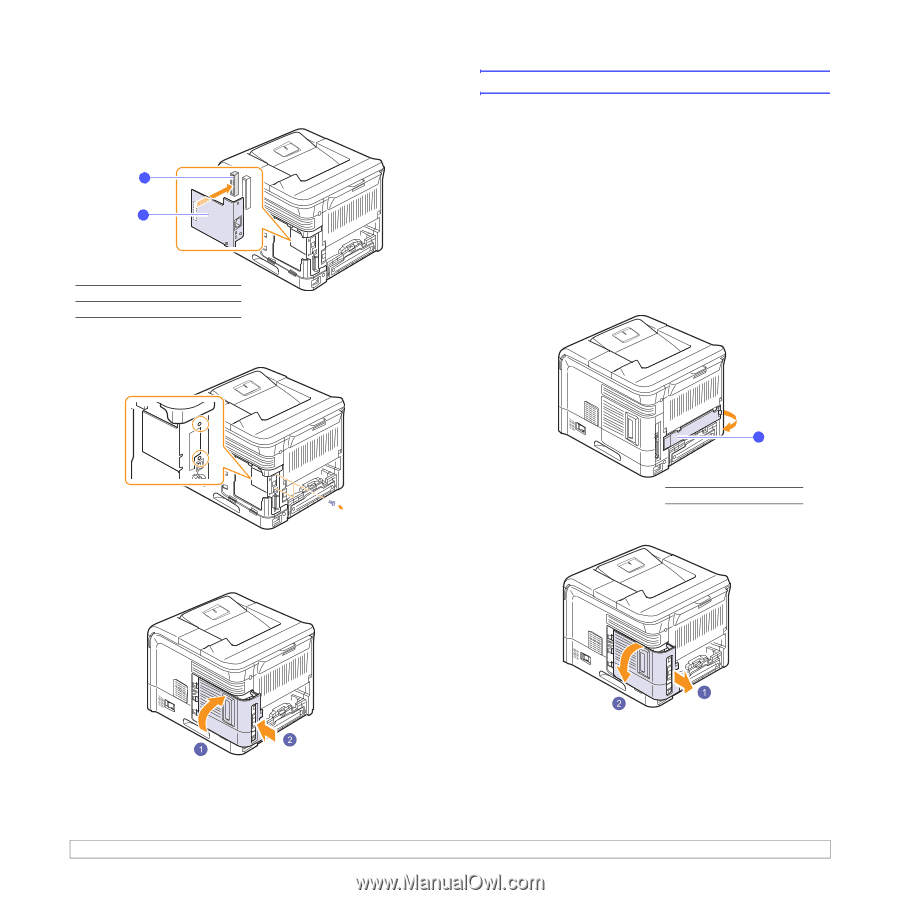
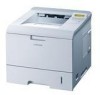
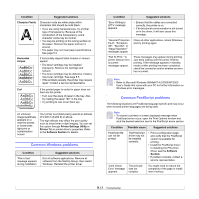
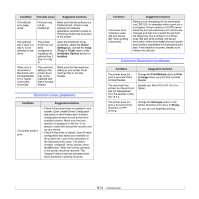
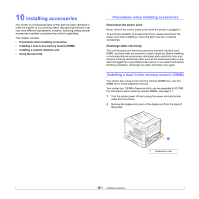
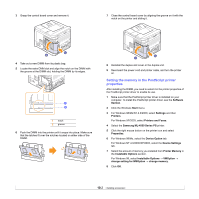
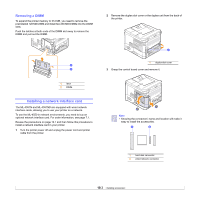
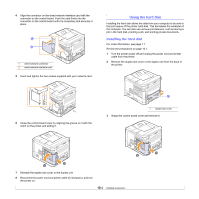
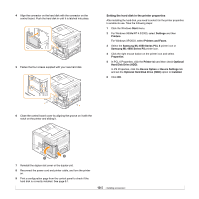
4 Align the connector on the wired network interface card with the connector on the control board. Push the card firmly into the connector on the control board until it is completely and securely in place. 1 2 1 wired network connector 2 wired network interface card 5 Insert and tighten the two screws supplied with your network card. Using the hard disk Installing the hard disk allows the data from your computer to be sent to the print queue of the printer hard disk. This decreases the workload of the computer. You can also use various print features, such as storing a job in the hard disk, proofing a job, and printing private documents. Installing the hard disk For order information, see page 7.1. Review the precautions on page 10.1. 1 Turn the printer power off and unplug the power cord and printer cable from the printer. 2 Remove the duplex-slot cover or the duplex unit from the back of the printer. 6 Close the control board cover by aligning the groove on it with the notch on the printer and sliding it. 1 1 duplex-slot cover 3 Grasp the control board cover and remove it. 7 Reinstall the duplex-slot cover or the duplex unit. 8 Reconnect the power cord and printer cable (if necessary), and turn the printer on. 10.4
-
 1
1 -
2
-
3
-
4
-
5
-
6
-
7
-
8
-
9
-
10
-
11
-
12
-
13
-
14
-
15
-
16
-
17
-
18
-
19
-
20
-
21
-
22
-
23
-
24
-
25
-
26
-
27
-
28
-
29
-
30
-
31
-
32
-
33
-
34
-
35
-
36
-
37
-
38
-
39
-
40
-
41
-
42
-
43
-
44
-
45
-
46
-
47
-
48
-
49
-
50
-
51
-
52
-
53
-
54
-
55
-
56
-
57
-
58
-
 59
59 -
 60
60 -
 61
61 -
 62
62 -
 63
63 -
 64
64 -
 65
65 -
 66
66 -
 67
67 -
 68
68 -
 69
69 -
70
-
71
-
72
-
73
-
74
-
75
-
76
-
77
-
78
-
79
-
80
-
81
-
82
-
83
-
84
-
85
-
86
-
87
-
88
-
89
-
90
-
91
-
92
-
93
-
94
-
95
-
96
-
97
-
98
-
99
-
100
-
101
-
102
-
103
-
104
-
105
-
106
-
107
-
108
-
109
-
110
-
111
-
112
 |
 |