Samsung SCX4521F User Manual (ENGLISH) - Page 15
Getting Started, Unpacking - scx driver
 |
UPC - 635753616040
View all Samsung SCX4521F manuals
Add to My Manuals
Save this manual to your list of manuals |
Page 15 highlights
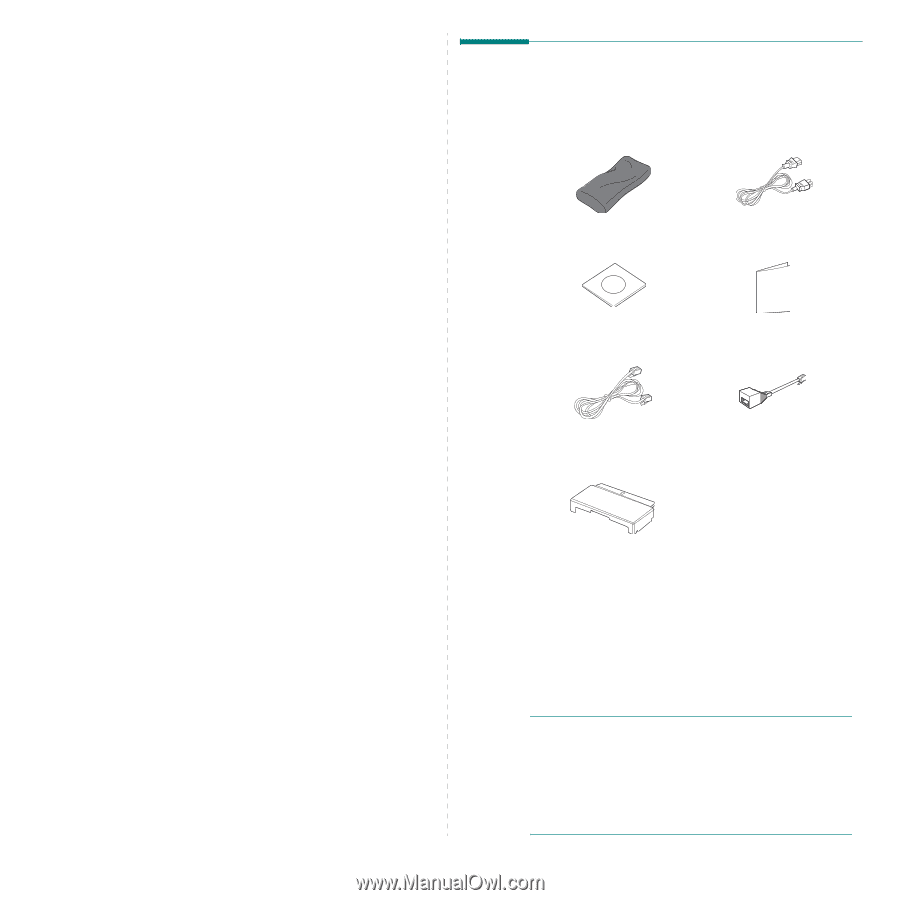
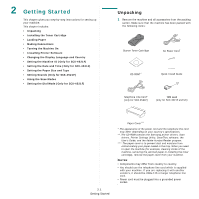
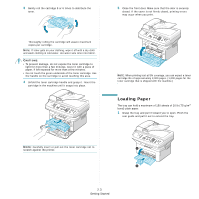
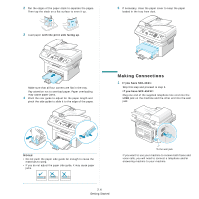
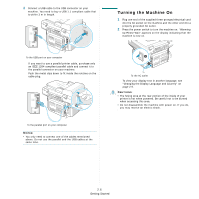
2 Getting Started This chapter gives you step-by-step instructions for setting up your machine. This chapter includes: • Unpacking • Installing the Toner Cartridge • Loading Paper • Making Connections • Turning the Machine On • Installing Printer Software • Changing the Display Language and Country • Setting the Machine ID (Only for SCX-4521F) • Setting the Date and Time (Only for SCX-4521F) • Setting the Paper Size and Type • Setting Sounds (Only for SCX-4521F) • Using the Save Modes • Setting the Dial Mode (Only for SCX-4521F) Unpacking 1 Remove the machine and all accessories from the packing carton. Make sure that the machine has been packed with the following items: Starter Toner Cartridge AC Power Cord* CD-ROM** Quick Install Guide Telephone Line Cord* (only for SCX-4521F) TAM Lead (only for SCX-4521F and UK) 2.1 Getting Started Paper Cover*** *.The appearance of the power cord and the telephone line cord may differ depending on your country's specifications. **.The CD-ROM contains the Samsung printer drivers, Scan drivers, Printer Settings Utility, SmarThru software, the User's Guide, and the Adobe Acrobat Reader program. ***.The paper cover is to prevent dust and moisture from contaminating your paper loaded in the tray. When you need to open the machine (for example, cleaning inside of the machine, removing the jammed paper or installing the toner cartridge), remove the paper cover from your machine. NOTES: • Components may differ from country to country. • You should use the telephone line cord which is supplied with your machine. If you are replacing it with another vendor's, it should be AWG #26 or larger telephone line cord. • Power cord must be plugged into a grounded power socket.
-
 1
1 -
2
-
3
-
4
-
5
-
6
-
7
-
8
-
9
-
 10
10 -
 11
11 -
 12
12 -
 13
13 -
 14
14 -
 15
15 -
 16
16 -
 17
17 -
 18
18 -
 19
19 -
 20
20 -
21
-
22
-
23
-
24
-
25
-
26
-
27
-
28
-
29
-
30
-
31
-
32
-
33
-
34
-
35
-
36
-
37
-
38
-
39
-
40
-
41
-
42
-
43
-
44
-
45
-
46
-
47
-
48
-
49
-
50
-
51
-
52
-
53
-
54
-
55
-
56
-
57
-
58
-
59
-
60
-
61
-
62
-
63
-
64
-
65
-
66
-
67
-
68
-
69
-
70
-
71
-
72
-
73
-
74
-
75
-
76
-
77
-
78
-
79
-
80
-
81
-
82
-
83
-
84
-
85
-
86
-
87
-
88
-
89
-
90
-
91
-
92
-
93
-
94
-
95
-
96
-
97
-
98
-
99
-
100
-
101
-
102
-
103
-
104
-
105
-
106
-
107
-
108
-
109
-
110
-
111
-
112
-
113
-
114
-
115
-
116
-
117
 |
 |