Samsung SM-G900T User Manual T-mobile Wireless Sm-g900t Galaxy S 5 Kit Kat Eng - Page 33
Contacts Screen Options, Contacts Settings, Deleting Contacts
 |
View all Samsung SM-G900T manuals
Add to My Manuals
Save this manual to your list of manuals |
Page 33 highlights
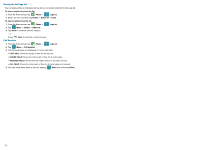
Deleting Contacts Important! Once Contacts list entries are deleted, they cannot be recovered. 1. From the Home screen, tap Apps g Contacts. 2. Touch and hold a contact name from the list, place a check mark alongside the desired entry, and select Delete g OK. Contacts Screen Options 1. From the Home screen, tap Apps g Contacts. 2. Tap Menu. The following options display: ● Select: allows you to select entries by placing a check mark alongside a desired entry. ● Delete: allows you to delete one or more of your selected contacts. ● Business cards: allows you to create new business cards or access previously photographed business cards. - Tap g to begin framing and then photographing a new business card. This process automatically imports that information and updates either an existing contact or creates a new one. ● Merge accounts: Allows you to merge all of your current Contact entries with either your active Google or Samsung account. If several of your contacts are from other external sources, this allows you to "back them up" or copy them to your Samsung account. Tap OK to continue or Cancel to exit. ● Speed dial: Allows you to set up speed‑dialing. ● Send message or email: Allows you to send a text /picture message or an email using your Google account. ● Link contacts: Allows you to link the current contact to another current contact. Similar to a "see also" feature. If you can't remember a contact's information, linking entries can help you find the person you are looking for. ● Settings: Allows you to configure where you access either Call or Contacts settings. - Call: Provides quick access to the Phone settings menu. - Contacts: Provides access to Contacts options such as: Import/Export, Contacts to display, etc.. ● Help: Provides an on‑screen Help file that covers most high level topics for Contacts. Contacts Settings 1. From the Home screen, tap Apps g Contacts. 2. Tap Menu g Settings g Contacts. The following options display: ● Import/Export: Imports or exports contacts to or from the USB storage location, and SIM card or SD card. ● Contacts to display: Allows you to choose to display All contacts, those on your Device, SIM card, or only display contacts that are part of a Customized list. Note: Other account types such as Gmail, Samsung account, and Microsoft Exchange appear once they have been added to the device. ● Swipe to call or send msg: Allows you to enable the ability to either call or send a message to a targeted Contacts entry by either sliding left of right across the entry from the Contacts list. ● Only contacts with phones: Allows you to only display those Contacts entries that only have an available phone number. This hides all other entries with only email addresses, etc.. Note: If you have recently updated your entries from an external account (ex: Exchange or Gmail), and they do not appear in your list, disable the Only contacts with phones option to view all entries. ● Sort by: Allows you to sort the on‑screen list of entries by either a First name or Last name. ● Display contacts by: Defines how the current list of Contacts are listed: First name first (ex: Steve Smith) or Last name first (Smith, Steve). ● Service numbers: Lists the currently available service numbers. ● Send contact information: Allows you configure how your Contacts entries are sent: individually or as a single file containing all available entries. Tap Export settings to select a share setting. - Send together: Allows you to set your Contact sharing option to all so that your entire Contacts entries are sent as a group and not as multiple single files. If all your entries are selected only a single file is sent. - Send individually: Allows you to set your default to send individual contacts one at a time. Even if you select all your entries, each is sent individually. Note: Your destination device must support this feature or no entries will be received by the external device. ● Accounts: Provides quick access to your accounts listing. Section 4: Contacts 33
-
 1
1 -
2
-
3
-
4
-
5
-
6
-
7
-
8
-
9
-
10
-
11
-
12
-
13
-
14
-
15
-
16
-
17
-
18
-
19
-
20
-
21
-
22
-
23
-
24
-
25
-
26
-
27
-
 28
28 -
 29
29 -
 30
30 -
 31
31 -
 32
32 -
 33
33 -
 34
34 -
 35
35 -
 36
36 -
 37
37 -
 38
38 -
39
-
40
-
41
-
42
-
43
-
44
-
45
-
46
-
47
-
48
-
49
-
50
-
51
-
52
-
53
-
54
-
55
-
56
-
57
-
58
-
59
-
60
-
61
-
62
-
63
-
64
-
65
-
66
-
67
-
68
-
69
-
70
-
71
-
72
-
73
-
74
-
75
-
76
-
77
-
78
-
79
-
80
-
81
-
82
-
83
-
84
-
85
-
86
-
87
-
88
-
89
-
90
-
91
-
92
-
93
-
94
-
95
-
96
-
97
-
98
-
99
-
100
-
101
-
102
-
103
 |
 |
