Samsung SP-P310ME User Manual (user Manual) (ver.1.0) (English) - Page 17
Basic Settings, Connecting the Power, Connecting to a PC, Connecting to an AV device
 |
View all Samsung SP-P310ME manuals
Add to My Manuals
Save this manual to your list of manuals |
Page 17 highlights
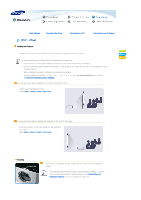
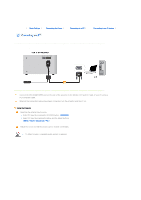
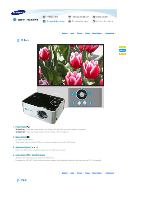
| Basic Settings | Connecting the Power | Connecting to a PC | Connecting to an AV device | Installing the Projector Install the projector so that the beam from the projector is perpendicular to the screen. Place the projector so that the lens is at the center of the screen. If the screen is not vertically installed, the picture on the screen may not be a rectangle. Do not install the screen in bright surroundings. If the screen is too bright, the picture on the screen will not be displayed clearly. When installing the screen in a bright surrounding, use curtains. You can install the projector front floor / fro (To view the installation position settings) nt ceiling / rear floor / rear ceiling. To view the picture when installing the projector behind the screen, Install a semi-transparent screen. Select Menu > Setup > Install > Rear-Floor To view the picture when installing the projector in the front of the screen, Install the projector at the side where you are watching the screen. Select Menu > Setup > Install > Front-Floor Focusing Turn the Focus Ring left or right until the picture on the screen is displayed clearly. If the distance between the projector and the screen is farther or shorter than the specified projection distance (Refer to the Screen Size and Projection Distance), the focus adjustment might fail.
-
 1
1 -
2
-
3
-
4
-
5
-
6
-
7
-
8
-
9
-
10
-
11
-
 12
12 -
 13
13 -
 14
14 -
 15
15 -
 16
16 -
 17
17 -
 18
18 -
 19
19 -
 20
20 -
 21
21 -
 22
22 -
23
-
24
-
25
-
26
-
27
-
28
-
29
-
30
-
31
-
32
 |
 |
