Samsung T27B750ND User Manual Ver.1.0 (English) - Page 65
Manual Wired Network Setup, English - 65
 |
View all Samsung T27B750ND manuals
Add to My Manuals
Save this manual to your list of manuals |
Page 65 highlights
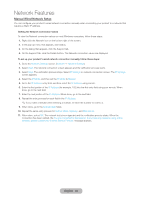
Network Features Manual Wired Network Setup You can configure your product's wired network connection manually when connecting your product to a network that requires a Static IP address. Getting the Network Connection Values To view the Network connection values on most Windows computers, follow these steps: 1. Right click the Network icon on the bottom right of the screen. 2. In the pop-up menu that appears, click Status. 3. On the dialog that appears, click the Support tab. 4. On the Support Tab, click the Details button. The Network connection values are displayed. To set up your product's wired network connection manually, follow these steps: 1. Go to the Network Settings screen. (Network → Network Settings) 2. Select Start. The network connection screen appears and the verification process starts. 3. Select Stop. The verification process stops. Select IP Settings on network connection screen. The IP Settings screen appears. 4. Select the IP Mode, and then set the IP Mode to Manual. 5. Go to the IP Address entry field, and then select the IP Address using remote. 6. Enter the first portion of the IP Address (for example, 105) into the first entry field using your remote. When done, go to the next field. 7. Enter the next portion of the IP Address. When done, go to the next field. 8. Repeat the entry process for each field in the IP Address. ✎✎If you make a mistake when entering a number, re-enter the number to correct it. 9. When done, go to the Subnet Mask fields. 10. Repeat the same entry process for Subnet Mask, Gateway, and DNS Server. 11. When done, select OK. The network test screen appears and the verification process starts. When the connection has been verified, the You are connected to the Internet. If you have any problems using online services, please contact your Internet Service Provider. message appears. English - 65
-
 1
1 -
2
-
3
-
4
-
5
-
6
-
7
-
8
-
9
-
10
-
11
-
12
-
13
-
14
-
15
-
16
-
17
-
18
-
19
-
20
-
21
-
22
-
23
-
24
-
25
-
26
-
27
-
28
-
29
-
30
-
31
-
32
-
33
-
34
-
35
-
36
-
37
-
38
-
39
-
40
-
41
-
42
-
43
-
44
-
45
-
46
-
47
-
48
-
49
-
50
-
51
-
52
-
53
-
54
-
55
-
56
-
57
-
58
-
59
-
 60
60 -
 61
61 -
 62
62 -
 63
63 -
 64
64 -
 65
65 -
 66
66 -
 67
67 -
 68
68 -
 69
69 -
 70
70 -
71
-
72
-
73
-
74
-
75
-
76
-
77
-
78
-
79
-
80
-
81
-
82
-
83
-
84
-
85
-
86
-
87
-
88
-
89
-
90
-
91
-
92
-
93
-
94
-
95
-
96
-
97
-
98
-
99
-
100
-
101
-
102
-
103
-
104
-
105
-
106
-
107
-
108
-
109
-
110
-
111
-
112
-
113
-
114
-
115
-
116
-
117
-
118
-
119
-
120
-
121
-
122
-
123
-
124
-
125
-
126
-
127
-
128
-
129
-
130
-
131
-
132
-
133
-
134
-
135
-
136
-
137
-
138
-
139
-
140
-
141
-
142
-
143
-
144
-
145
-
146
-
147
-
148
-
149
-
150
-
151
-
152
-
153
-
154
-
155
-
156
 |
 |
