Sanyo PDG-DWT50L Owners Manual - Page 19
R/cr, G/y, B/cb, Item Label Description See
 |
UPC - 086483067563
View all Sanyo PDG-DWT50L manuals
Add to My Manuals
Save this manual to your list of manuals |
Page 19 highlights
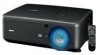
1. Introduction ITEM LABEL 10. SCREEN TRIGGER 11. S-VIDEO 12. POWER SWITCH 13. AC IN AUDIO IN 14. [L(MONO)/R] (VIDEO) 15. VIDEO IN 16. COMPONENT IN (Y, Cb/Pb, Cr/Pr) COMPUTER 2 IN 17. (R/Cr, G/Y, B/Cb, H, V) 18. COMPUTER 1 IN 19. AUDIO IN (COMPUTER 1) 20. LAN 21. SERVICE DESCRIPTION When connected to the screen through a commercially available cable, the screen deploys automatically on start up of the projector. The screen retracts when the projector is powered off (see notes below) Connect a commercially available S-video cable from a video device Turn on/off the projector Connect the supplied power cable Connect RCA audio cables (not supplied) from the input device right and left channels. This audio jack is shared with S-Video input. Connect a composite video cable (not supplied) from a video device to the yellow RCA jack Connect a component video enabled device Connect RGBHV or Component signal from computer or component video enabled device Connect a VGA cable (supplied) from a computer Connect the audio cable (not supplied) from the input device Connect a LAN cable (not supplied) from a computer Connect the USB cable (not supplied) from a computer. For service personnel only. SEE PAGE: 117 30 32,41 31 - 30 29 26 26 - - - Note: To use this feature, you must turn on the Screen Trigger function on the OSD. Screen controllers are supplied and supported by screen manufacturers. Do not use this jack for anything other than intended use. Connecting the wired remote control to the Trigger mini jack causes damage to the remote control. 10
-
 1
1 -
2
-
3
-
4
-
5
-
6
-
7
-
8
-
9
-
10
-
11
-
12
-
13
-
 14
14 -
 15
15 -
 16
16 -
 17
17 -
 18
18 -
 19
19 -
 20
20 -
 21
21 -
 22
22 -
 23
23 -
 24
24 -
25
-
26
-
27
-
28
-
29
-
30
-
31
-
32
-
33
-
34
-
35
-
36
-
37
-
38
-
39
-
40
-
41
-
42
-
43
-
44
-
45
-
46
-
47
-
48
-
49
-
50
-
51
-
52
-
53
-
54
-
55
-
56
-
57
-
58
-
59
-
60
-
61
-
62
-
63
-
64
-
65
-
66
-
67
-
68
-
69
-
70
-
71
-
72
-
73
-
74
-
75
-
76
-
77
-
78
-
79
-
80
-
81
-
82
-
83
-
84
-
85
-
86
-
87
-
88
-
89
-
90
-
91
-
92
-
93
-
94
-
95
-
96
-
97
-
98
-
99
-
100
-
101
-
102
-
103
-
104
-
105
-
106
-
107
-
108
-
109
-
110
-
111
-
112
-
113
-
114
-
115
-
116
-
117
-
118
-
119
-
120
-
121
-
122
-
123
-
124
-
125
-
126
-
127
-
128
-
129
-
130
-
131
-
132
-
133
-
134
-
135
 |
 |
