Sanyo PDG-DWT50L Owners Manual - Page 29
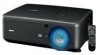
Installing the New Lens, Pull out the existing lens slowly., Insert the lens label side up.
 |
UPC - 086483067563
View all Sanyo PDG-DWT50L manuals
Add to My Manuals
Save this manual to your list of manuals |
Page 29 highlights
2. Installation and Connections 3. Pull out the existing lens slowly. CAUTION When Installing the lens into the projector, be sure to remove the lens cap from the back of the optional lens before installing the optional lens into the projector. Failure to do so will cause damage to the projector. Installing the New Lens 1. Insert the lens label side up. 2. Rotate the lens clockwise until it clicks into place. 20
-
 1
1 -
2
-
3
-
4
-
5
-
6
-
7
-
8
-
9
-
10
-
11
-
12
-
13
-
14
-
15
-
16
-
17
-
18
-
19
-
20
-
21
-
22
-
23
-
 24
24 -
 25
25 -
 26
26 -
 27
27 -
 28
28 -
 29
29 -
 30
30 -
 31
31 -
 32
32 -
 33
33 -
 34
34 -
35
-
36
-
37
-
38
-
39
-
40
-
41
-
42
-
43
-
44
-
45
-
46
-
47
-
48
-
49
-
50
-
51
-
52
-
53
-
54
-
55
-
56
-
57
-
58
-
59
-
60
-
61
-
62
-
63
-
64
-
65
-
66
-
67
-
68
-
69
-
70
-
71
-
72
-
73
-
74
-
75
-
76
-
77
-
78
-
79
-
80
-
81
-
82
-
83
-
84
-
85
-
86
-
87
-
88
-
89
-
90
-
91
-
92
-
93
-
94
-
95
-
96
-
97
-
98
-
99
-
100
-
101
-
102
-
103
-
104
-
105
-
106
-
107
-
108
-
109
-
110
-
111
-
112
-
113
-
114
-
115
-
116
-
117
-
118
-
119
-
120
-
121
-
122
-
123
-
124
-
125
-
126
-
127
-
128
-
129
-
130
-
131
-
132
-
133
-
134
-
135
 |
 |

2. Installation and Connections
20
3.
Pull out the existing lens slowly.
CAUTION
When Installing the lens into the projector, be sure to remove the lens cap from the back of the optional
lens before installing the optional lens into the projector. Failure to do so will cause damage to the projec-
tor.
Installing the New Lens
1.
Insert the lens label side up.
2.
Rotate the lens clockwise until it
clicks into place.