Sanyo WF10 Instruction Manual, PLV-WF10 - Page 18
BEFORE OPERATION, Remote Control Batteries Installation
 |
UPC - 086483050046
View all Sanyo WF10 manuals
Add to My Manuals
Save this manual to your list of manuals |
Page 18 highlights
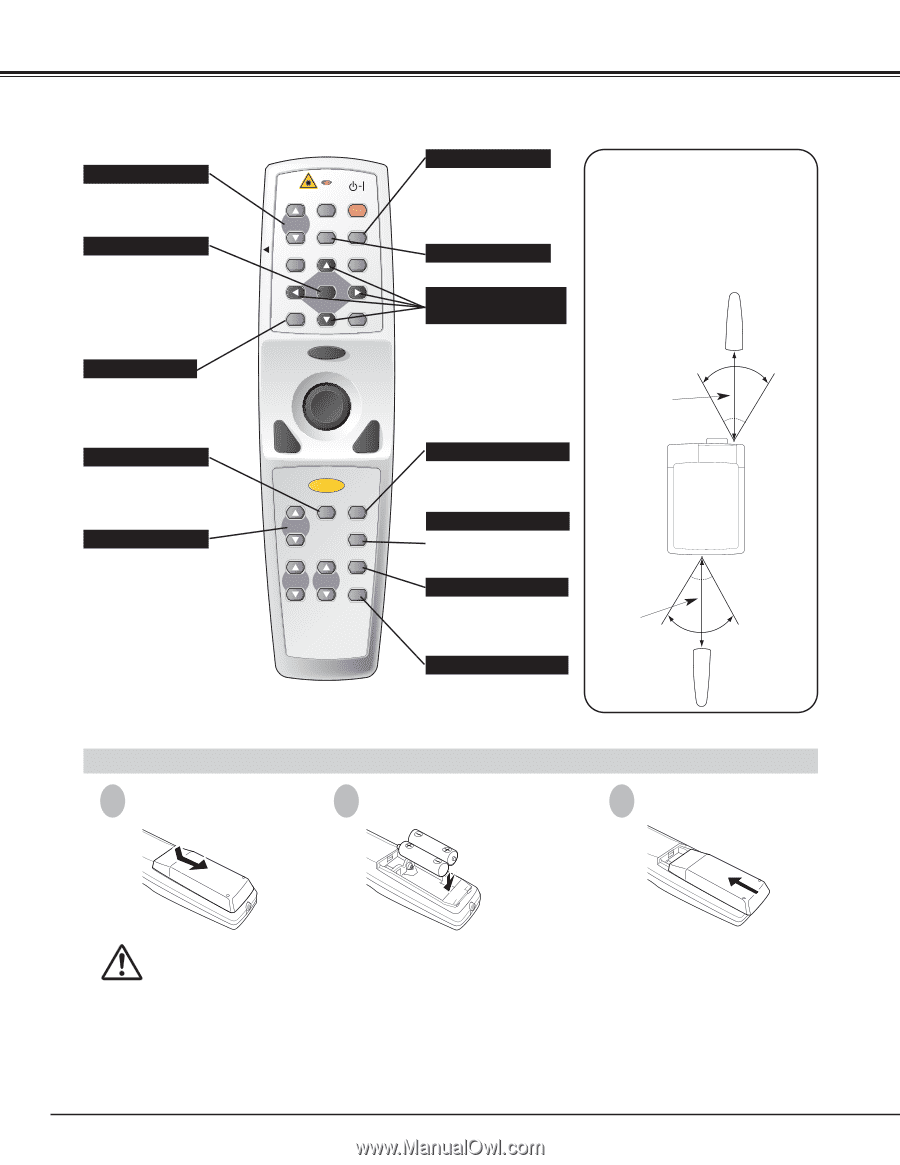
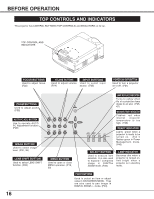
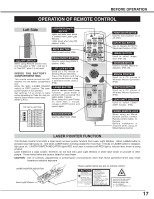
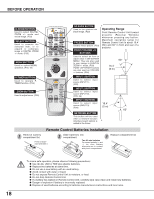
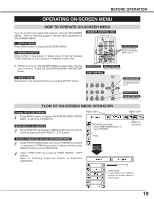
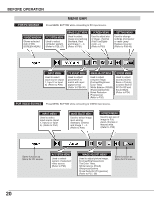
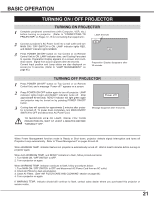
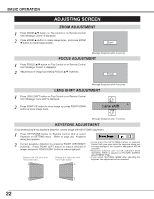
BEFORE OPERATION D.ZOOM BUTTON Used to select DIGITAL ZOOM +/- mode and resize image. (P33) SELECT BUTTON Used to execute the selected item, or to expand or compress image in DIGITAL ZOOM +/- mode. (P33) MENU BUTTON Used to select MENU operation. (P18, 19) P-TIMER BUTTON Used to operate PTIMER function. (P23) ZOOM BUTTON Used to adjust zoom. (P22) LOCK AUTO PC ON-OFF D.ZOOM FREEZE NO SHOW MUTE IMAGE VOLUME- SELECT VOLUME+ MENU KEYSTONE LASER P-TIMER INPUT 1 ZOOM INPUT 2 INPUT 3 FOCUS LENS NETWORK NO SHOW BUTTON Used to turn picture into black image. (P23) FREEZE BUTTON Used to freeze picture. (P23) POINT (VOLUME +/-) BUTTONS Used to select an item or adjust value in ON-SCREEN MENU. They are also used to pan image in DIGITAL ZOOM +/- mode. (P33) POINT LEFT/RIGHT buttons are also used as VOLUME +/- buttons. (P24) Operating Range Point Remote Control Unit toward projector (Receiver Window) whenever pressing any button. Maximum operating range for Remote Control Unit is about 16.4' (5m) and 60° in front and rear of a projector. 60° 16.4' (5 m) INPUT 1 BUTTON Used to select input source (INPUT 1). (P25) INPUT 2 BUTTON Used to select input source (INPUT 2). (P25, 34) INPUT 3 BUTTON Used to select input 16.4' source (INPUT 3). (P34) (5 m) 60° NETWORK BUTTON This button will be used when a network function (interface board :option) is added in the future. Remote Control Batteries Installation 1 Remove battery compartment lid. Press lid downward and slide it. 2 Slide batteries into compartment. 3 Replace compartment lid. Two AA size batteries For correct polarity (+ and -), be sure battery terminals are in contact with pins in compartment. 18 To insure safe operation, please observe following precautions : G Use (2) AA, UM3 or R06 type alkaline batteries. G Replace two batteries at same time. G Do not use a new battery with an used battery. G Avoid contact with water or liquid. G Do not expose Remote Control Unit to moisture, or heat. G Do not drop Remote Control Unit. G If a battery has leaked on Remote Control Unit, carefully wipe case clean and install new batteries. G Danger of explosion if battery is incorrectly replaced. G Dispose of used batteries according to batteries manufacturers instructions and local rules.
-
 1
1 -
2
-
3
-
4
-
5
-
6
-
7
-
8
-
9
-
10
-
11
-
12
-
 13
13 -
 14
14 -
 15
15 -
 16
16 -
 17
17 -
 18
18 -
 19
19 -
 20
20 -
 21
21 -
 22
22 -
 23
23 -
24
-
25
-
26
-
27
-
28
-
29
-
30
-
31
-
32
-
33
-
34
-
35
-
36
-
37
-
38
-
39
-
40
-
41
-
42
-
43
-
44
-
45
-
46
-
47
-
48
-
49
-
50
-
51
-
52
-
53
-
54
-
55
-
56
 |
 |