Seagate OneTouch II OneTouch II Installation Guide - Page 29
ng Up Boot, ble B, kup w, th the, OneTou, h Button - driver for windows 7
 |
View all Seagate OneTouch II manuals
Add to My Manuals
Save this manual to your list of manuals |
Page 29 highlights
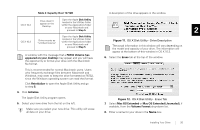
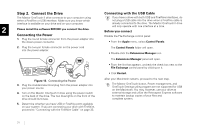
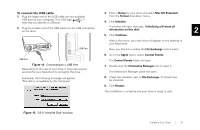
9. Select the check box next to Install Mac OS 9 Drivers. Setting Up Bootable Backup with the This will allow your disk to be recognized if you start your OneTouch Button system in Mac OS 9. (If you will never use this drive with OS 9, The following steps will provide you with a complete bootable you can leave this unchecked). backup of your Macintosh computer. 2 10. Click Erase to continue. Bootable backup works with FireWire only. The Erase Disk window appears to confirm the Erase process. 11. Click Erase to start the formatting process. After a few minutes, your drive will be formatted with the Mac OS Extended format and you will be able to see it appear on the desktop of your Macintosh. When finished, you will not only have a backup of your entire computer, but you also be able to start up your computer from your Maxtor OneTouch II drive. Before you begin, make sure the Maxtor Install CD is NOT in your CD-ROM drive. 12. In the Disk Utility program, go to the Disk Utility menu and select Quit Disk Utility. 13. The installation is complete and your Maxtor OneTouch II drive is ready to use! If you did the Full Installation, including Retrospect Express, we encourage you to go to the next section to setup the Maxtor OneTouch button for easy, automated backup of your entire computer, anytime, at the touch of a button! The bootable backup option requires either using the entire OneTouch II drive for the backup copy or creating a dedicated disk partition for the backup copy. If you wish to store any files on the OneTouch II drive that are not included on the system drive you plan to copy, they must be stored in another partition on the OneTouch II drive. Prepare your Maxtor OneTouch II drive 1. Select your system drive in the Finder and select Get Info from the File menu. Write down its capacity, it is listed here as "Capacity: xxx.xx GB". 2. Open Apple's Disk Utility program (located in the Applications/ Utilities folder) 3. Select your Maxtor OneTouch II drive in the list and click on the Partition tab 27
-
 1
1 -
2
-
3
-
4
-
5
-
6
-
7
-
8
-
9
-
10
-
11
-
12
-
13
-
14
-
15
-
16
-
17
-
18
-
19
-
20
-
21
-
22
-
23
-
 24
24 -
 25
25 -
 26
26 -
 27
27 -
 28
28 -
 29
29 -
 30
30 -
 31
31 -
 32
32 -
 33
33 -
 34
34 -
35
-
36
-
37
-
38
-
39
-
40
-
41
-
42
-
43
-
44
-
45
-
46
-
47
-
48
-
49
-
50
-
51
-
52
-
53
-
54
-
55
-
56
-
57
-
58
-
59
-
60
-
61
-
62
-
63
-
64
-
65
-
66
-
67
-
68
 |
 |
