Sharp CD-DK890N CD-DK890N Operation Manual
Sharp CD-DK890N Manual
 |
View all Sharp CD-DK890N manuals
Add to My Manuals
Save this manual to your list of manuals |
Sharp CD-DK890N manual content summary:
- Sharp CD-DK890N | CD-DK890N Operation Manual - Page 1
operating your SHARP product. CD-DK890N Mini Component System consisting of CD-DK890N (main unit), CP-DK890N (speaker system). MODEL CD-DK890N OPERATION MANUAL Accessories Please confirm that only the following accessories are included. iPod is a registered trademark of Apple Inc. Remote control - Sharp CD-DK890N | CD-DK890N Operation Manual - Page 2
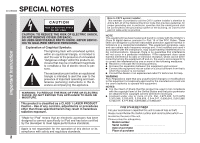
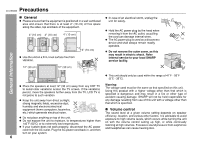
Important Instruction CD-DK890N SPECIAL NOTES CAUTION: TO REDUCE THE RISK OF ELECTRIC SHOCK, DO NOT REMOVE COVER (OR BACK). NO USER-SERVICEABLE PARTS INSIDE. REFER SERVICING TO QUALIFIED SERVICE PERSONNEL. Explanation of Graphical Symbols: The lightning flash with arrowhead symbol, within an - Sharp CD-DK890N | CD-DK890N Operation Manual - Page 3
the following instructions when installing, operating and cleaning the product. To ensure your safety and prolong the service life of this product, please read the following precautions carefully before use. 1) Read these instructions. 2) Keep these instructions. 10) Protect the power cord from - Sharp CD-DK890N | CD-DK890N Operation Manual - Page 4
810-21) GROUND CLAMPS P OWER SERVICE GROUNDING ELECTRODE SYSTEM (NEC ART 250, PART H) 24) Protective Attachment Plug - The product is equipped with an attachment plug having overload protection. This is a safety feature. See Instruction Manual for replacement or resetting of protective device. If - Sharp CD-DK890N | CD-DK890N Operation Manual - Page 5
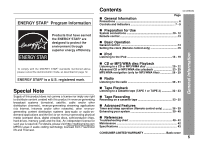
1 or TAPE 2 32 - 33 Tape Recording Recording on a cassette tape 33 - 35 Advanced Features Timer and sleep operation (Remote control only 36 - 39 Enhancing your system 39 - 40 References Troubleshooting chart 40 - 42 Maintenance 42 Specifications 43 CONSUMER LIMITED WARRANTY Back cover 5 - Sharp CD-DK890N | CD-DK890N Operation Manual - Page 6
operable. PLAYBACK (PLAY & STOP) PHONES AUDIO IN RECORD/PLAYBACK 4" (10 cm) Do not remove the outer cover, as this Use the unit on a firm, level surface free from vibration. 5 4 3 2 1 TIMER 5 CD 4 3 2 1 may result in electric shock. Refer internal service to your local SHARP service - Sharp CD-DK890N | CD-DK890N Operation Manual - Page 7
Controls and indicators 1 2 3 4 5 6 7 8 9 10 11 12 13 14 5 4 3 2 1 TIMER CD 5 4 3 2 1 PLAYBACK (PLAY & STOP) PHONES AUDIO IN RECORD/PLAYBACK 15 16 17 18 19 20 21 22 CD-DK890N Front panel Reference page 1. iPod Terminal 17 2. Disc Trays 21 3. Timer Indicator 37 4. Power On/Stand-by Button - Sharp CD-DK890N | CD-DK890N Operation Manual - Page 8
CD-DK890N Controls Indicator 37 12. FM Stereo Mode Indicator 30 13. FM Stereo Receiving Indicator 30 14.Tape Power Cord 12 3. FM 75 Ohms Antenna Jack 11 4. AM Antenna Ground Terminal 11 5. AM Loop Antenna Terminal 11 6. Video Out Jack 39 7. Front Speaker Terminals 11 Speaker system - Sharp CD-DK890N | CD-DK890N Operation Manual - Page 9
CD-DK890N General Information Remote control 1 Reference page 17 21 1. Remote Control Transmitter 13 2. Disc Number Select Buttons Extra Bass/Demo Button 14 3 9. On/Stand-by Button 14, 20, 30 4 14 10. CD Button 20 15 11. Tuner (Band) Button 30 12. Tape (1 2) Button 32 13. Audio - Sharp CD-DK890N | CD-DK890N Operation Manual - Page 10
CD-DK890N System connections Make sure to unplug the AC power cord before making any connections Antenna connection (see page 11) FM antenna AM loop antenna Right speaker Left speaker Preparation for Use AC INPUT Speaker connection (see page 11) 10 AC Outlet (AC 120 V ~ 60 Hz) AC power - Sharp CD-DK890N | CD-DK890N Operation Manual - Page 11
Note: Placing the antenna on the unit or near the AC power cord may cause noise pickup. Place the antenna away from the unit Speaker connection Connect the black wire to the FRONT SPEAKERS minus (-) terminal, and the red wire to the FRONT SPEAKERS plus (+) terminal. CD-DK890N Caution: Use speakers - Sharp CD-DK890N | CD-DK890N Operation Manual - Page 12
CD-DK890N System connections (continued) AC power connection After checking all the connections have been made correctly, plug the AC power cord of this unit cannot be turned on. Wait until the process is finished. Unplug the AC power cord from the AC outlet if the unit will not be in use for a - Sharp CD-DK890N | CD-DK890N Operation Manual - Page 13
use: Replace the batteries if the operating distance is reduced or if the operation becomes erratic. Periodically clean the transmitter on the remote control and the sensor on the unit with a soft cloth. Exposing the sensor on the unit to strong light may interfere with operation. Change the - Sharp CD-DK890N | CD-DK890N Operation Manual - Page 14
CD-DK890N General control 5 4 3 2 1 POWER ON/ STAND-BY TIMER CD 5 4 3 2 1 - VOL. Volume control Main unit operation: When the VOLUME control is turned clockwise, the volume will increase. When it is turned counterclockwise, the volume will decrease. 0 ..... 30 MAXIMUM Remote control operation: - Sharp CD-DK890N | CD-DK890N Operation Manual - Page 15
control only) CD-DK890N 5 Press the or button to adjust the hour and then press the MEMORY button. Press the or button once to advance the time by 1 hour. Hold it down to advance continuously. 6 Press the or button to adjust the minutes and then press the MEMORY button. Basic Operation - Sharp CD-DK890N | CD-DK890N Operation Manual - Page 16
iPod CD-DK890N Listening to the iPod Supported iPod models: iPod nano (software 1.2 above) iPod mini (software 1.2 above) 5th Generation iPod (software 1.3 above) (Dock connector equipped Click Wheel model) 4th Generation iPod (software 3.0.2 above) (Dock connector equipped Click Wheel model) iPod - Sharp CD-DK890N | CD-DK890N Operation Manual - Page 17
To insert iPod adaptor 1. Press the ON/STAND-BY button to turn the power on. 2. Adaptor without tip. Insert the tip of a screwdriver ("-" type, small) into the iPod adaptor hole as shown and lift upward to remove. CD-DK890N 2. Insert the iPod adaptor into the iPod dock and connect your iPod. - Sharp CD-DK890N | CD-DK890N Operation Manual - Page 18
CD-DK890N Listening to the iPod (continued) Navigating the iPod menus with the remote control 1 Press the [MENU] button System on operation When the main unit is powered on, the iPod unit will automatically power on when docked in the unit (including TIMER function). System off (stand-by operation - Sharp CD-DK890N | CD-DK890N Operation Manual - Page 19
start the desired track. Press and hold down in the playback mode. Release the button to resume playback. CD-DK890N iPod Function Back light/TV OUT Repeat Main unit ____ ____ Remote control Operation iPod back light ON. Press for more than 2 seconds to toggle the video out display between iPod - Sharp CD-DK890N | CD-DK890N Operation Manual - Page 20
on the remote control: The unit turns on and CD playback starts (regardless of the last function). / button on the main unit: The unit turns on and playback of the last function starts (CD, TAPE, TUNER, AUDIO IN, iPod). Auto power off function: In the stop mode of CD, MP3 or WMA operation, the main - Sharp CD-DK890N | CD-DK890N Operation Manual - Page 21
button to start playback. CD-DK890N Playback will begin from track 1 on disc 1. After that disc finishes playing, the next disc will automatically play. After the to enter the power stand-by mode and then turn the power on again. If TV or radio interference occurs during CD operation, move the unit - Sharp CD-DK890N | CD-DK890N Operation Manual - Page 22
disc Playback CD-DK890N Listening to a CD or MP3/WMA disc (continued) Various disc functions Function Play Main unit Remote control Operation Press in DISPLAY button. Each time the button is pressed, the display will change as follows. Fast forward/ Fast reverse Press and hold down in the - Sharp CD-DK890N | CD-DK890N Operation Manual - Page 23
playback CD-DK890N To be played. Use the direct search buttons on the remote control to select the desired track while playing the selected automatically. Note: If a disc tray with no disc is selected, playback will not start and the disc indicator will disappear. To stop playback: Press the (CD - Sharp CD-DK890N | CD-DK890N Operation Manual - Page 24
automatically. To random play all tracks on up to 5 discs: Press the PLAY MODE button for 2 seconds on the remote control. To cancel random play: Press the PLAY MODE button. "R" will disappear Notes: If you press the button during random play, you can move to the next track by the random operation - Sharp CD-DK890N | CD-DK890N Operation Manual - Page 25
CD-DK890N Programmed play You can choose up to 32 selections for playback in the order you like. 1 While in the stop mode, press the MEMORY button to enter the programming save mode. To clear the programmed selections: Press the CLEAR/DIMMER button on the remote control while the "MEMORY" - Sharp CD-DK890N | CD-DK890N Operation Manual - Page 26
CD-DK890N MP3/WMA navigation (only for MP3/WMA files) CD or MP3/WMA disc Playback MP3/WMA navigation: You can search and play files by folder or title. For example, when you assign three titles - Sharp CD-DK890N | CD-DK890N Operation Manual - Page 27
of folders and files on the selected disc. MP3 indicator WMA indicator CD-DK890N 7 Use the or cursor button to scroll and select a folder CD or MP3/WMA disc Playback Total number Total number of folders of files 4 Press the NAVIGATION button. 5 Press the , , or cursor button on the remote control - Sharp CD-DK890N | CD-DK890N Operation Manual - Page 28
CD-DK890N MP3/WMA navigation (only for MP3/WMA files) (continued) Character search (for direct buttons: The direct buttons on the remote control can also be used for character entry. In step 5 on the left, use buttons 0 9 to enter alphabets. Alphabet types change as you press a button. To delete - Sharp CD-DK890N | CD-DK890N Operation Manual - Page 29
CD-DK890N CD or MP3/WMA disc Playback Programmed play (for folder, title 1/2/3) or title 1/2/3)" on page 27. 2 Press the NAVIGATION button. 3 Press the , , or cursor button on the remote control to select "FOL", "T-1", "T-2" or "T-3" and then press the ENTER button. The total number of folders (or - Sharp CD-DK890N | CD-DK890N Operation Manual - Page 30
) button to extinguish the "ST" indicator. The reception changes to monaural, and the sound becomes clearer. Radio Auto power on function: When you press any of the following buttons, the unit turns on. TUNER (BAND) button (main unit and remote control): The unit turns on and the "TUNER" function - Sharp CD-DK890N | CD-DK890N Operation Manual - Page 31
button to store that station in memory. CD-DK890N To recall a memorized station Press the PRESET ( or ) button for less than 0.5 seconds to select the desired station. To scan the preset stations The stations saved in memory can be scanned automatically. (Preset memory scan) 1 Press the PRESET ( or - Sharp CD-DK890N | CD-DK890N Operation Manual - Page 32
CD-DK890N Listening to a cassette tape (TAPE 1 or remote control): The unit turns on and the "TAPE" function is activated. / button (main unit): The unit turns on and playback of the last function starts (CD, TAPE, TUNER, AUDIO IN, iPod). Auto power off function: In the stop mode of tape operation - Sharp CD-DK890N | CD-DK890N Operation Manual - Page 33
on a cassette tape CD-DK890N Various tape functions Function Playback Main unit Remote control Operation Press in the stop open the compartment. Before changing from one tape operation to another, press the (TAPE ) button. If a power failure occurs during tape operation, the tape head will - Sharp CD-DK890N | CD-DK890N Operation Manual - Page 34
CD-DK890N Recording on a cassette tape (continued) Tape Recording POWER ON/ STAND-BY CD 5 4 3 2 1 TIMER CD 5 4 3 2 1 PLAYBACK (PLAY & STOP) PHONES AUDIO IN RECORD/PLAYBACK OPEN/ CLOSE 5 4 3 2 1 Recording from the iPod 1 Press iPod button to go to iPod function. 2 Insert iPod unit - Sharp CD-DK890N | CD-DK890N Operation Manual - Page 35
CD-DK890N Tape Recording 6 Within 5 seconds, press the / button to start recording. Recording is started from the selected disc. When the playback of the last track is finished or the end of the tape is reached, the disc and the cassette will stop automatically. Playback of the disc will start - Sharp CD-DK890N | CD-DK890N Operation Manual - Page 36
CD-DK890N Timer and sleep operation (Remote control only) Timer playback: The unit turns on and plays the desired source (CD, tuner, the once timer (pages 36 - 37). 1 Press the ON/STAND-BY button to turn the power on. 2 Press the CLOCK/TIMER button. 3 Within 10 seconds, press the or button to - Sharp CD-DK890N | CD-DK890N Operation Manual - Page 37
until it reaches the preset volume. 13 When the timer end time is reached, the system will enter the power stand-by mode automatically. Once timer: The timer will be canceled. Daily timer: The timer will operate at the same time every day. It will continue until the daily timer setting is canceled - Sharp CD-DK890N | CD-DK890N Operation Manual - Page 38
CD-DK890N Timer and sleep operation (Remote control only) (continued) Advanced Features Note: When performing timer playback or recording using another unit connected to the AUDIO IN jack, select "AUDIO IN" in step 9. This unit will turn on or enter the power stand-by mode automatically, however, - Sharp CD-DK890N | CD-DK890N Operation Manual - Page 39
operation together Sleep and timer playback: For example, you can fall asleep listening to the radio and wake up to CD in the next morning. Sleep and timer recording: For example, you can fall asleep listening to the CD and record radio programs while sleeping. Enchancing your system CD-DK890N - Sharp CD-DK890N | CD-DK890N Operation Manual - Page 40
CD-DK890N Enhancing your system (continued) Troubleshooting chart Advanced Features Auto power on function: When you press any of the following buttons, the unit turns on. AUDIO IN button (main unit and remote control): The unit turns on and the "AUDIO IN" function is activated. / button on the - Sharp CD-DK890N | CD-DK890N Operation Manual - Page 41
Sudden temperature changes, storage or operation in an extremely humid environment may cause condensation inside the cabinet (CD pickup, tape heads, etc.) or on the transmitter on the remote control. Condensation can cause the unit to malfunction. If this happens, leave the power on with - Sharp CD-DK890N | CD-DK890N Operation Manual - Page 42
CD-DK890N Troubleshooting chart (continued) Clearing all the memory (reset) 1 Press the ON/STAND-BY button to enter the power stand-by mode. 2 While pressing down the button and the button, press the CD button until "CLEAR ALL" appears. OPEN/ CLOSE CD References Caution: This operation will - Sharp CD-DK890N | CD-DK890N Operation Manual - Page 43
WRMS) Speaker Type Maximum input power Rated input power Impedance Dimensions Weight 2-way type speaker system 2" (5 cm) tweeter 6 - 5/16" (16 cm) woofer 250 W 125 W 6 ohms Width: 7 - 7/8" (200 mm) Height: 13" (330 mm) Depth: 8 - 11/16" (220.5 mm) 7.0 lbs. (3.18 kg)/each References CD-DK890N 43 - Sharp CD-DK890N | CD-DK890N Operation Manual - Page 44
WHICH VARY FROM STATE TO STATE. Model Specific Section CD-DK890N Mini Component System Your Product Model Number & Description: (Be sure to have this information available when you need service for your Product.) Warranty Period for this Product: One (1) year parts and labor from the date of
-
 1
1 -
 2
2 -
 3
3 -
 4
4 -
 5
5 -
 6
6 -
 7
7 -
8
-
9
-
10
-
11
-
12
-
13
-
14
-
15
-
16
-
17
-
18
-
19
-
20
-
21
-
22
-
23
-
24
-
25
-
26
-
27
-
28
-
29
-
30
-
31
-
32
-
33
-
34
-
35
-
36
-
37
-
38
-
39
-
40
-
41
-
42
-
43
-
44
 |
 |
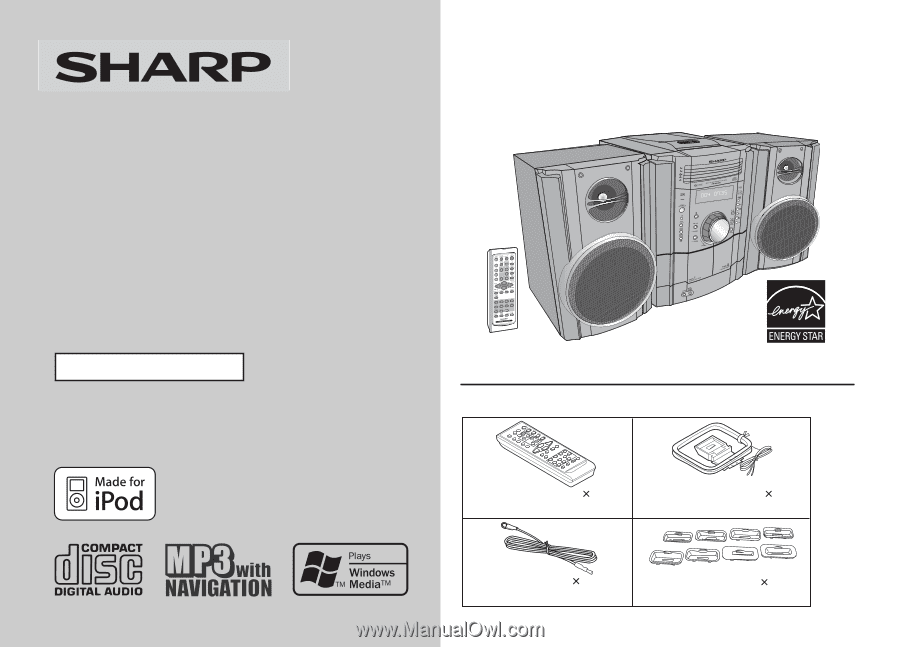
Thank you for purchasing this SHARP product.
To obtain the best performance from this product, please read this
manual carefully. It will guide you in operating your SHARP product.
MINI COMPONENT SYSTEM
CD-DK890N Mini Component System consisting of CD-DK890N (main
unit), CP-DK890N (speaker system).
Accessories
Please confirm that only the following accessories are included.
MODEL
OPERATION MANUAL
iPod is a registered trademark of Apple Inc.
CD-DK890N
(RRMCGA173AWSA)
AM loop antenna
1
(QANTL0010AWZZ)
(92LFANT1535A)
iPod
®
adaptor
8
(UACRTA008AW01)
Remote control
1
FM antenna
1