Sharp LL-T15S1 Operation Manual - Page 12
Connecting the monitor and turning, the monitor on and off
 |
View all Sharp LL-T15S1 manuals
Add to My Manuals
Save this manual to your list of manuals |
Page 12 highlights
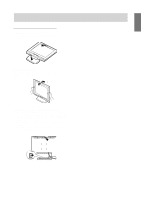
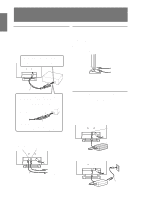
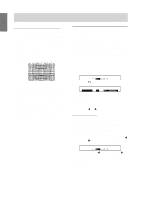
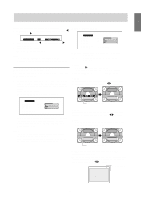
Connecting the monitor and turning the monitor on and off Connecting the monitor to a computer (PC etc.) When connecting, ensure that both the monitor and computer are switched off. Note: - Do not overly bend the cable or add extension cords as this could lead to malfunction. Connecting the monitor to headphones and a microphone Headphones and a microphone (both to be purchase separately) can be connected here. Note: - Do not overly bend the cable or add extension cords as this could lead to malfunction. Firmly insert the analog RGB output terminal (mini D-sub 15 pin with 3 rows) then tighten the screws each side. RGB cable If connecting to a D-sub 15 pin 2 row Apple Power Macintosh, attach a Macintosh conversion adapter (to be purchased separately) to the RGB signal cable. Macintosh conversion adapter RGB signal cable After connecting the adapter, tighten the screws on each side to fix into place. Microphone terminal Headphone terminal Microphone Headphones Note: - DO only connect cables less than 3m to the LL- T15S1. - When the headphones are connected, no sound can be heard from the monitor speakers. Connecting the monitor to a power source Before connecting, first turn off the monitor's main power switch. Note: - Do not overly bend the cable or add extension cords as this could lead to malfunction. 1. Connect the AC adapter to the monitor's power terminal Power terminal Using the audio cable included, the computer's audio output terminal or a microphone terminal can be connected. Audio input terminal Microphone output terminal AC adapter 2. Attach the power cord to the AC adapter and place the power plug into the AC terminal. PC (Microphone terminal) Audio cable PC (Audio output terminal) Note: - DO only connect cables less than 3m to the LL- T15S1. 12 Power cord
-
 1
1 -
2
-
3
-
4
-
5
-
6
-
 7
7 -
 8
8 -
 9
9 -
 10
10 -
 11
11 -
 12
12 -
 13
13 -
 14
14 -
 15
15 -
 16
16 -
 17
17 -
18
-
19
-
20
-
21
-
22
-
23
-
24
-
25
-
26
-
27
-
28
-
29
-
30
-
31
-
32
-
33
-
34
-
35
-
36
-
37
-
38
-
39
-
40
-
41
-
42
-
43
-
44
-
45
-
46
-
47
-
48
-
49
-
50
-
51
-
52
-
53
-
54
-
55
-
56
-
57
-
58
-
59
-
60
-
61
-
62
-
63
-
64
-
65
-
66
-
67
-
68
-
69
-
70
-
71
-
72
-
73
-
74
-
75
-
76
-
77
-
78
-
79
-
80
-
81
-
82
-
83
-
84
-
85
-
86
-
87
-
88
-
89
-
90
-
91
-
92
-
93
-
94
-
95
-
96
-
97
-
98
-
99
-
100
-
101
-
102
-
103
-
104
-
105
-
106
-
107
-
108
-
109
-
110
-
111
-
112
-
113
 |
 |
