Sharp PG-D120U PG-D120U Operation Manual - Page 11
Using the Image Invert/Reverse Function
 |
UPC - 074000347502
View all Sharp PG-D120U manuals
Add to My Manuals
Save this manual to your list of manuals |
Page 11 highlights
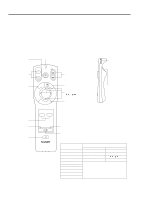
Using the Image Invert/Reverse Function s This projector is equipped with an image invert/reverse function. The projected image can be inverted or reversed by using the MENU button and the ADJUSTMENT / and / buttons. 1 IMAGE ADJ. BLACK SCREEN INPUT DISPLAY E-ZOOM REVERSE INVERT [OFF] [OFF] [OFF] [OFF] [OFF] :SEL. :ADJ. MENU : E N D 1. Press the MENU button. With the MENU screen displayed, press the ADJUSTMENT / buttons to select IMAGE ADJ. Then press the ENTER button to display the IMAGE ADJ. screen. • The last MENU screen selected is indicated for about 30 seconds. 2 2. Reversed Image Mode INVERT REVERSE E-ZOOM INPUT DISPLAY BLACK SCREEN IMAGE ADJ. [OFF] [ON] [OFF] [OFF] [OFF] In the IMAGE ADJ. menu, press the ADJUSTMENT / buttons to select REVERSE. Then press the ADJUSTMENT / buttons to select ON. The reversed image will appear. :ADJ. :SEL. MENU : E N D 3 3. Inverted Image Mode :SEL. :ADJ. MENU : E N D In the IMAGE ADJ. menu, press the ADJUSTMENT / buttons to select INVERT. Then press the ADJUSTMENT / buttons to select ON. The inverted image will appear. IMAGE ADJ. BLACK SCREEN INPUT DISPLAY E-ZOOM REVERSE INVERT [OFF] [OFF] [OFF] [OFF] [ON] 4 :ADJ. MENU : E N D :SEL. INVERT REVERSE E-ZOOM INPUT DISPLAY BLACK SCREEN IMAGE ADJ. [ON] [ON] [OFF] [OFF] [OFF] 4. Reversed Inverted Image Mode In the IMAGE ADJ. menu, set the REVERSE and INVERT functions to ON. The reversed inverted image will appear. 5. Press the MENU button anytime to exit IMAGE ADJ. How to set up the projector and screen Caution: When setting up the projector • Do not place it in humid or dusty places, or places where the air is sooty of full of cigarette smoke. If the lens, mirror, or other optical components become dirty, the picture will blur or darken, making viewing difficult. • Do not expose to extreme heat or cold. Operating temperature: 41°F to 104°F (5°C to 40°C) Storage temperature: -4°F to 132°F (-20°C to 60°C) • Do not tilt the projector more than 5°. s Position the screen so that it is not in direct sunlight or room light. Light falling directly onto the screen washes out colors, making viewing difficult. Close the curtains and dim the lights when using the screen in a bright or sunny room. s The best picture will be obtained when the projector is at a 90 degree angle to the screen. Position the projector and screen as shown on the previous page. E-11
-
 1
1 -
2
-
3
-
4
-
5
-
 6
6 -
 7
7 -
 8
8 -
 9
9 -
 10
10 -
 11
11 -
 12
12 -
 13
13 -
 14
14 -
 15
15 -
 16
16 -
17
-
18
-
19
-
20
-
21
-
22
-
23
-
24
-
25
-
26
-
27
-
28
-
29
-
30
-
31
-
32
-
33
-
34
-
35
-
36
-
37
-
38
 |
 |
