Sharp SR3U Operation Manual
Sharp SR3U - DV DVD Recorder Manual
 |
UPC - 074000354371
View all Sharp SR3U manuals
Add to My Manuals
Save this manual to your list of manuals |
Sharp SR3U manual content summary:
- Sharp SR3U | Operation Manual - Page 1
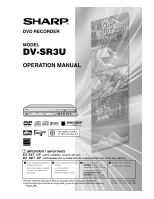
DVD RECORDER MODEL DV-SR3U OPERATION MANUAL 1 • The region number for this recorder is 1 IMPORTANT / IMPORTANTE EZ SET UP (AUTO CHANNEL /CLOCK SET UP) EZ SET UP (PROGRAMACIÓN AUTOMÁTICA DE CANAL/PUESTA EN HORA DEL RELOJ) 1 Connect Antenna/Cable to Recorder first. En primer lugar conecte la - Sharp SR3U | Operation Manual - Page 2
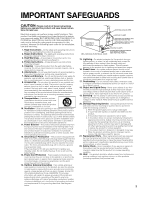
PARTS INSIDE. REFER SERVICING TO QUALIFIED SERVICE PERSONNEL. This symbol warns the user of uninsulated voltage within the unit that can cause dangerous electric shocks. This symbol alerts the user that there are important operating and maintenance instructions in the literature accompanying - Sharp SR3U | Operation Manual - Page 3
servicing. 1. Read Instructions - All the safety and operating instructions should be read before the product is operated. 2. Retain Instructions - The safety and operating instructions with regard to proper grounding of the mast and supporting structure, grounding of the lead-in wire to an - Sharp SR3U | Operation Manual - Page 4
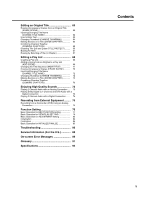
34 Direct Recording to DVD 34 Setting the Record End Time during Direct Recording (Simple Recording Timer 35 Setting Recording Mode 36 DVD-RW/R Recording Mode and Recording Time ........ 36 Setting the Manual Recording Mode (MN 36 Timer Recording 37 Easy Recording Guide 37 Timer Recording with - Sharp SR3U | Operation Manual - Page 5
2 Channel Audio with a Digital Connection ....... 74 Recording from External Equipment ......... 75 Recording from a Camcorder (VCR) Using an Analog Connection 84 Finalization 84 Basic Operation for INITIALIZE/FINALIZE 85 Troubleshooting 86 Service Information (For the U.S 88 On-screen Error - Sharp SR3U | Operation Manual - Page 6
back with existing DVD players. This lets you enjoy recording to suit your purpose. 3 High picture quality design 1Progressive scanning playback High-quality, television guides, and local CATV listings. Simply by inputting this PlusCode number, you can program your Recorder for timer recording, - Sharp SR3U | Operation Manual - Page 7
Accessories Remote control unit (RRMCGA199WJSA) Two "AAA" size batteries (R-03, UM/SUM-4) for the remote control unit Video/audio cable (QCNW-A002WJPZ) Round coaxial cable (QCNW-A005WJPZ) 7 - Sharp SR3U | Operation Manual - Page 8
in electric shock and/or damage to the Recorder. For service and adjustment inside the cabinet, please contact the nearest Sharp Authorized Service Center. Do not cover the fan or ventilation holes on the back of the Recorder. • When setting up the Recorder, do not cover the fan or ventilation holes - Sharp SR3U | Operation Manual - Page 9
system adjustment. Notes about this operation manual • In this operation manual, the terms "the Recorder", "this Recorder" or "your Recorder" refer to the "DV-SR3U DVD Recorder. • The screen displays and Recorder illustrations given in this operation manual are for explanatory purposes, and may - Sharp SR3U | Operation Manual - Page 10
control signal) may not be able to be played back with this Recorder. • DVD video players and discs have region numbers, which dictate the regions in which a disc or Recorder is prohibiting the function. Read the disc's manual along with this manual. • If a menu screen or operating instructions are - Sharp SR3U | Operation Manual - Page 11
even if titles are erased (because erasure here refers only to making the titles not visible). • Although these discs can be played back with other DVD players once they have been finalized, the discs can no longer be recorded or erased after they have been finalized. • Discs can be additionally - Sharp SR3U | Operation Manual - Page 12
function of being able to play back DVD-RW discs recorded in the VR mode with a DVD recorder. *10 When using a DVD-RW Ver. 1.1 disc (CPRM compatible). Recorded programs cannot be played back with other DVD players (including DVD-RW players) or DVD recorders not compatible with CPRM. Video Mode This - Sharp SR3U | Operation Manual - Page 13
to play back a recorded disc with a DVD player or DVD Video compatible PC • When not re-recording a recorded disc (when making a permanent recording or when you do not want the recording to be erased) • When you want to play back a recorded disc with a DVD player or DVD Video compatible PC • When - Sharp SR3U | Operation Manual - Page 14
finalized discs can be played back on all DVD players or DVD Video compatible PCs.) • Finalizing a DVD-R disc prevents all recording and editing of that disc. • Although DVD-RW discs can be re-recorded by initializing even after they have been recorded in the Video mode and finalized, all previously - Sharp SR3U | Operation Manual - Page 15
). The Icons Used in This Operation Manual DVD-RW DVD-RW ... Indicates the functions that can be VR MODE VIDEO MODE performed for DVD-RW discs. VR MODE: • Indicates that the function will operate when recording in VR mode or playing back a disc recorded in VR mode. VIDEO MODE: • Indicates - Sharp SR3U | Operation Manual - Page 16
nearest Sharp Authorized Service Center. recording with a DVD-RW disc first before making any important recordings to confirm whether or not the recorded material is recorded properly. Æ Compensation for Recordings • In the event a recording is unable to be made due to a problem with this Recorder - Sharp SR3U | Operation Manual - Page 17
47) 10 ■ STOP (pp. 35, 47) 11 STILL/PAUSE (pp. 35, 50) 12 CHANNEL "/' 13 E REC (p. 35) 12 3 4 5 67 8 9 10 1 Title indicator (p. 33) 2 Simple Recording Timer indicator (p. 35) 3 Chapter indicator (p. 33) 4 Disc Remaining Time indicator (p. 33) 5 AV AUTO REC indicator (p. 44) 6 DISC IN indicator - Sharp SR3U | Operation Manual - Page 18
54) 23 VIRTUAL SURROUND (p. 54) 24 INPUT/ Repeat (pp. 51, 75) 25 ORIGINAL/PLAY LIST / DVD MENU (pp. 47, 53, 59) 26*SET/ENTER (pp. 26, 28) 27*n RETURN (p. 28) 52) 36 FUNCTION (p. 56) 37 AV AUTO REC (p. 44) 38 CHAPTER MARK / CONNECTION GUIDE/RESET (pp. 26, 48, 65) 39 AUDIO (pp. 32, 51) 40 SUBTITLE (p. - Sharp SR3U | Operation Manual - Page 19
it clicks. NOTE • Do not subject the remote control unit to shock, water or excessive humidity. • The remote control unit may not function if the Recorder's remote sensor is in direct sunlight or any other strong light. • Incorrect use of batteries may cause them to leak or burst. Read the battery - Sharp SR3U | Operation Manual - Page 20
TVs. To enter the Manufacturer's Code for your TV, follow the instructions below. There is no guarantee that the universal remote control will function operate this Recorder: RC-1 and RC-2. If you operate this Recorder by remote control along with another SHARP DVD recorder or DVD player placed next - Sharp SR3U | Operation Manual - Page 21
coaxial cable. 4 Connect the VIDEO/AUDIO Output jacks on this Recorder to the video/audio input jacks on your TV using the supplied a video/audio cable. Important! • When using this connection, set "PROGRESSIVE OUT" to "PROGRESSIVE SCAN OFF" (see page 80). After the connection Plug in the power cords - Sharp SR3U | Operation Manual - Page 22
Using an S-VIDEO Output Connect the S-VIDEO Output jack on this Recorder to the Svideo input jack on your TV using an S-video cable (commercially available). Important! • When using this connection, set "PROGRESSIVE OUT" to "PROGRESSIVE SCAN OFF" (see page 80). After the connection Plug in the power - Sharp SR3U | Operation Manual - Page 23
S-video or component connections if they are available. Important! • Connect this Recorder directly to your TV and not via the cable box, satellite receiver, or a VCR. • When using this connection, set "PROGRESSIVE OUT" to "PROGRESSIVE SCAN OFF" (see page 80). After the connection Plug in the power - Sharp SR3U | Operation Manual - Page 24
Cable box/ Satellite receiver To antenna input jack Important! • Connect this Recorder directly to your TV and not via the cable box, satellite receiver, or a VCR. • When using this connection, set "PROGRESSIVE OUT" to "PROGRESSIVE SCAN OFF" (see page 80). After the connection Plug in the power - Sharp SR3U | Operation Manual - Page 25
automatically searches EDS signals, but if you are in a hurry to use timer recording or know the channel of the EDS signal carrier in your area, follow the procedure in "Auto Clock Setting" (page 29) or "Manual Clock Setting" (page 30). During Auto Channel Setting During Auto Clock Setting EZ - Sharp SR3U | Operation Manual - Page 26
screen language, etc. Preparation • Turn on the power of TV. • Switch TV input to the AV input used to connect to the Recorder. 1 Press and hold CONNECTION GUIDE for more than 2 seconds. Selecting the On-screen Display Language 2 Press ' / " to select the lan- guage you want to use. OSD LANGUAGE - Sharp SR3U | Operation Manual - Page 27
to select "PROGRES- SIVE SCAN ON" or "PROGRESSIVE SCAN OFF", then press SET/ENTER. CONNECTION GUIDE 12 / 25 SAT 10 : 28 AM SETS PROGRESSIVE SCAN OUTPUT YOU CAN ENJOY CLEAR IMAGES WHEN PROGRESSIVE TV IS PLAYED BACK VIA COMPONENT TERMINAL. PROGRESSIVE SCAN ON PROGRESSIVE SCAN OFF • The display - Sharp SR3U | Operation Manual - Page 28
CHECK Programming with Easy Recording Guide... page 37 Timer recording with VCR Plus+®... page 39 Timer recording by designating date ] REC. FUNCTION VIEW/PLAY SETTING AUTO CHAPTER EXACT RECORDING REC. AUDIO FORMAT EXTERNAL AUDIO DUAL MONO REC. SET MANUAL REC. MODE SAP SETTING 12 / 25 SAT 10 - Sharp SR3U | Operation Manual - Page 29
ZONE ATLANTIC 10 Press SET/ENTER, then EXIT. 11 Press POWER to turn off the Recorder. • The Auto Clock Setting function will automatically set the clock. NOTE • If the "EDS CH SET" mode is set to "MANUAL" in step 6 and a channel that does not carry EDS signals is selected in step 7, the - Sharp SR3U | Operation Manual - Page 30
Example: Dec. 25, 2004, DST: ON OTHER SETTINGS[CLOCK SETTING] AUTO SETTING MANUAL SETTING SET CLOCK MANUALLY TIME DATE 12 / 25 SAT 10 : 28 AM YEAR DST 10 : 28 automatically set back 1 hour. 2:00 AM NOTE • If the timer recording program is affected by the DST time change, check your TV listing - Sharp SR3U | Operation Manual - Page 31
Channel Setting Channel Setting This Recorder can receive a maximum of 181 channels as shown below by pressed before the screen returns to normal. Adding/Erasing Channel Memory Use this function to manually add or erase channels to/from the memory. 1 Select the channel to be added with - Sharp SR3U | Operation Manual - Page 32
screen and change the audio output mode to MONO. Checking the Channel 1 Press CH DISPLAY while view- ing a live program (DVD stopping) or recording (DVD recording). • Channel information is displayed. 3 STEREO L R SAP SAP ON • Each time you press CH DISPLAY, the channel information display is turned - Sharp SR3U | Operation Manual - Page 33
Panel Display Display Information Front panel display 1 Turn the power on. • Channel display (when watching TV) • Counter display (during playback/ recording) Hour Minute Second 2 Press DISPLAY (under the cover). • Remaining time display (when watching TV) Hour Minute • Current title number and - Sharp SR3U | Operation Manual - Page 34
other audio equipment, turn them on as well. 2 Set the TV input mode to the mode the recorder is set to. 2 Press POWER to turn on the recorder. 3 Set a DVD-RW or DVD-R disc. • When a new DVD-RW disc not initialized yet is set, VR mode initializing starts automatically. When initializing is over, you - Sharp SR3U | Operation Manual - Page 35
mark is recorded. • You can only record chapter marks manually when recording to DVD-RW (VR mode). • You cannot record chapter marks manually when recording to DVD-RW (Video mode) or DVD-R. Setting the Record End Time during Direct Recording (Simple Recording Timer) DVD-RW DVD-RW DVD-R VR MODE - Sharp SR3U | Operation Manual - Page 36
MODE : MN 21 ( : 3 Mbps ) REMAINING TIME : 1h26m NOTE When playing back a DVD-RW/R disc (Video Mode) recorded with the recorder using a DVD player. • When you play back a disc recorded with the manual mode of the recorder using a DVD player, it may not be able to play back depending on the model - Sharp SR3U | Operation Manual - Page 37
Timer Recording Easy Recording Guide DVD-RW DVD-RW DVD-R VR MODE VIDEO MODE • This lets you set the timer recording schedule for the next 7 days simply by filling in the pertinent blocks in the onscreen time schedule. • You can set timer recording for up to a maximum of 8 programs. (This includes - Sharp SR3U | Operation Manual - Page 38
AM SELECT THE RECORDING MODE FINE SP LP EP MANUAL SETTING (MN) HIGH QUALITY STANDARD 2X 3X ABLE TO MANUALLY SELECT 1 recording while timer recording is in progress • If you press ■STOP, "TIMER RECORDING IS IN PROGRESS. IF YOU PRESS THE STOP BUTTON ONCE MORE, TIMER RECORDING CANCELS AND RECORDING - Sharp SR3U | Operation Manual - Page 39
Timer Recording Timer Recording with VCR Plus+® System DVD-RW DVD-RW DVD-R VR MODE VIDEO MODE • The VCR Plus+® System allows you to program your Recorder for timer recording simply by inputting the PlusCode number. • The PlusCode numbers are listed in most newspapers, television guides, and local - Sharp SR3U | Operation Manual - Page 40
, change or cancel timer settings • See page 43. To stop recording while timer recording is in progress • If you press ■STOP, "TIMER RECORDING IS IN PROGRESS. IF YOU PRESS THE STOP BUTTON ONCE MORE, TIMER RECORDING CANCELS AND RECORDING STOPS." will appear on the screen. Even that message goes out - Sharp SR3U | Operation Manual - Page 41
by Specifying Date, Time and Channel DVD-RW DVD-RW DVD-R VR MODE VIDEO MODE • You can timer record up to 8 programs scheduled within a year, including VCR Plus+ System and Easy Recording Guide. Preparation for Timer Recording 1 Check that the clock is displaying the correct time. 2 Preset the - Sharp SR3U | Operation Manual - Page 42
, change or cancel timer settings • See page 43. To stop recording while timer recording is in progress • If you press ■STOP, "TIMER RECORDING IS IN PROGRESS. IF YOU PRESS THE STOP BUTTON ONCE MORE, TIMER RECORDING CANCELS AND RECORDING STOPS." will appear on the screen. Even that message goes out - Sharp SR3U | Operation Manual - Page 43
Timer Recording Confirm, Change and Cancel a Timer Program DVD-RW DVD-RW DVD-R VR MODE VIDEO MODE • You can confirm, change and cancel the content of timer programs set by "EASY REC. GUIDE", "VCR Plus+" and "TIMER PROGRAM". • The Timer Program List shows all timer programs set. Confirming 1 - Sharp SR3U | Operation Manual - Page 44
(AV AUTO REC) DVD-RW DVD-RW DVD-R VR MODE VIDEO MODE When connected to a satellite receiver, etc. with a timer recording function, this Recorder can be used to automatically record the timer program. (Refer to the operation manual of the satellite receiver, etc. for instructions on how to set - Sharp SR3U | Operation Manual - Page 45
(AV AUTO REC) To Cancel the AV AUTO REC Function Before Recording Press POWER. • The Recorder is turned on and the AV AUTO REC function will be canceled with the "AUTO REC" indicator on the front display panel turned off. During Recording Press ■STOP. • The "AUTO REC" indicator will be turned off - Sharp SR3U | Operation Manual - Page 46
capacity. • Cancel disc protection or change to new recordable DVD for recording. Suggested Solution • Load recordable DVD. • Load recordable DVD with enough capacity. • Cancel disc protection or change to new recordable DVD for recording. • Erase unnecessary timer programs. • Stop playing back the - Sharp SR3U | Operation Manual - Page 47
side you want to view down. 4 Press OPEN/CLOSE to close the disc tray. Playback from REC LIST DVD-RW DVD-RW DVD-R VR MODE VIDEO MODE 1 1 Turn on the power of TV. • When the recorder is connected to other audio equipment, turn them on as well. 2 Set the TV input mode to the - Sharp SR3U | Operation Manual - Page 48
finalized (pages 14, 84), a menu screen will be created automatically to enable playback with other DVD players. For that reason, the menu screen is different before and after finalization. • If a title was set with another DVD recorder, and it contains characters which cannot be displayed with this - Sharp SR3U | Operation Manual - Page 49
video CD discs have Playback Control (PBC) function which guides the playback by the menu displayed. Video CD (with depending on the disc. Refer to the manual of the video CD.) Turning off PBC each time you press the button. When playing back a DVD (Approx. 2g) (Approx. 8g) (Approx. 32g) When - Sharp SR3U | Operation Manual - Page 50
during playback. • Playback pauses. • PLAY indicator on the front of Recorder blinks during Still Picture Playback. • If you are playing back an Kto reverse one frame. • Frame Reverse Playback will not work with DVD-RW (Video mode), DVD-R, DVD-Video and Video CD discs. 3 Press |PLAY to return to - Sharp SR3U | Operation Manual - Page 51
VIDEO The sound number which is currently played back will be displayed. DVD-RW DVD-RW DVD-R VR MODE VIDEO MODE The sound you can select varies depending on the sound recorded on the disc. (page 77) • When recording SAP broadcast or stereo, the way audio channel changes may differ depending on the - Sharp SR3U | Operation Manual - Page 52
and Fast Reverse. • Audio and subtitles are not played back with DVD video discs and video CDs. • Depending on the disc and the scene being played back, the Recorder may not operate at the speed listed in this manual when performing Fast Forward. Slow Playback • You cannot perform slow playback - Sharp SR3U | Operation Manual - Page 53
page is the basic operation procedure. Procedures vary depending on the DVD video disc, so operate by following the instructions in the DVD video disc manual, or the instructions displayed on the screen. • A title menu is not displayed for a DVD-RW/ R (Video mode) if it has not been finalized. Title - Sharp SR3U | Operation Manual - Page 54
level. • To cancel, press GAMMA until "OFF" appears on the screen. 3 Press SET/ENTER. Digital Super Picture (Increase Sharpness) DVD-RW VR MODE VIDEO CD DVD-RW VIDEO MODE DVD-R DVD VIDEO It is possible to sharpen images by increasing detail and outline. It is also possible to obtain clearer - Sharp SR3U | Operation Manual - Page 55
turn them on as well. 2 Switch TV input to the AV input used to connect to the Recorder. 2 Press POWER to turn on the recorder. 3 Load an MP3 recorded CD-R or the CD-RW, then press DVD MENU. CD MP3 1 WOLF 3 ANGEL 1 14 2 SHARK 1 4 TRISH 1 To Play Another File (music title) during Playback - Sharp SR3U | Operation Manual - Page 56
For a description of each setting item, see "Functions which can be set" (page 57). DVD VIDEO VIDEO 1 / 3 5 / 25 00:00:00 2 ENGLISH 1 1 2ch OFF vary depending on the setting item. Operate by following the operation guide instructions on the screen. 4 Press RETURN or FUNCTION (under the cover - Sharp SR3U | Operation Manual - Page 57
from a DVD. - When playing back Dolby Digital audio. - When "DIGITAL AUDIO OUTPUT" (page 80) is set to "PCM". • This Recorder uses • There is one setting level on the "soft" side and 3 setting levels on the "sharp" side. • If you want to enjoy a more defined picture (with detailed pictures), press | - Sharp SR3U | Operation Manual - Page 58
quence of originals, and it does not actually copy the originals. This makes it possible to perform editing while using only a little disc space. Recordings on DVD-RW/R in Video mode The following content can be edited. • Input (change) title name (page 62) • Erase title (page 67) NOTE • ERASE TITLE - Sharp SR3U | Operation Manual - Page 59
slight discrepancy may arise between the edit screen and actually edited video. • If you play back a disc edited at the frame level with another DVD recorder, there may be a shift in the start or end point, or the screen may show a different thumbnail. Switching between Original and Play List (Play - Sharp SR3U | Operation Manual - Page 60
by title (or chapter), see page 67. NOTE • Scenes cannot be erased on DVD-RW/R (Video mode) discs. 1 Press START MENU to display START MENU screen 25 SAT 10 : 28 AM REC LIST EDIT/ ERASE EDITS/ERASES RECORDED TITLES INITIALIZE/ FINALIZE OTHER SETTINGS TIMER PROGRAM/ CHECK SELECT ENTER ENTER - Sharp SR3U | Operation Manual - Page 61
added and erased a maximum of 50 times per title. • If scenes have been added 51 or more times to a disc using another DVD recorder, Editing (Recording) may not function. Searching for the Start Point and End Point Scenes The following playback operations are available when searching for the start - Sharp SR3U | Operation Manual - Page 62
Title Inputting/Changing Title Name (CHANGE TITLE NAME) DVD-RW DVD-RW DVD-R VR MODE VIDEO MODE • When you record, a title name including the date, time and to original name. • Operate according to the instructions of the screen. 8 Press EXIT to quit editing. • Edit mode will terminate. 62 - Sharp SR3U | Operation Manual - Page 63
Editing an Original Title How to Enter Text DVD-RW DVD-RW DVD-R VR MODE VIDEO MODE Input Character Screen Input field (Displays title name. Can change and input title name.) Cursor (Displays the position to input characters.) - Sharp SR3U | Operation Manual - Page 64
(CHANGE THUMBNAIL) DVD-RW VR MODE / 25 SAT 10 : 28 AM REC LIST EDIT/ ERASE EDITS/ERASES RECORDED TITLES INITIALIZE/ FINALIZE OTHER SETTINGS TIMER PROGRAM/ CHECK SELECT ENTER ENTER n RETURN according to the instructions of the screen. 9 Press EXIT to quit Thumbnail edit. • Edit mode - Sharp SR3U | Operation Manual - Page 65
DVD-RW VR MODE Divides a title into multiple chapters and makes editing and dubbing of chapter as unit easier. • You can set chapter divisions by pressing CHAPTER MARK (under the cover) during recording Green (C) (UNDO). • Operate according to the instructions on the screen. 9 Press EXIT to quit - Sharp SR3U | Operation Manual - Page 66
EDIT MENU). 1 2 3 Disabling Title Edit and Erase (TITLE PROTECT) DVD-RW VR MODE Disables edit and erases so you cannot mistakenly change or erase the content of a title. Lets you safely save a disc for which editing is in progress. • This operation will not work with Video mode discs. • Titles - Sharp SR3U | Operation Manual - Page 67
all titles recorded on DVD. When originals are erased, play lists are also erased. • PLAY LIST: Erases all play lists created on DVD. Even if restore the erased content, press Green (C) (CNL ERSE). Operate according to the instructions on the screen. (Note: You can only undo once, to the state - Sharp SR3U | Operation Manual - Page 68
Editing a Play List Creating a Play List DVD-RW VR MODE You can create a Play List by copying a title or chapter units from an original. Also you can select your favorite scenes from - Sharp SR3U | Operation Manual - Page 69
or end point to add a scene. • You cannot add a scene which is less than 3 seconds. Adding a Scene from an Original to a Play List (ADD SCENE) DVD-RW VR MODE Adds video selected from an original to the end of play list titles. NOTE • The selected scene cannot be added if adding - Sharp SR3U | Operation Manual - Page 70
a start point, the start point will cancel. • If scenes have been added or erased 51 or more times to a single title in a disc using another DVD recorder, Editing (Recording) may not function. 70 - Sharp SR3U | Operation Manual - Page 71
Play List Changing the Title Sequence (MOVE TITLE) DVD-RW VR MODE Freely changes the sequence of titles. • Press Green (C) (UNDO) to restore to the state before the movement. Operate according to the instructions on the screen. EDIT(PLAYLIST) TITLE: CH33 FINE 12 / 25 SAT 10 : 28 AM TITLE INFO - Sharp SR3U | Operation Manual - Page 72
an original title (steps 4 - 8 on page 62). Changing Thumbnail (CHANGE THUMBNAIL) DVD-RW VR MODE Changes the image of title displayed in REC LIST to a scene you cannot combine chapters automati- cally recorded when a scene was erased, or chapters recorded due to adding a scene to a play list ( - Sharp SR3U | Operation Manual - Page 73
audio, select DTS audio at the disc menu during DVD playback, or select DTS audio using the AUDIO button Digital" (see page 80). NOTE • To play a disc recorded with DTS, you need to use DTS processor or amplifier. manual for the processor or amplifier for information about connecting to it. 73 - Sharp SR3U | Operation Manual - Page 74
back by the ordinary playback procedure. (The normal audio output is not played back for discs recorded with DTS.) DVD Video Disc • There is no audio signal generated for DVD video discs recorded with DTS. A processor or amplifier equipped with a DTS Surround decoder function is required to enjoy - Sharp SR3U | Operation Manual - Page 75
be required to be connected using a special cable. • Refer to the operation manual provided with the camcorder for further information on the procedure for connecting the camcorder. • Material protected with a copy guard cannot be recorded. It may be impossible to get the correct video, even if you - Sharp SR3U | Operation Manual - Page 76
- (off) EXACT RECORDING • This function works when timer recording (Easy Recording Guide/VCR Plus+/Timer YES Program) onto DVD-RW/R. If disc select whether to record the left or right audio channel when recording an L CH external source onto DVD-RW/R in Video mode. R CH MANUAL REC. MODE - Sharp SR3U | Operation Manual - Page 77
RECORDING REC. AUDIO FORMAT EXTERNAL AUDIO DUAL MONO REC. SET MANUAL REC recording to a DVD-RW/R disc in Video mode, the SAP channel is recorded on this channel. When recording audio in the PCM format with the recording mode set to "FINE" or "MN32", audio is recorded in the same format as recorded - Sharp SR3U | Operation Manual - Page 78
level of restriction.) • When "PARENTAL CONTROL" is set to "OFF", DVD discs can be played back regardless of the parental level. The parental level of an appropriate level, please check the level when you purchase your DVD disc equipped with the parental control feature. • Parental Control cannot be - Sharp SR3U | Operation Manual - Page 79
then press SET/ ENTER. OTHER SETTINGS[VIEW/PLAY SETTING] REC. FUNCTION VIEW/PLAY SETTING PASSWORD SETTING DVD PLAY SETTING 12 / 25 SAT 10 : 28 AM ADJUSTMENT 3 Press ' / " to select "DVD PLAY SETTING", then press SET/ ENTER. OTHER SETTINGS[VIEW/PLAY SETTING] REC. FUNCTION VIEW/PLAY SETTING - Sharp SR3U | Operation Manual - Page 80
SETTING AUTO MANUAL TIME ZONE MANUAL SETTING TIME: progressive compatible, select "PROGRESSIVE SCAN OFF". * If you connect with a TV which is not progressive compatible and set to "PROGRESSIVE SCAN ON", video playback from the DVD will not be output to the TV. PROGRESSIVE SCAN ON PROGRESSIVE SCAN - Sharp SR3U | Operation Manual - Page 81
is hard to hear dialog. NO: This outputs recorded audio as is. YES*: This raises the average when playing back discs with little noise (like DVD video). CHANNEL PRESET SELECT RECEPTION TYPE • This channel setting automatically or manually. AUTO MANUAL OPTION SEAMLESS PLAYBACK SETTING - Sharp SR3U | Operation Manual - Page 82
on the TV screen is automatically switched to a blue screen if you select a channel whose broadcast is finished, or a channel with no broadcast. DVD DISC PROTECTION • This protects the disc so you do not mistakenly record on it or erase its content. NO YES YES NO OFF ON NOT PROTECT PROTECT 82 - Sharp SR3U | Operation Manual - Page 83
OUT DIGITAL AUDIO OUTPUT DD OUTPUT LEVEL 3D Y/C SEPARATION DNR SETS PROGRESSIVE SCAN OUTPUT YOU CAN ENJOY CLEAR IMAGES WHEN PROGRESSIVE TV IS PLAYED BACK VIA COMPONENT TERMINAL PROGRESSIVE SCAN ON PROGRESSIVE SCAN OFF SELECT ENTER ENTER n RETURN 2 Press \ / | to select the desired option - Sharp SR3U | Operation Manual - Page 84
• Set this when you want to play back a VR mode or Video mode disc YES using another recorder capable of playback. NO If you finalize a recording on DVD-R disc, you will not be able to record any more on the disc. • Finalization can take anywhere from a few minutes to one hour. During - Sharp SR3U | Operation Manual - Page 85
INITIALIZE/FINALIZE 12 / 25 SAT 10 : 28 AM INITIALIZE REVERTS DISC TO UNUSED STATE (ALL STORED DATA ERASED). DVD FINALIZE ENABLES PLAYBACK OF RECORDED DVD DISC ON OTHER DVD PLAYERS. SELECT ENTER ENTER n RETURN 3 Press ' / " to select "VR MODE INIT.", then press SET/ENTER. INITIALIZE VR MODE - Sharp SR3U | Operation Manual - Page 86
Troubleshooting The following problems do not always suggest a defect or malfunction of this Recorder. Perform the checks listed below before calling service. Problem Suggested Solution The Recorder in this Recorder. • If you set to "PROGRESSIVE SCAN ON", reverse. • DVD audio recorded in DTS is - Sharp SR3U | Operation Manual - Page 87
Troubleshooting Problem Suggested Solution A disc recorded using this Recorder cannot be played back on another DVD player. • Check that the disc is finalized when the disc is in video mode. • Some players will not play even a finalized disc. • If the disc was recorded in VR mode, it can only be - Sharp SR3U | Operation Manual - Page 88
Troubleshooting Problem Suggested Solution Timer recording was set, but not executed. • Was there a power failure while standing by for timer recording? • Is the DVD full? Erase unnecessary titles from the list. • Is the power cord unplugged from the AC outlet? The timer recorded content stops - Sharp SR3U | Operation Manual - Page 89
is loaded in the disc tray. • Occurs if operation is incorrect. • Occurs if you attempt to record or edit a disc for which disc protection is set. • If there is a power failure during DVD recording, the system automatically tries to recover data after power is restored. This error occurs if such - Sharp SR3U | Operation Manual - Page 90
when recording stops before disc information has been correctly written onto a DVD, due to a problem like a power failure. • Occurs if the loaded disc cannot be recorded to the Recorder is connected with the Video In or S-Video In jack of a TV, and PROGRESSIVE OUT is set to "PROGRESSIVE SCAN ON". - Sharp SR3U | Operation Manual - Page 91
. Finalization This is done to enable playback of discs (Video mode) recorded with this Recorder using other DVD-RW and DVD-R compatible DVD players. (We do not guarantee that playback will be possible with all DVD players.) The DVD players which can play back VR mode discs are those with an - Sharp SR3U | Operation Manual - Page 92
Glossary Linear PCM Sound MP3 Multi Angle Multi Audio Original Pan Scan 4:3 PS Linear PCM is a signal recording format used for Audio CDs. The sound on Audio CDs is recorded at 44.1 kHz with 16 bits. (On DVD discs, sound is recorded at between 48 kHz with 16 bits and 96 kHz with 24 bits.) One - Sharp SR3U | Operation Manual - Page 93
in the opposite cases. This is a recording format for making DVD -RW/R discs playable with other commercially available DVD players. (We do not guarantee that playback will be possible with all DVD players.) This recording format is the basic DVD-RW recording format, and lets you enjoy the various - Sharp SR3U | Operation Manual - Page 94
(2ch)/Linear PCM (FINE mode only) Recording time (With 4.7GB DVD-RW/R FINE (High picture quality): Approx. 1 hour SP (Standard): Approx. 2 hours LP (2X): Approx. 4 hours EP (3X): Approx. 6 hours MN (Manual): 32 levels between FINE and EP Playback Playable discs DVD Video, DVD-RW/R, Audio CD (CD-DA - Sharp SR3U | Operation Manual - Page 95
.... 97 Guía de operación rápida en español 98 Conexión básica 98 EZ Set Up 98 Antes de utilizar la grabadora 99 Grabación directa en DVD 99 Reproducción DVD-RW/R 100 Reproducción de DVD Vídeo 100 Reproducción de Audio CD/Vídeo CD 100 95 - Sharp SR3U | Operation Manual - Page 96
referencia, anote los números de modelo y de serie (indicados en la parte posterior este producto) en el espacio provisto. No. de modelo: DV-SR3U No. de serie: AVISO: PARA REDUCIR EL RIESGO DE INCENDIO O ELECTROCHOQUE NO EXPONGA ESTE APARATO A LA HUMEDAD. PRECAUCION PELIGRO DE DESCARGA ELECTRICA - Sharp SR3U | Operation Manual - Page 97
o con la compañía eléctrica local. Con respecto al producto diseñado para utilizarse con pilas, o otras fuentes de suministro consulte el manual de instrucciones. 12. Puesta a tierra o polarización - Este producto dispone de un enchufe polarizado de dos cables (una cuchilla del enchufe es màs grande - Sharp SR3U | Operation Manual - Page 98
Guía de operación rápida en español Conexión básica La conexión siguiente es la conexión básica para ver o grabar programas de TV. TV Para los enchufes Video/audio IN Para los enchufes Video/audio IN Cable de Video/audio (includio) 4 Para el enchufe de ebtrada de antena Para el enchufe de - Sharp SR3U | Operation Manual - Page 99
MN x x" es el modo de grabación establecido en la pantalla de selección MANUAL REC MODE. 6 Pulse Æ REC. • Empieza la grabación y se visualiza el indicador REC de la parte delantera de la grabadora se enciende en rojo durante la grabación. DVD-RW REC ORIG INAL VR F I NE REST. 1h0m 1/1 1/1 00 : 00 : - Sharp SR3U | Operation Manual - Page 100
la alimentación.) • La función de reanudación de la reproducción no se activa durante la reproducción de CDs de vídeo. Reproducción de DVD Vídeo DVD VIDEO 1 Introduzca un disco. • La reproducción puede empezar automáticamente dependiendo del disco. 2 Pulse | PLAY. • La reproducción empieza desde el - Sharp SR3U | Operation Manual - Page 101
on contract, negligence, strict liability or otherwise. In no event shall Sharp be liable, or in any way responsible, for any damages or Product Model Number & Description: DV-SR3U DVD RECORDER (Be sure to have this information available when you need service for your Product.) Warranty Period
-
 1
1 -
 2
2 -
 3
3 -
 4
4 -
 5
5 -
 6
6 -
 7
7 -
8
-
9
-
10
-
11
-
12
-
13
-
14
-
15
-
16
-
17
-
18
-
19
-
20
-
21
-
22
-
23
-
24
-
25
-
26
-
27
-
28
-
29
-
30
-
31
-
32
-
33
-
34
-
35
-
36
-
37
-
38
-
39
-
40
-
41
-
42
-
43
-
44
-
45
-
46
-
47
-
48
-
49
-
50
-
51
-
52
-
53
-
54
-
55
-
56
-
57
-
58
-
59
-
60
-
61
-
62
-
63
-
64
-
65
-
66
-
67
-
68
-
69
-
70
-
71
-
72
-
73
-
74
-
75
-
76
-
77
-
78
-
79
-
80
-
81
-
82
-
83
-
84
-
85
-
86
-
87
-
88
-
89
-
90
-
91
-
92
-
93
-
94
-
95
-
96
-
97
-
98
-
99
-
100
-
101
 |
 |
DVD RECORDER
• Please read this Operation Manual carefully before using your Recorder.
• Instrucciones importantes de seguridad y guía de operación rápida en español
➝
Página
95
IMPORTANT /
IMPORTANTE
EZ SET UP
(AUTO CHANNEL /CLOCK SET UP)
EZ SET UP
(PROGRAMACIÓN AUTOMÁTICA DE CANAL/PUESTA EN HORA DEL RELOJ)
Detail: Please see page
25.
Detalle: véase la página
98.
1
•
The region number
for this recorder is
1
1
Connect Antenna/Cable
to Recorder first.
En primer lugar conecte
la antena/el cable a el
producto.
2
Then, plug into AC Power
Outlet.
A continuación,
enchúfelos al
tomacorriente de CA.
3
Do not press the
POWER
button until
completion of EZ Set Up.
No pulse el botón de
ALIMENTACIÓN
(POWER)
hasta haber
terminado la EZ SET UP.
4
EZ SET UP complete.
EZ SET UP completo.
MODEL
DV-SR3U
OPERATION MANUAL