Sony CCD-FX311 Primary User Manual - Page 17
Fade-out, Playing
 |
View all Sony CCD-FX311 manuals
Add to My Manuals
Save this manual to your list of manuals |
Page 17 highlights
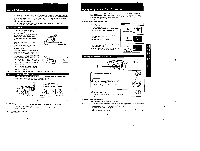
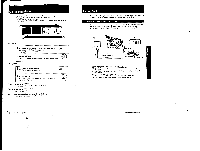
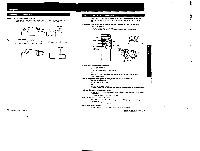
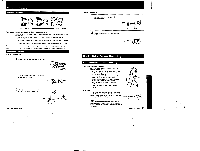
• Fade-in and Fade-out you can fed, in or fade-out to give your recording a professional appearance. When Nan) In tne picture will gradually appear from black. The saurlded OhMo geradually Nosey. When fading cut picture will gradually fade to black. The sound will also decease. FA DE IN OFAUDTE When swing In 1 Press FADED after setting the STANDBY switch up to put the camcorder into standby mode. The FADER indicator starts blinking 2 Press START/STOP. The FADER indicator stops blinking and the recording starts fading in When fading-out _ -- 1 Press FADER while recording. The FADER Indicator starts blinking 2 Press START/STOP. The FADER mdicator stops blinking and the picture fades out and se recording stops Te ceps& the fade-In/out function Before pressing START STOP, press FADER again A5159 the fade-in/out function repeatedly Stan from step When the date/time toga 24). Or age (page 24), is displayed The datenve. or age does not fadetn or fade-out Playing Back In the °artier section (page 17) we explained the basic connection to your TV with the RFU adaptor. In this section we discuss several other ways of connecting to your TV. Connecting a TV with Audio Video Inputs There are several ways to connect your camcorder to your TV If your TV has audio/video inputs, use an AN cable. Before connecting, make sure that your TV is turned on to prevent apeaker damage If your TV hes only an antenna Input, see page 17. vtieruur 4 AUD VIDEO VIDEO Out AUDio OuT VNICSIO M5920 MS AC-V35N35A 1 Use an AN cable to connect your TV and camcorder fal If your TV is a stereo type, use the VMCSIOMS/920MS kV connecting cable (not supplied) (bi If your TV is a monaural type. use the VMC-710M/720M AN connecting cable Inot supplied). 2 Connect the AC adaptor to a wall outlet 3 Attach the connecting plate of the AC power adaptor to the camcorder. 4 Set the CHARGE/VTR selector on the AC power adaptor to VTR (DC OUT). 32 AdOnCed Camera 9e0.=" 33 Advanced Camera Operation
-
 1
1 -
2
-
3
-
4
-
5
-
6
-
7
-
8
-
9
-
10
-
11
-
 12
12 -
 13
13 -
 14
14 -
 15
15 -
 16
16 -
 17
17 -
 18
18 -
 19
19 -
 20
20 -
 21
21 -
 22
22 -
23
-
24
-
25
-
26
-
27
 |
 |
