Sony CDX-M600 Operating Instructions - Page 27
Boosting the bass sound
 |
View all Sony CDX-M600 manuals
Add to My Manuals
Save this manual to your list of manuals |
Page 27 highlights
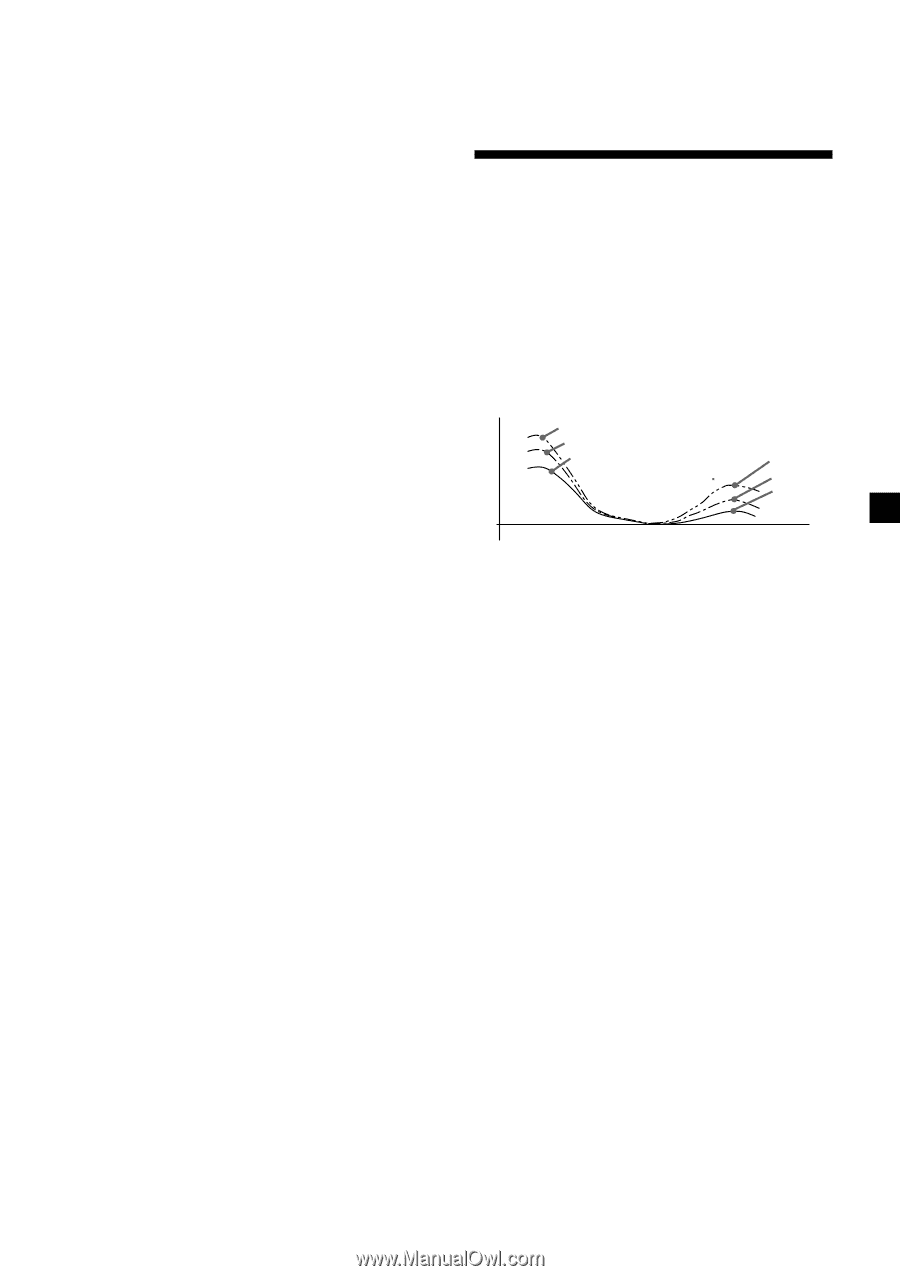
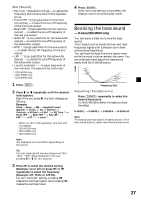
Snd (Sound) • EQ Tune*1 (Equalizer tuning) - to adjust the frequency and volume level of the equalizer curve. • Front HPF*1 (High pass filter for the front pre-output) - to select the cut-off frequency of the front pre-output. • Rear HPF*1 (High pass filter for the rear preoutput) - to select the cut-off frequency of the rear pre-output. • SUB LPF*1 (Low pass filter for the subwoofer output) - to select the cut-off frequency of the subwoofer output. • HPF*2*3 (High pass filter for the pre-output) - to select the cut-off frequency of the preoutput. • LPF*2*3 (Low pass filter for the subwoofer output) - to select the cut-off frequency of the subwoofer output. • Loud (Loudness)*2 - to enjoy bass even at low volumes. The bass will be reinforced. *1 CDX-M750 only *2 CDX-M650 only *3 CDX-M600 only 1 Press (MENU). 2 Press M or m repeatedly until the desired item appears. Each time you press m, the item changes as follows: Example Clock t Beep t RM t English/French/ Spanish t D.Info t SA t Dimmer t Contrast t M.Dspl t A.Scrl*1 t EQ Tune*2 t Front HPF*2 t Rear HPF*2 t Sub LPF*2 t HPF*3*4 t LPF*3*4 t Loud*3 *1 When no CD or MD is playing, this item will not appear. *2 CDX-M750 only *3 CDX-M650 only *4 CDX-M600 only Note The displayed item will differ depending on the source. Tip You can easily switch among categories ("Set," "Snd," "P/M" (Play Mode) and "Dis") by pressing M or m for two seconds. 3 Press , to select the desired setting (Example: on or off) or press < or , repeatedly to select the frequency (Example: off, 78 Hz or 125 Hz). For the "Contrast" setting, pressing , makes the contrast higher, and pressing < makes the contrast lower. 4 Press (ENTER). After the mode setting is completed, the display returns to normal play mode. Boosting the bass sound - D-bass (CDX-M600 only) You can enjoy a clear and powerful bass sound. The D-bass function boosts the low and high frequency signal with a sharper curve than conventional bass boost. You can hear the bass line more clearly even while the vocal volume remains the same. You can emphasize and adjust the bass sound easily with the D-BASS button. Level D-BASS 3 D-BASS 2 D-BASS 1 D-BASS 3 D-BASS 2 D-BASS 1 0dB Frequency (Hz) Adjusting the bass curve Press (D-BASS) repeatedly to select the desired bass curve. As the D-BASS number increases so does the effect. D-BASS 1 t D-BASS 2 t D-BASS 3 t D-BASS off Note The bass sound may distort at same volume. If the bass sound distorts, select less effective bass curve. 27
-
 1
1 -
2
-
3
-
4
-
5
-
6
-
7
-
8
-
9
-
10
-
11
-
12
-
13
-
14
-
15
-
16
-
17
-
18
-
19
-
20
-
21
-
 22
22 -
 23
23 -
 24
24 -
 25
25 -
 26
26 -
 27
27 -
 28
28 -
 29
29 -
 30
30 -
 31
31 -
 32
32 -
33
-
34
-
35
-
36
-
37
-
38
-
39
-
40
-
41
-
42
-
43
-
44
-
45
-
46
-
47
-
48
-
49
-
50
-
51
-
52
-
53
-
54
-
55
-
56
-
57
-
58
-
59
-
60
-
61
-
62
-
63
-
64
-
65
-
66
-
67
-
68
-
69
-
70
-
71
-
72
-
73
-
74
-
75
-
76
-
77
-
78
-
79
-
80
-
81
-
82
-
83
-
84
-
85
-
86
-
87
-
88
-
89
-
90
-
91
-
92
-
93
-
94
-
95
-
96
-
97
-
98
-
99
-
100
-
101
-
102
-
103
-
104
-
105
-
106
-
107
-
108
-
109
-
110
-
111
-
112
-
113
-
114
-
115
-
116
 |
 |