Sony CPD-L133 Operating Instructions (primary manual) - Page 12
Adjusting, Picture, Position, Displaying, Actual, Resolution
 |
View all Sony CPD-L133 manuals
Add to My Manuals
Save this manual to your list of manuals |
Page 12 highlights
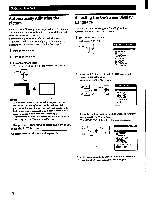
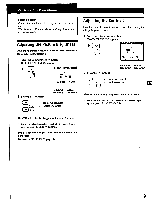
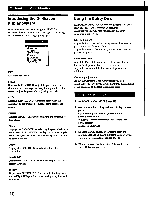
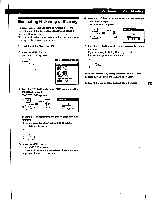
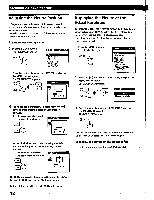
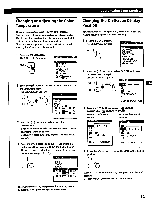
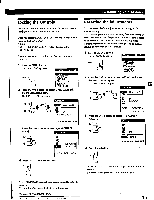
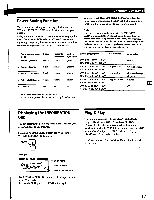
Customizing Your Monitor Adjusting the Picture Position If the picture is not in the center of the screen, press the AUTO button. If this operation does not work, adjust the centering as follows. Once the centering is adjusted, it will be stored in memory for the current input signal. 1 Load the Utility Disk (page 10). 2 Press the MENU button. The MENU OSD appears. MENU MENU OKFINIMINIMEM At PHASE (19 PITCH E'CENTER EZOOM la COLOR 3 Press the 0/0 buttons to select CENTER, and press .the MENU button again. The CENTER OSD appears. CI MENU CENTER O 26 O Displaying the Picture at the Actual Resolution The monitor is set at the factory to display the picture on the screen in full, irrespective of the picture's resolution. You can also view the picture at its actual resolution. Once the zoom is set, it will be stored in memory for the current input signal. 1 Press the MENU button. The MENU OSD appears. MENU MENU OK -T711 A.PHASE OD PITCH laliCENTER &ZOOM CI COLOR El LANGUAGE EIOPTION 2 Press the 0/0 buttons to select ZOOM, and press the MENU button again. The ZOOM OSD appears. -0C 4j O MENU IF ZOOM REAL MODE 4 For horizontal adjustment, select H using the 0/0 buttons and adjust the position using the +/- buttons. + ... to move the picture right - ... to move the picture left CENTER c]b Om O 26 C For vertical adjustment, select V using the 0/0 buttons and adjust the position using the +/- buttons. + ... to move the picture up CENTER - ... to move the picture down rti O 26 a 3 Press the 0 button to select REAL MODE, and press the MENU button again. The MENU OSD appears. •0' The OSD automatically disappears after about 30 seconds. To dose the OSD, press the MENU button again. To display the picture on the screen in full Press the Q button in step 3 to select FULL MODE. The OSD automatically disappears after about 30 seconds. To close the OSD, press the MENU button again. To turn off the test pattern, click on the screen. 12
-
 1
1 -
2
-
3
-
4
-
5
-
6
-
 7
7 -
 8
8 -
 9
9 -
 10
10 -
 11
11 -
 12
12 -
 13
13 -
 14
14 -
 15
15 -
 16
16 -
 17
17 -
18
-
19
-
20
 |
 |
