Sony CPD-L133 Operating Instructions (primary manual) - Page 6
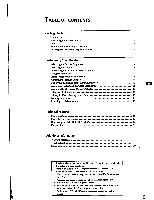
Identifying, Parts, Controls
 |
View all Sony CPD-L133 manuals
Add to My Manuals
Save this manual to your list of manuals |
Page 6 highlights
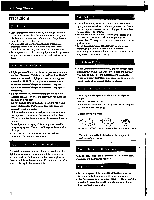
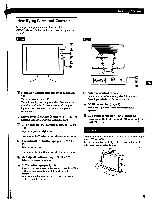
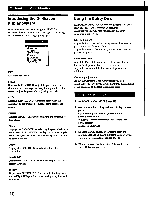
Identifying Parts and Controls See the pages in parentheses for further details. CPD-L150 is used for illustration purposes throughout this manual. Front 1 2 3 4 5 6 Rear Getting Started Wyss M U (power) switch and indicator (pages 8, 17) Turns the monitor on or off. . The indicator lights up in green when the monitor is turned on, and either flashes in green and orange or lights up in orange When the monitor is in power saving mode. El MENU (menu) button (pages 8, 11 - 15, 17) Displays the MENU OSD (On-Screen Display). El * (brightness) (0) button (pages 8 - 9, 11 - 15) Adjusts the picture brightness. Functions as the Q button when selecting menu items. El 0 (contrast) (0) button (pages 8 - 9, 11 - 15) Adjusts the contrast. Functions as the b button when selecting menu items. El +1- (adjust) buttons (pages 9, 11 - 15) Adjusts the selected menu item. E AUTO button (pages 8, 11) After you have connected this monitor, press the AUTO button to automatically adjust the picture to the computer. You also should press this button if the picture is not centered or if it is fuzzy. External control connector Inputs the external control signal of RS-232 format. Consult your dealer for further information. E DC IN connector (page 6) Provides DC power to the monitor from the AC adaptor. 09 RGB input connector (HD15) (page 6) Inputs analog RGB video signals (0.714 Vp-p, positive) and SYNC signals. i Use the tilt feature to adjust the monitor to the desired angle within 30° vertically. To turn the monitor vertically, hold it at the bottom with both hands as illustrated below. 30° 0 9 5
-
 1
1 -
 2
2 -
 3
3 -
 4
4 -
 5
5 -
 6
6 -
 7
7 -
 8
8 -
 9
9 -
 10
10 -
 11
11 -
 12
12 -
13
-
14
-
15
-
16
-
17
-
18
-
19
-
20
 |
 |
