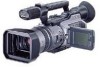
Sony DCR VX2100 Operating Instructions - Page 15
Step 3 Inserting a cassette - mini dv
 |
UPC - 027242639812
View all Sony DCR VX2100 manuals
Add to My Manuals
Save this manual to your list of manuals |
Page 15 highlights
Getting Started Step 3 Inserting a cassette (1) Install the power source. (2) While pressing the small blue button on the EJECT switch, slide it in the direction of the arrow. After the cassette lid is opened, the cassette compartment automatically opens. (3) Push the middle portion of the back of the cassette to insert it. Insert the cassette in a straight line deeply into the cassette compartment with the window facing out and the write-protect tab facing upward. (4) Close the cassette compartment by pressing the PUSH mark on it. (5) Close the cassette lid until it clicks by pressing the PUSH button on the lid. 2 3,4 Window 5 PUSH Write-protect tab PUSH To eject a cassette Follow the procedure above, and take out the cassette in step 3. Note The cassette lid will not be closed when you press any part of the lid other than the PUSH button. When you use mini DV cassettes with cassette memory Read the instruction about cassette memory to use this function properly (p. 144). To prevent accidental erasure Slide the write-protect tab on the cassette to SAVE. If the grip strap prevents the cassette lid from opening fully Adjust the length of the grip strap (p. 168). If Q flashes even if the cassette has been inserted Press the PUSH button again to close the cover firmly. 15
-
 1
1 -
2
-
3
-
4
-
5
-
6
-
7
-
8
-
9
-
 10
10 -
 11
11 -
 12
12 -
 13
13 -
 14
14 -
 15
15 -
 16
16 -
 17
17 -
 18
18 -
 19
19 -
 20
20 -
21
-
22
-
23
-
24
-
25
-
26
-
27
-
28
-
29
-
30
-
31
-
32
-
33
-
34
-
35
-
36
-
37
-
38
-
39
-
40
-
41
-
42
-
43
-
44
-
45
-
46
-
47
-
48
-
49
-
50
-
51
-
52
-
53
-
54
-
55
-
56
-
57
-
58
-
59
-
60
-
61
-
62
-
63
-
64
-
65
-
66
-
67
-
68
-
69
-
70
-
71
-
72
-
73
-
74
-
75
-
76
-
77
-
78
-
79
-
80
-
81
-
82
-
83
-
84
-
85
-
86
-
87
-
88
-
89
-
90
-
91
-
92
-
93
-
94
-
95
-
96
-
97
-
98
-
99
-
100
-
101
-
102
-
103
-
104
-
105
-
106
-
107
-
108
-
109
-
110
-
111
-
112
-
113
-
114
-
115
-
116
-
117
-
118
-
119
-
120
-
121
-
122
-
123
-
124
-
125
-
126
-
127
-
128
-
129
-
130
-
131
-
132
-
133
-
134
-
135
-
136
-
137
-
138
-
139
-
140
-
141
-
142
-
143
-
144
-
145
-
146
-
147
-
148
-
149
-
150
-
151
-
152
-
153
-
154
-
155
-
156
-
157
-
158
-
159
-
160
-
161
-
162
-
163
-
164
-
165
-
166
-
167
-
168
-
169
-
170
-
171
-
172
-
173
-
174
-
175
-
176
 |
 |
