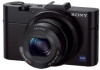
Sony DSC-RX100M2COS Cyber-shot® User Guide (Printable PDF) - Page 111
ISO, Adjusting ISO Sensitivity Recommended Exposure Index, High ISO sensitivity
 |
View all Sony DSC-RX100M2COS manuals
Add to My Manuals
Save this manual to your list of manuals |
Page 111 highlights
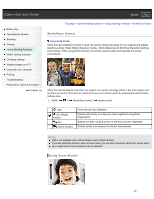
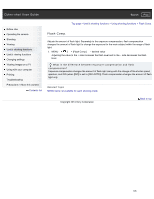
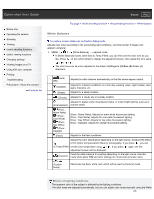
Cyber-shot User Guide Search Print Before Use Operating the camera Shooting Viewing Useful shooting functions Useful viewing functions Changing settings Viewing images on a TV Using with your computer Printing Troubleshooting Precautions / About this camera Contents list Top page > Useful shooting functions > Using shooting functions > ISO ISO 1. MENU 3 [ISO] desired mode In case you select [Multi Frame Noise Reduct.] or [ISO AUTO], press to display the setting screen, then select a desired value. on the control wheel (Multi Frame Noise Reduct.) The camera overlays the continuous shots so that an image with less noise results. Press on the control wheel to display the setting screen, then select a desired value from ISO AUTO, 200 to 25600 using / . (ISO AUTO) The camera sets the ISO sensitivity automatically based on the surrounding light conditions. You can set the maximum and minimum ISO value for [ISO AUTO] mode. Press to display the setting screen. You can reduce image blurring in dark 100/125/160/200/400/800/1600/3200/6400/12800 locations or with moving subjects by increasing the ISO sensitivity (select a larger number). Adjusting ISO Sensitivity (Recommended Exposure Index) ISO sensitivity is a speed rating for recording media that incorporates an image sensor that receives light. Even when the exposure is the same, images differ depending on the ISO sensitivity. High ISO sensitivity Records a bright image even in dark locations while increasing shutter speed to reduce blur. However, the image tends to be noisy. Low ISO sensitivity 102
-
 1
1 -
2
-
3
-
4
-
5
-
6
-
7
-
8
-
9
-
10
-
11
-
12
-
13
-
14
-
15
-
16
-
17
-
18
-
19
-
20
-
21
-
22
-
23
-
24
-
25
-
26
-
27
-
28
-
29
-
30
-
31
-
32
-
33
-
34
-
35
-
36
-
37
-
38
-
39
-
40
-
41
-
42
-
43
-
44
-
45
-
46
-
47
-
48
-
49
-
50
-
51
-
52
-
53
-
54
-
55
-
56
-
57
-
58
-
59
-
60
-
61
-
62
-
63
-
64
-
65
-
66
-
67
-
68
-
69
-
70
-
71
-
72
-
73
-
74
-
75
-
76
-
77
-
78
-
79
-
80
-
81
-
82
-
83
-
84
-
85
-
86
-
87
-
88
-
89
-
90
-
91
-
92
-
93
-
94
-
95
-
96
-
97
-
98
-
99
-
100
-
101
-
102
-
103
-
104
-
105
-
 106
106 -
 107
107 -
 108
108 -
 109
109 -
 110
110 -
 111
111 -
 112
112 -
 113
113 -
 114
114 -
 115
115 -
 116
116 -
117
-
118
-
119
-
120
-
121
-
122
-
123
-
124
-
125
-
126
-
127
-
128
-
129
-
130
-
131
-
132
-
133
-
134
-
135
-
136
-
137
-
138
-
139
-
140
-
141
-
142
-
143
-
144
-
145
-
146
-
147
-
148
-
149
-
150
-
151
-
152
-
153
-
154
-
155
-
156
-
157
-
158
-
159
-
160
-
161
-
162
-
163
-
164
-
165
-
166
-
167
-
168
-
169
-
170
-
171
-
172
-
173
-
174
-
175
-
176
-
177
-
178
-
179
-
180
-
181
-
182
-
183
-
184
-
185
-
186
-
187
-
188
-
189
-
190
-
191
-
192
-
193
-
194
-
195
-
196
-
197
-
198
-
199
-
200
-
201
-
202
-
203
-
204
-
205
-
206
-
207
-
208
-
209
-
210
-
211
-
212
-
213
-
214
-
215
-
216
-
217
-
218
-
219
-
220
-
221
-
222
-
223
-
224
-
225
-
226
-
227
-
228
-
229
-
230
-
231
-
232
-
233
-
234
-
235
-
236
-
237
-
238
-
239
-
240
-
241
-
242
-
243
-
244
-
245
-
246
-
247
-
248
-
249
-
250
-
251
-
252
-
253
-
254
-
255
-
256
-
257
-
258
-
259
-
260
-
261
-
262
-
263
-
264
-
265
-
266
-
267
-
268
-
269
 |
 |
