Sony DSC T5 User Guide - Page 68
To delete the USB connection, Creating a video CD using, ImageMixer VCD2, To start up ImageMixer VCD2
 |
UPC - 027242675490
View all Sony DSC T5 manuals
Add to My Manuals
Save this manual to your list of manuals |
Page 68 highlights
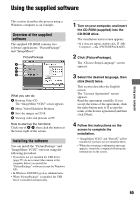
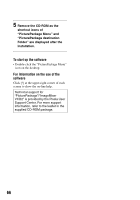
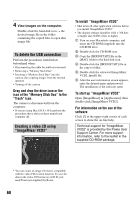
4 View images on the computer. Double-click the hard disk icon t the desired image file in the folder containing the copied files to open that image file. To delete the USB connection Perform the procedures listed below beforehand when: • Disconnecting the cable for multi-use terminal • Removing a "Memory Stick Duo" • Inserting a "Memory Stick Duo" into the camera after copying images from the internal memory • Turning off the camera Drag and drop the drive icon or the icon of the "Memory Stick Duo" to the "Trash" icon. The camera is disconnected from the computer. • If you are using Mac OS X v10.0, perform the procedure above after you have turned your computer off. Creating a video CD using "ImageMixer VCD2" To install "ImageMixer VCD2" • Shut down all other application software before you install "ImageMixer VCD2." • The display settings should be 1024 × 768 dots or higher and 32,000 colors or higher. 1 Turn on your Macintosh computer, and insert the CD-ROM (supplied) into the CD-ROM drive. 2 Double-click the CD-ROM icon. 3 Copy the [IMXINST.SIT] file in the [MAC] folder to the hard disk icon. 4 Double-click the [IMXINST.SIT] file in the copy-to folder. 5 Double-click the extracted [ImageMixer VCD2_Install] file. 6 After the user information screen appears, enter the desired name and password. The installation of the software starts. To start up "ImageMixer VCD2" Open [ImageMixer] in [Application], then double-click [ImageMixer VCD2]. For information on the use of the software Click [?] at the upper-right corner of each screen to show the on-line help. Technical support for "ImageMixer VCD2" is provided by the Pixela User Support Center. For more support information, refer to the leaflet in the supplied CD-ROM package. • You can create an image file that is compatible with the video CD creation function. To save the data in the video CD format on a CD-R, you need Toast (not supplied) by Roxio. 68
-
 1
1 -
2
-
3
-
4
-
5
-
6
-
7
-
8
-
9
-
10
-
11
-
12
-
13
-
14
-
15
-
16
-
17
-
18
-
19
-
20
-
21
-
22
-
23
-
24
-
25
-
26
-
27
-
28
-
29
-
30
-
31
-
32
-
33
-
34
-
35
-
36
-
37
-
38
-
39
-
40
-
41
-
42
-
43
-
44
-
45
-
46
-
47
-
48
-
49
-
50
-
51
-
52
-
53
-
54
-
55
-
56
-
57
-
58
-
59
-
60
-
61
-
62
-
 63
63 -
 64
64 -
 65
65 -
 66
66 -
 67
67 -
 68
68 -
 69
69 -
 70
70 -
 71
71 -
 72
72 -
 73
73 -
74
-
75
-
76
-
77
-
78
-
79
-
80
-
81
-
82
-
83
-
84
-
85
-
86
-
87
-
88
-
89
-
90
-
91
-
92
-
93
-
94
-
95
-
96
-
97
-
98
-
99
-
100
-
101
-
102
-
103
-
104
-
105
-
106
-
107
 |
 |
