Sony DSC-W190/R Cyber-shot® Handbook - Page 74
On “PMB (Picture Motion Browser - news
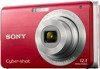 |
UPC - 027242766389
View all Sony DSC-W190/R manuals
Add to My Manuals
Save this manual to your list of manuals |
Page 74 highlights
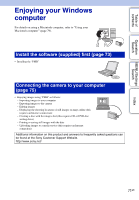
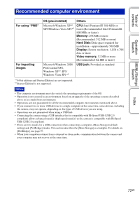
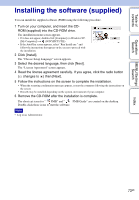
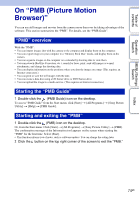
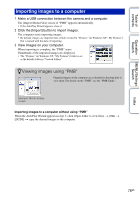
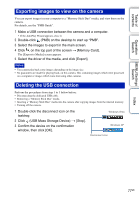
Table of contents Operation Search MENU/Settings Search Index On "PMB (Picture Motion Browser)" You can use still images and movies from the camera more than ever by taking advantage of the software. This section summarizes the "PMB". For details, see the "PMB Guide". "PMB" overview With the "PMB": • You can import images shot with the camera to the computer and display them on the computer. • You can export images in your computer to a "Memory Stick Duo" media, and display them on the camera. • You can organize images on the computer on a calendar by shooting date to view them. • You can retouch (Red Eye Correction, etc.), search for faces, print, send still images as e-mail attachments, and change the shooting date. • You can display information on the positions where you shot the images on a map. (This requires an Internet connection.) • You can print or save the still images with the date. • You can create a data disc using a CD burner drive or DVD burner drive. • You can upload the image to a media service. (This requires an Internet connection.) Starting the "PMB Guide" 1 Double-click the (PMB Guide) icon on the desktop. To access "PMB Guide" from the Start menu, click [Start] t [All Programs] t [Sony Picture Utility] t [Help] t [PMB Guide]. Starting and exiting the "PMB" 1 Double-click the (PMB) icon on the desktop. Or, from the Start menu: Click [Start] t [All Programs] t [Sony Picture Utility] t [PMB]. The confirmation message of the Information tool appears on the screen when starting the "PMB" for the first time. Select [Start]. • This function informs you of news, such as software updates. You can change the setting later. 2 Click the button on the top right corner of the screen to exit the "PMB." 74GB
-
 1
1 -
2
-
3
-
4
-
5
-
6
-
7
-
8
-
9
-
10
-
11
-
12
-
13
-
14
-
15
-
16
-
17
-
18
-
19
-
20
-
21
-
22
-
23
-
24
-
25
-
26
-
27
-
28
-
29
-
30
-
31
-
32
-
33
-
34
-
35
-
36
-
37
-
38
-
39
-
40
-
41
-
42
-
43
-
44
-
45
-
46
-
47
-
48
-
49
-
50
-
51
-
52
-
53
-
54
-
55
-
56
-
57
-
58
-
59
-
60
-
61
-
62
-
63
-
64
-
65
-
66
-
67
-
68
-
 69
69 -
 70
70 -
 71
71 -
 72
72 -
 73
73 -
 74
74 -
 75
75 -
 76
76 -
 77
77 -
 78
78 -
 79
79 -
80
-
81
-
82
-
83
-
84
-
85
-
86
-
87
-
88
-
89
-
90
-
91
-
92
-
93
-
94
-
95
-
96
-
97
-
98
-
99
-
100
-
101
-
102
-
103
-
104
 |
 |