Sony DSC-W190/R Cyber-shot® Handbook - Page 80
Importing and viewing images on a computer, Deleting the USB connection, the folder where
 |
UPC - 027242766389
View all Sony DSC-W190/R manuals
Add to My Manuals
Save this manual to your list of manuals |
Page 80 highlights
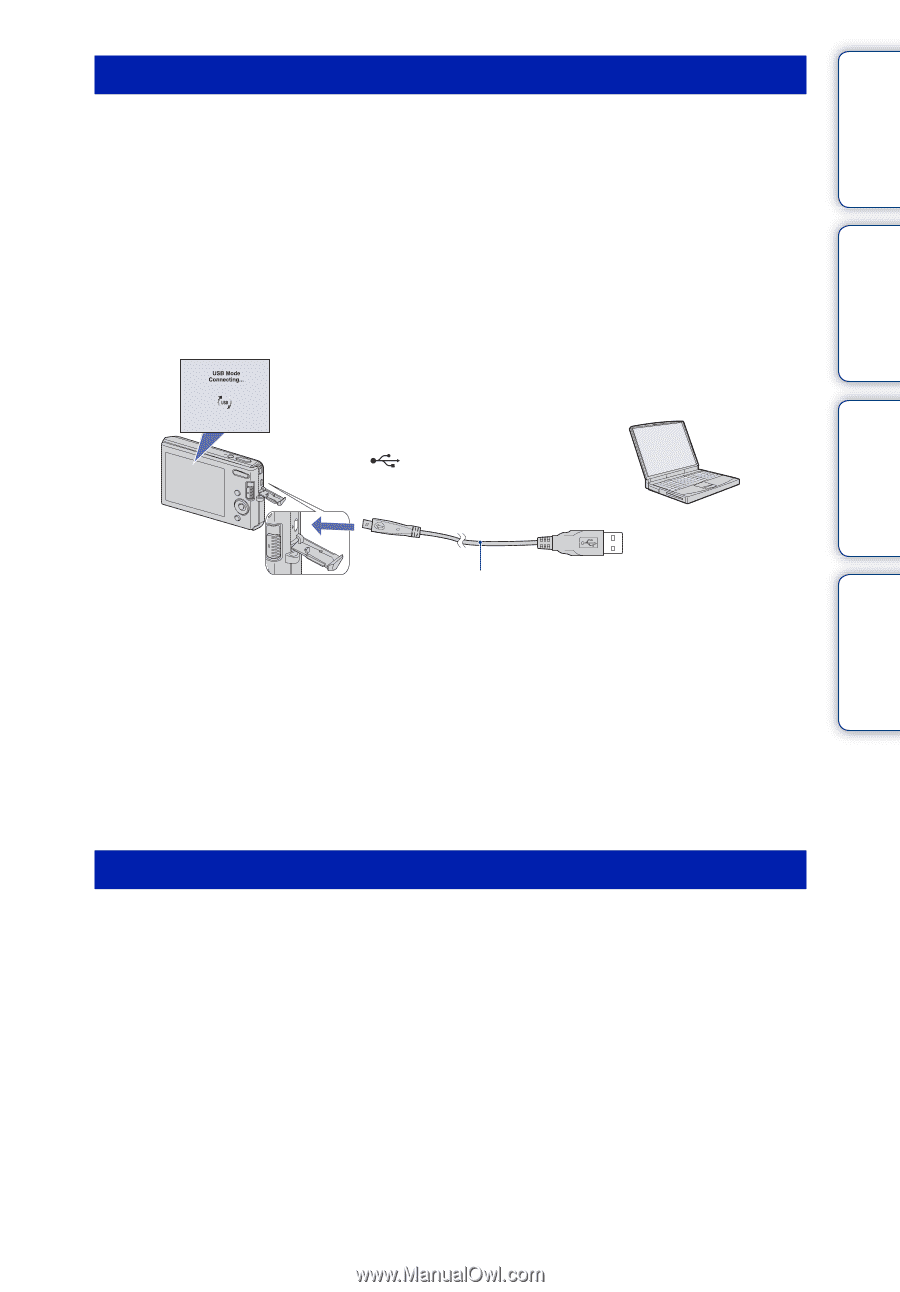
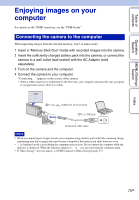
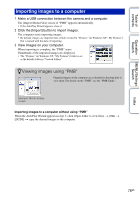
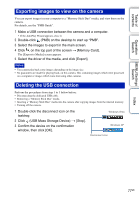
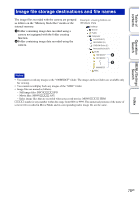
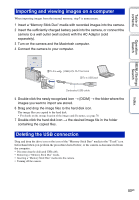
Table of contents Operation Search MENU/Settings Search Importing and viewing images on a computer When importing images from the internal memory, step 1 is unnecessary. 1 Insert a "Memory Stick Duo" media with recorded images into the camera. 2 Insert the sufficiently charged battery pack into the camera, or connect the camera to a wall outlet (wall socket) with the AC Adaptor (sold separately). 3 Turn on the camera and the Macintosh computer. 4 Connect the camera to your computer. 2To the (USB)·A/V OUT terminal 1To a USB jack Dedicated USB cable 5 Double-click the newly recognized icon t [DCIM] t the folder where the images you want to import are stored. 6 Drag and drop the image files to the hard disk icon. The image files are copied to the hard disk. • For details on the storage location of the images and file names, see page 78. 7 Double-click the hard disk icon t the desired image file in the folder containing the copied files. Deleting the USB connection Drag and drop the drive icon or the icon of the "Memory Stick Duo" media to the "Trash" icon beforehand when you perform the procedures listed below, or the camera is disconnected from the computer. • Disconnecting the dedicated USB cable. • Removing a "Memory Stick Duo" media. • Inserting a "Memory Stick Duo" media into the camera. • Turning off the camera. Index 80GB
-
 1
1 -
2
-
3
-
4
-
5
-
6
-
7
-
8
-
9
-
10
-
11
-
12
-
13
-
14
-
15
-
16
-
17
-
18
-
19
-
20
-
21
-
22
-
23
-
24
-
25
-
26
-
27
-
28
-
29
-
30
-
31
-
32
-
33
-
34
-
35
-
36
-
37
-
38
-
39
-
40
-
41
-
42
-
43
-
44
-
45
-
46
-
47
-
48
-
49
-
50
-
51
-
52
-
53
-
54
-
55
-
56
-
57
-
58
-
59
-
60
-
61
-
62
-
63
-
64
-
65
-
66
-
67
-
68
-
69
-
70
-
71
-
72
-
73
-
74
-
 75
75 -
 76
76 -
 77
77 -
 78
78 -
 79
79 -
 80
80 -
 81
81 -
 82
82 -
 83
83 -
 84
84 -
 85
85 -
86
-
87
-
88
-
89
-
90
-
91
-
92
-
93
-
94
-
95
-
96
-
97
-
98
-
99
-
100
-
101
-
102
-
103
-
104
 |
 |