Sony HDR HC7 Operating Guide - Page 46
CAMERA COLOR, WB SHIFT White Balance Shift, SPOT FOCUS, FOCUS
 |
UPC - 027242701458
View all Sony HDR HC7 manuals
Add to My Manuals
Save this manual to your list of manuals |
Page 46 highlights
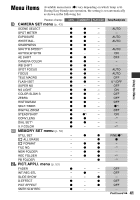
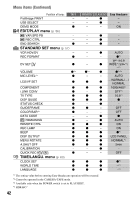
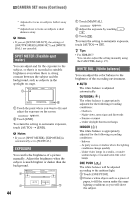
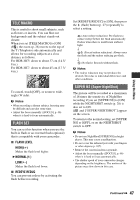
CAMERA SET menu (Continued) z Tips • Touch if the subject is white or the backlight is bright, or touch if the subject is black or the light is dim. • You can adjust the automatic exposure level to brighter or darker when [EXPOSURE] is set to [AUTO]. • For HDR-HC7: You can also adjust the setting manually using the CAM CTRL dial (p. 27). CAMERA COLOR You can adjust the color intensity with / . appears when [CAMERA COLOR] is anything other than the default setting. Decreases color intensity Increases color intensity WB SHIFT (White Balance Shift) You can adjust the white balance to the desired setting using / . and the setting value appear when [WB SHIFT] is anything other than the default setting. z Tips • When the white balance is set to a lower value, pictures appear bluish, and when set to a higher value, pictures appear reddish. • For HDR-HC7: You can also adjust the setting manually using the CAM CTRL dial (p. 27). SPOT FOCUS You can select and adjust the focal point to a subject not located in the center of the screen. 1 2 46 1 Touch the subject on the screen. 9 appears. 2 Touch [END]. To adjust the focus automatically, touch [AUTO] t [END] in step 1. b Notes • If you set [SPOT FOCUS], [FOCUS] is automatically set to [MANUAL]. FOCUS You can adjust the focus manually. You can select this function also when you want to focus on a certain subject intentionally. 1 Touch [MANUAL]. 9 appears. 2 Touch (focusing on close subjects)/ (focusing on distant subjects) to sharpen the focus. appears when the focus cannot be adjusted any closer, and appears when the focus cannot be adjusted farther away. 3 Touch . To adjust the focus automatically, touch [AUTO] t in step 1. b Notes • The minimum possible distance between camcorder and subject while maintaining sharp focus is about 1 cm (about 13/32 in.) for wide angle and about 80 cm (about 2 5/8 feet) for telephoto. z Tips • It is easier to focus on the subject by moving the power zoom lever towards T (telephoto) to adjust the focus, then towards W (wide angle) to adjust the zoom for recording. When you want to record a subject at close range, move the power zoom lever to W (wide angle), then adjust the focus. • For HDR-HC7: You can also adjust the focus manually using the CAM CTRL dial (p. 27).
-
 1
1 -
2
-
3
-
4
-
5
-
6
-
7
-
8
-
9
-
10
-
11
-
12
-
13
-
14
-
15
-
16
-
17
-
18
-
19
-
20
-
21
-
22
-
23
-
24
-
25
-
26
-
27
-
28
-
29
-
30
-
31
-
32
-
33
-
34
-
35
-
36
-
37
-
38
-
39
-
40
-
 41
41 -
 42
42 -
 43
43 -
 44
44 -
 45
45 -
 46
46 -
 47
47 -
 48
48 -
 49
49 -
 50
50 -
 51
51 -
52
-
53
-
54
-
55
-
56
-
57
-
58
-
59
-
60
-
61
-
62
-
63
-
64
-
65
-
66
-
67
-
68
-
69
-
70
-
71
-
72
-
73
-
74
-
75
-
76
-
77
-
78
-
79
-
80
-
81
-
82
-
83
-
84
-
85
-
86
-
87
-
88
-
89
-
90
-
91
-
92
-
93
-
94
-
95
-
96
-
97
-
98
-
99
-
100
-
101
-
102
-
103
-
104
-
105
-
106
-
107
-
108
-
109
-
110
-
111
-
112
-
113
-
114
-
115
-
116
-
117
-
118
-
119
-
120
-
121
-
122
-
123
-
124
-
125
-
126
-
127
-
128
-
129
-
130
-
131
 |
 |