Sony KDL 52W5100 Operating Instructions - Page 16
Running Initial Setup, Initial Setup, Retail, Continue, TV Guide On Screen, Network Setup, button - turning itself off and on
 |
UPC - 027242752894
View all Sony KDL 52W5100 manuals
Add to My Manuals
Save this manual to your list of manuals |
Page 16 highlights
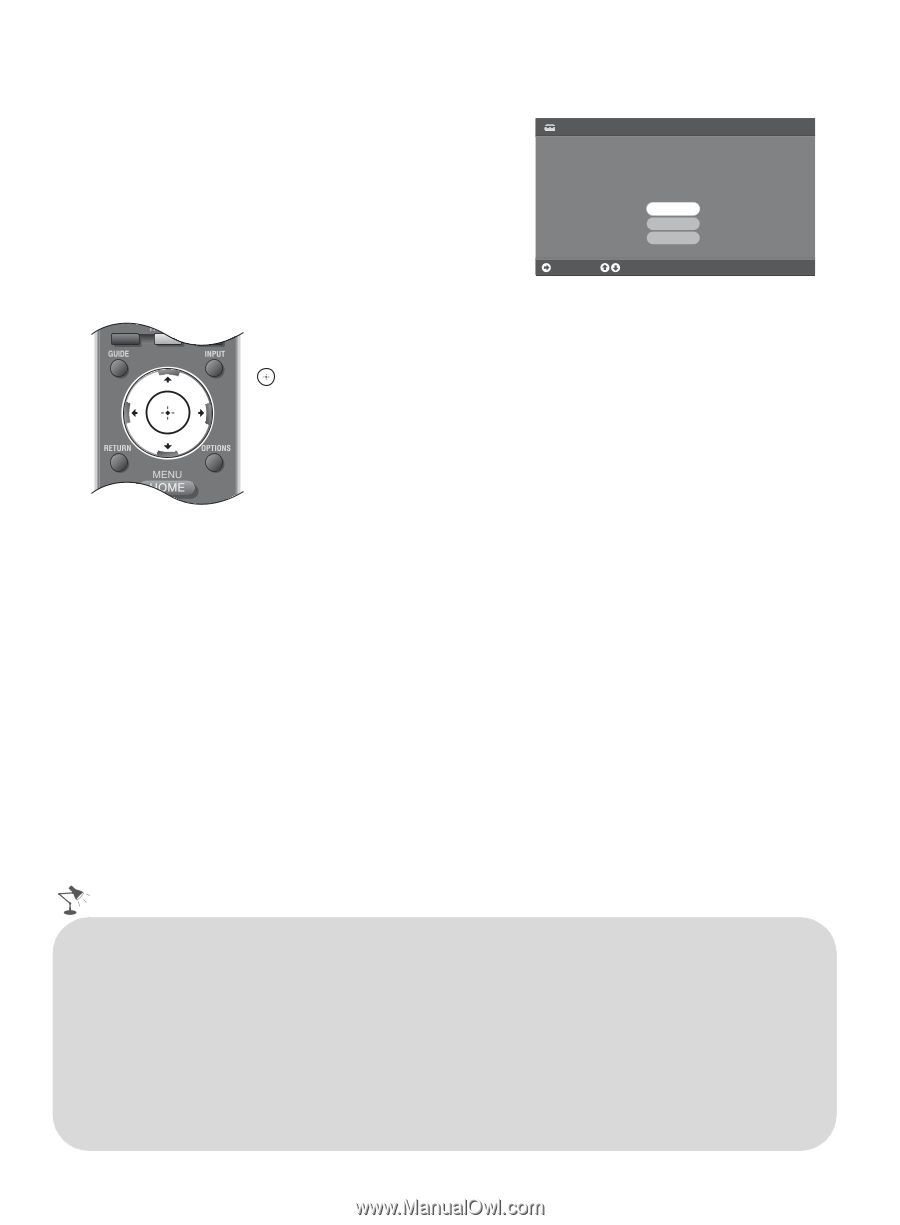
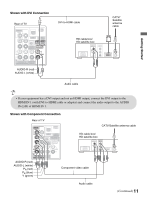
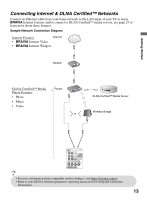
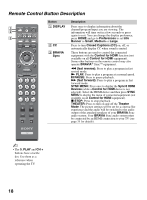
Running Initial Setup The Initial Setup screen appears when you turn on the TV for the first time. 1 Complete your cable connections before proceeding with the Initial Setup (refer to the Quick Setup Guide and the online Reference Book for additional information). 2 Use the following remote control buttons to navigate through the Initial Setup. Initial Setup Welcome! Please select a language. ¡Bienvenido! Seleccione el idioma. Bienvenue! Sélectionner la langue. Continue English Español Français Choose RETURN WIDE SCENE V/v button: Allows you to highlight options where applicable. button: Allows you to select the highlighted option. B button: Allows you to move back to the previous screen, where applicable. b button: Allows you to move to the next screen, where applicable. 3 Select the language for the on-screen display (OSD) text. 4 Select your viewing environment. Home mode sets the TV display to settings optimized for home viewing (this setting is ENERGY STAR compliant). Retail mode changes the display settings to a default more appropriate for a store environment. 5 Select your country and enter your ZIP or Postal code. 6 Set the clock to the current date and time. 7 Select Continue to scan for available channels and enable the TV Guide On Screen® feature. If you receive channels from a cable box or satellite receiver and do not wish to use the TV's built-in tuner, select Skip. Selecting Skip will disable the TV Guide On Screen feature, which is only available when the TV's tuner is used. 8 To benefit from the network features included on this TV, connect to your existing home network (see page 13). Follow the instructions on the screen to complete Network Setup, or select Skip to complete it at a later time (optional). Refer to the online Reference Book for more details. Initial Setup is complete. You can now begin watching your new TV. • Enabling the TV Guide On Screen feature will increase the amount of time the TV is in Download Acquisition Mode (DAM); see page 38. • For more information on TV Guide On Screen, see page 31. • If the language that you selected in the Language setting is available from the broadcaster as an Alternate Audio language, your TV will automatically switch to the matching language with the Alternate Audio feature. To change the audio settings, access the Alternate Audio menu by pressing OPTIONS on the remote control when an alternate audio stream is available from the broadcaster. Alternate Audio is only available for digital programs (see the online Reference Book). • To complete Network Setup at a later time, access the XMB™ and select the Network icon on the Settings menu. Then select Network Setup. 16
-
 1
1 -
2
-
3
-
4
-
5
-
6
-
7
-
8
-
9
-
10
-
 11
11 -
 12
12 -
 13
13 -
 14
14 -
 15
15 -
 16
16 -
 17
17 -
 18
18 -
 19
19 -
 20
20 -
 21
21 -
22
-
23
-
24
-
25
-
26
-
27
-
28
-
29
-
30
-
31
-
32
-
33
-
34
-
35
-
36
-
37
-
38
-
39
-
40
 |
 |