Sony KDL 52W5100 Operating Instructions - Page 6
Getting Started, Setting Up Your TV, Using a Wall-Mount Bracket - wall mount for
 |
UPC - 027242752894
View all Sony KDL 52W5100 manuals
Add to My Manuals
Save this manual to your list of manuals |
Page 6 highlights
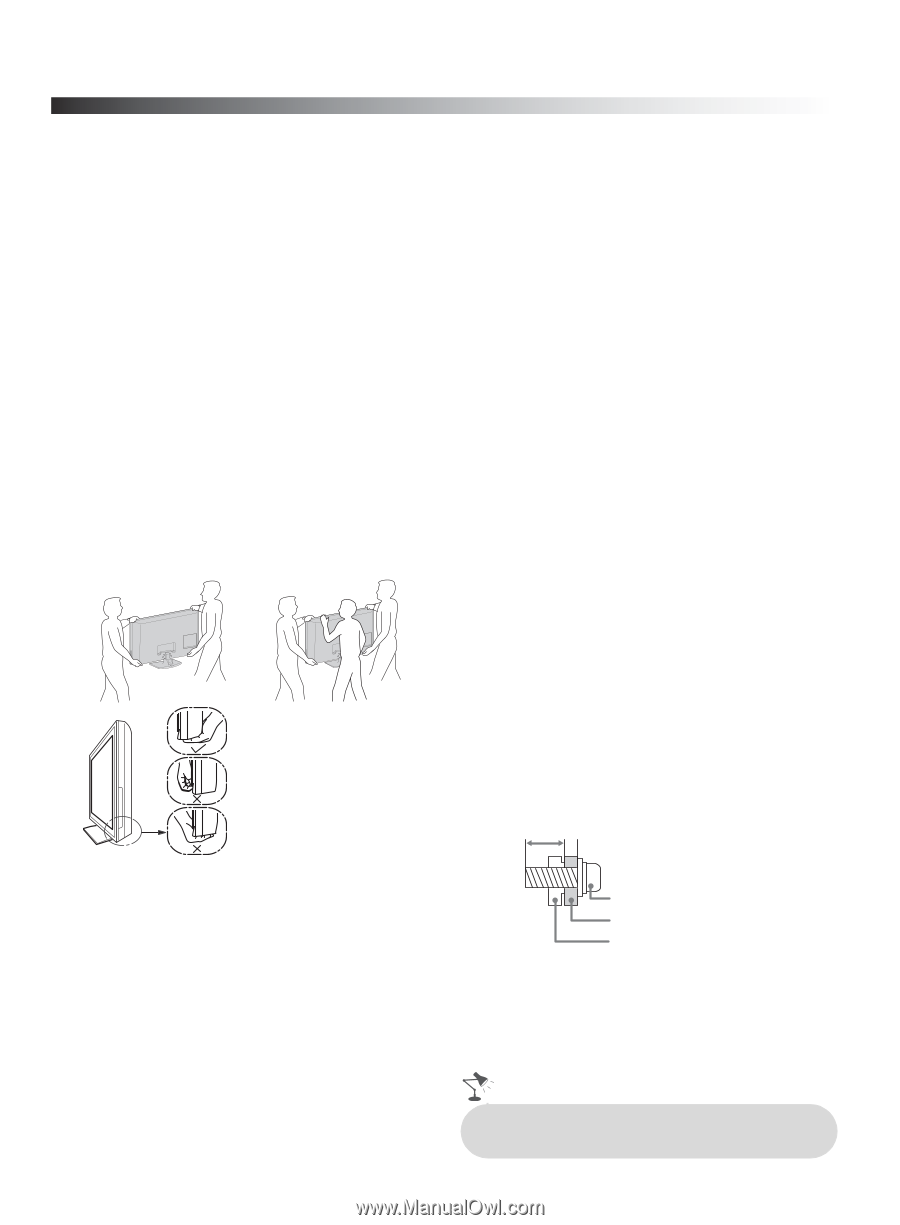
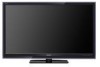
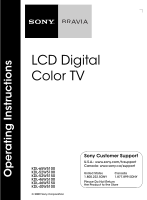
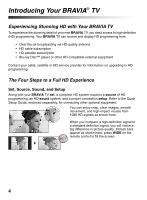
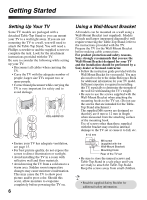
Getting Started Setting Up Your TV Some TV models are packaged with a detached Table-Top Stand so you can mount your TV to a wall right away. If you are not mounting the TV to a wall, you will need to attach the Table-Top Stand. You will need a Phillips screwdriver and the supplied screws to complete the task. Look for the attachment instructions provided with the TV. Be sure to consider the following while setting up your TV: • Disconnect all cables when carrying the TV. • Carry the TV with the adequate number of people; larger size TVs require two or more people. • Correct hand placement while carrying the TV is very important for safety and to avoid damage. KDL-65W5100 • Ensure your TV has adequate ventilation, see page 15. • For best picture quality, do not expose the screen to direct illumination or sunlight. • Avoid installing the TV in a room with reflective wall and floor materials. • Avoid moving the TV from a cold area to a warm area. Sudden room temperature changes may cause moisture condensation. This may cause the TV to show poor picture and/or poor color. Should this occur, allow moisture to evaporate completely before powering the TV on. 6 Using a Wall-Mount Bracket All models can be mounted on a wall using a Wall-Mount Bracket (not supplied). Models 52 inch and larger (measured diagonally) will require removing the Table-Top Stand; refer to the instructions provided with the TV. Prepare the TV for the Wall-Mount Bracket before making cable connections. For product protection and safety reasons, Sony strongly recommends that you use the Wall-Mount Bracket designed for your TV and the installation should be performed by a Sony dealer or licensed contractor. • Follow the instruction guide provided with the Wall-Mount Bracket for your model. You may also need to refer to the online Reference Book for additional information for your TV model. Sufficient expertise is required in installing this TV, especially to determine the strength of the wall for withstanding the TV's weight. • Be sure to use the screws supplied with the Wall-Mount Bracket when attaching the mounting hooks to the TV set. (Do not use the screws that are intended for the TableTop Stand attachment.) The supplied M6 screws are designed so that they are 8 mm to 12 mm in length when measured from the attaching surface of the mounting hook. Use of screws other than those supplied with the bracket may result in internal damage to the TV set or cause it to fall, etc. 8-12 mm M6 screw (supplied with the Wall-Mount Bracket) Mounting Hook Rear of the TV set • Be sure to store the unused screws and Table-Top Stand in a safe place until you are ready to attach the Table-Top Stand. Keep the screws away from small children. • Read the supplied Safety Booklet for additional safety information.
-
 1
1 -
 2
2 -
 3
3 -
 4
4 -
 5
5 -
 6
6 -
 7
7 -
 8
8 -
 9
9 -
 10
10 -
 11
11 -
 12
12 -
13
-
14
-
15
-
16
-
17
-
18
-
19
-
20
-
21
-
22
-
23
-
24
-
25
-
26
-
27
-
28
-
29
-
30
-
31
-
32
-
33
-
34
-
35
-
36
-
37
-
38
-
39
-
40
 |
 |