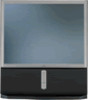
Sony KP-53HS10 Operating Instructions
Sony KP-53HS10 - 53" Projection Tv Manual
 |
View all Sony KP-53HS10 manuals
Add to My Manuals
Save this manual to your list of manuals |
Sony KP-53HS10 manual content summary:
- Sony KP-53HS10 | Operating Instructions - Page 1
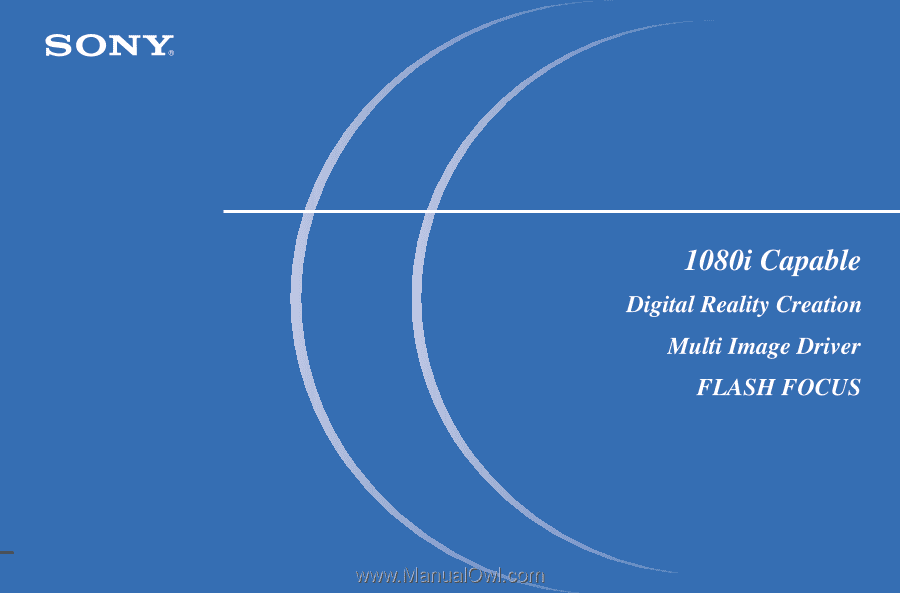
4-074-163-11 (1) Color Rear Video Projector Operating Instructions KP-53HS10 KP-61HS10 © 2000 Sony Corporation - Sony KP-53HS10 | Operating Instructions - Page 2
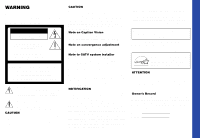
USER-SERVICEABLE PARTS INSIDE. REFER SERVICING TO QUALIFIED SERVICE convergence adjustment Before you use your projection TV, make sure to adjust convergence remote control RM-Y902 MODELS: KP-53HS10, KP-61HS10 Please keep this notice with the instruction manual. As an ENERGY STAR Partner, Sony - Sony KP-53HS10 | Operating Instructions - Page 3
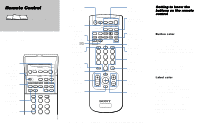
54) CODE SET (pages 53, 55) MTS (page 35) POWER MUTING SYSTEM DVD/ DBS TV OFF VTR CABLE VTR123DVD/MDP FUNCTION DVD/VTR DBSCABLE TV SLEEP TV/VTR CODE SET MTS REC DVD MENU TITLE DISPLAY TV/VIDEO ANT 123 456 789 MUTING (page 25) SYSTEM OFF* TV/DBS/ PICTURE MODE (page 34) GUIDE/[CC] (pages - Sony KP-53HS10 | Operating Instructions - Page 4
Connecting an Amplifier That Supports Dolby Pro Logic Decoder 21 Basic Set Up Using the Remote Control 22 Setting Up the Projection TV Automatically 23 Adjusting the Convergence Automatically (FLASH FOCUS 24 Using Your New Projection TV Watching the TV 25 Watching Digital TV 27 Watching Two - Sony KP-53HS10 | Operating Instructions - Page 5
Troubleshooting 56 Specifications 59 Index 60 Before You Begin Welcome! Thank you for purchasing the Sony Color Rear Video Projection TV. This manual is for models KP-53HS10 and KP-61HS10. Model KP-53HS10 is used for illustration purposes. The features you will enjoy include: • "1080i - Sony KP-53HS10 | Operating Instructions - Page 6
teaches you how to access onscreen menus and adjust your projection TV's settings. Instructions in this manual are written for the remote control. Similar controls may be found on the projection TV console. Precautions Safety • Operate the projection TV only on 120 V AC. • The plug is designed, for - Sony KP-53HS10 | Operating Instructions - Page 7
the type of power source indicated on the serial/model plate. If you are not sure of the type of electrical power supplied to your home, consult your dealer or local power company. For those sets designed to operate from battery power, refer to the operating instructions. Grounding or Polarization - Sony KP-53HS10 | Operating Instructions - Page 8
while the projection TV is operating, unplug the projection TV and consult your dealer or service technician. It is normal for some projection TV sets to make occasional snapping or popping sounds, particularly when being turned on or off. Installation Water and Moisture Do not use power-line - Sony KP-53HS10 | Operating Instructions - Page 9
Electric service equipment NEC: National Electrical Code Ground clamps Power service grounding electrode system (NEC Art 250 Part H) Lightning the operating instructions. Adjust only those controls that are specified in the operating instructions. Improper adjustment of other controls may result - Sony KP-53HS10 | Operating Instructions - Page 10
High quality video cable for enhanced picture quality Align guides and push into connection. Audio/Video cable Push into connection. Video - Yellow Audio (Left) - White Audio (Right) - Red Some DVD Players are equipped with the following three video connectors. Y - Green PB (CB, Cb or B-Y) - Blue PR - Sony KP-53HS10 | Operating Instructions - Page 11
(not supplied) Push into connection. About the CONTROL S IN/OUT jacks To control other Sony equipment with the projection TV's remote control, connect the CONTROL S IN jack of the equipment to the CONTROL S OUT jack on the projection TV with the CONTROL S cable. To control the projection TV with - Sony KP-53HS10 | Operating Instructions - Page 12
, SHOWTIME, etc.) *cable box (Rear of Projection TV) AUX For this set up, you can switch between scrambled channels (through your cable box), and normal (CATV) channels by pressing ANT on your remote control. Notes: • You may be able to program your Sony remote control to operate your cable box - Sony KP-53HS10 | Operating Instructions - Page 13
to the left (MONO) input on the projection TV. Disconnect all power sources before making any connections. S VIDEO (Rear of projection TV) CONTROL S IN OUT AUX IN OUT VIDEO 4 VIDEO 5 (DTV) SELECT IN VIDEO 1 VIDEO 3 HD VD S VIDEO VIDEO L (MONO) AUDIO R Y Y/G L PB PB/B (MONO) PR PR - Sony KP-53HS10 | Operating Instructions - Page 14
cable box is connected to by pressing TV/VIDEO. S VIDEO Disconnect all power sources before making any connections. (Rear of projection TV) CONTROL S IN OUT AUX IN OUT VIDEO 4 VIDEO 5 (DTV) SELECT IN VIDEO 1 VIDEO 3 HD VD S VIDEO VIDEO L (MONO) AUDIO R Y Y/G L PB PB/B (MONO) PR PR - Sony KP-53HS10 | Operating Instructions - Page 15
IN on the projection TV (WhiteAUDIO Left, Red-AUDIO Right). 4 Select VIDEO 5 by the TV/VIDEO button. 5 Select the SET UP menu and set DTV INPUT to R.G.B. (see "DTV INPUT" on page 43) Disconnect all power sources before making any connections. 2 Composite video cable for DTV receiver (not supplied - Sony KP-53HS10 | Operating Instructions - Page 16
Y. Connect PB (blue) to CB, Cb or B-Y. Connect PR (red) to CR, Cr or R-Y. Disconnect all power sources before making any connections. 2 VMC-10HG (not supplied) PB Y PR CONTROL S IN OUT AUX IN OUT VIDEO 4 VIDEO 5 (DTV) SELECT DTV receiver IN VIDEO 1 VIDEO 3 HD VD S VIDEO VIDEO L (MONO - Sony KP-53HS10 | Operating Instructions - Page 17
the DBS receiver is connected to by pressing TV/VIDEO on the remote control. Disconnect all power sources before making any connections. (Rear of projection TV) CONTROL S IN OUT AUX IN OUT VIDEO 4 VIDEO 5 (DTV) SELECT IN VIDEO 1 VIDEO 3 HD VD Cable/ Satellite antenna Antenna cable 21 - Sony KP-53HS10 | Operating Instructions - Page 18
connected to by pressing TV/VIDEO on the remote control. Disconnect all power sources before making any connections. S VIDEO (Rear of projection TV) CONTROL S IN OUT AUX IN OUT VIDEO 4 VIDEO 5 (DTV) SELECT IN VIDEO 1 VIDEO 3 HD VD Coaxial cable (not supplied) 3 SATELLITE IN LINE OUT - Sony KP-53HS10 | Operating Instructions - Page 19
left (MONO) input on the projection TV. Disconnect all power sources before making any connections. (Front of projection TV) S VIDEO Push to open. S VIDEO VIDEO L(MONO) AUDIO R SET UP VIDEO 2 INPUT VIDEO AUDIO-L AUDIO-R VMC-810S/820S (not supplied) 1 Audio/video outputs YC-15V/30V (not - Sony KP-53HS10 | Operating Instructions - Page 20
and other viewing problems. • You can select the output signal from SELECT OUT from the SET UP menu. (see "SELECT OUT" on page 41) 16 VCR (for playback) AUDIO R AUDIO L VIDEO LINE OUT OUT IN 1 Disconnect all power sources before making any connections. (Rear of projection TV) CONTROL S IN OUT - Sony KP-53HS10 | Operating Instructions - Page 21
). Note: • Since the high quality pictures on a DVD disc contain a lot of information, picture noise may appear. In this case, adjust NR in the VIDEO menu. (see "NR" on page 35) Disconnect all power sources before making any connections. S VIDEO (Rear of projection TV) CONTROL S IN OUT AUX IN - Sony KP-53HS10 | Operating Instructions - Page 22
, picture noise may appear. In this case, adjust NR in the VIDEO menu. (see "NR" on page 35) Disconnect all power sources before making any connections. PR PB (Rear of projection TV) Y CONTROL S IN OUT IN OUT VIDEO 4 VIDEO 5 (DTV) SELECT VMC-10HG (not supplied) AUX IN VIDEO 1 VIDEO - Sony KP-53HS10 | Operating Instructions - Page 23
on page 38) Disconnect all power sources before making any connections. Coaxial cable (not supplied) VMC-810S/820S (not supplied) (Rear of projection TV) 2 CONTROL S IN OUT AUX IN OUT VIDEO 4 VIDEO 5 (DTV) SELECT IN VIDEO 1 VIDEO 3 HD VD S VIDEO VIDEO L (MONO) AUDIO R Y Y/G L PB PB - Sony KP-53HS10 | Operating Instructions - Page 24
use the AUDIO menu to switch the projection TV's speakers off. (see "SPEAKER" on page 36) Note: • You can adjust VOLUME, BASS, TREBLE and BALANCE through the projection TV on AUDIO (VAR) OUT only. 20 Disconnect all power sources before making any connections. (Rear of projection TV) AUDIO OUT FIX - Sony KP-53HS10 | Operating Instructions - Page 25
the amplifier to the chosen Line input and use the AUDIO menu to set "SPEAKER" to "CENTER IN" on the projection TV. (see "SPEAKER" on page 36) Disconnect all power sources before making any connections. (Rear of projection TV) CENTER IN # AUDIO OUT FIX VAR CENTER IN 3 L 1 R AUDIO (FIX) OUT - Sony KP-53HS10 | Operating Instructions - Page 26
humidity is high. • Your remote control can be programmed to operate most video equipment. (see "Operating Video Equipment" on page 53) Using the remote control joystick 123 456 789 0 Move m Select The supplied remote control has a joystick which moves the on-screen selector in eight directions - Sony KP-53HS10 | Operating Instructions - Page 27
front panel on the projection TV: POWER TIMER/STAND BY STEREO + CHANNEL - + VOLUME - TV/VIDEO FLASH FOCUS S VIDEO VIDEO L(MONO) AUDIO R SET UP VIDEO 2 INPUT 1 Press POWER to turn on the projection TV. POWER 2 Press SET UP inside the lower front panel. The AUTO SET UP screen appears. SET UP - Sony KP-53HS10 | Operating Instructions - Page 28
Adjusting the Convergence Automatically (FLASH FOCUS) The projection tube image appears on the screen in three layers (red, green and blue). If they do not converge, the color is poor and the picture blurs. Before you use your projection TV, be sure to adjust the convergence. The FLASH FOCUS feature - Sony KP-53HS10 | Operating Instructions - Page 29
Using the white labeled buttons for projection TV operations REFER TO THE ILLUSTRATION OF THE REMOTE CONTROL ON THE INSIDE FRONT COVER OF THIS MANUAL AS YOU REVIEW THE FOLLOWING DESCRIPTIONS TV (FUNCTION) Activates the remote control for use with the projection TV. ANT - (AUX input) Press to change - Sony KP-53HS10 | Operating Instructions - Page 30
this service. (see "CAPTION VISION" on page 41) No display "OFF" appears and the display is canceled. TV/VIDEO Press repeatedly to scroll through available video inputs: TV, VIDEO 1, VIDEO 2, VIDEO 3, VIDEO 4 and VIDEO 5 If you select SKIP as a VIDEO LABEL in the SET UP menu, your projection TV will - Sony KP-53HS10 | Operating Instructions - Page 31
being received is displayed on the screen for three seconds. Note: • You cannot select VIDEO 5 unless a DTV receiver is connected. Tip z The optimum convergence alignment varies with digital TV formats. Whenever you find that the picture blurs, press FLASH FOCUS. (for details, see page 24) If - Sony KP-53HS10 | Operating Instructions - Page 32
10 seconds.) Window picture TV channel or input-source mode for the window picture (It will dim in about 3 seconds.) Using the yellow labeled buttons for PIP operations REFER TO THE ILLUSTRATION OF THE REMOTE CONTROL ON THE INSIDE FRONT COVER OF THIS MANUAL AS YOU REVIEW THE FOLLOWING DESCRIPTION - Sony KP-53HS10 | Operating Instructions - Page 33
New Projection TV AUDIO Press to alternate sound between the main picture and the window picture. The symbol "9" will appear for a few seconds to indicate which picture's sound is being received. FREEZE This is useful when you need to copy down information that appears on the TV's screen. Press - Sony KP-53HS10 | Operating Instructions - Page 34
yellow labeled buttons for P&P operations REFER TO THE ILLUSTRATION OF THE REMOTE CONTROL ON THE INSIDE FRONT COVER OF THIS MANUAL AS YOU REVIEW THE FOLLOWING DESCRIPTIONS Tip z If you press RESET in P&P mode, the right and left pictures will be reset to the same size (factory-preset size.) Press - Sony KP-53HS10 | Operating Instructions - Page 35
PROGRAM or through the CHANNEL SET UP menu). Note: • The CHANNEL INDEX feature is not available for the inputs from VIDEO 5 (DTV) IN. 1 Press . The current channel will be reduced in size and displayed in the center of the screen in normal motion picture format. The first twelve receivable channels - Sony KP-53HS10 | Operating Instructions - Page 36
OF THE REMOTE CONTROL ON THE INSIDE FRONT COVER OF THIS MANUAL AS YOU REVIEW THE FOLLOWING DESCRIPTIONS TV/VIDEO Press to scroll the center picture through the video inputs. The surrounding channels will not change. Note: • If you press VIDEO 5 while the CHANNEL INDEX screen is displayed - Sony KP-53HS10 | Operating Instructions - Page 37
VIDEO2 VIDEO3 VIDEO4 VIDEO5 Move Select Exit MENU 5 Move the joystick up or down to make your selection and press to activate it. The previous screen will reappear. SET UP PARENTAL CONTROL CAPTION VISION: CC1 SELECT OUT: VIDEO1 LANGUAGE: ENGLISH VIDEO LABEL DIRECT PLAY FREEZE MODE: NORMAL - Sony KP-53HS10 | Operating Instructions - Page 38
VIVID Sliders HIGH OFF OFF Move Select Exit MENU For detailed information on using the remote control to modify menu settings, refer to "Learning Menu Selection" on page 33. To select the VIDEO Display , Highlight menu: , Select MENU MODE - Customized picture viewing You can choose one of five - Sony KP-53HS10 | Operating Instructions - Page 39
Intensity Adjustment Select ON to emphasize the black level and to produce a bolder dynamic picture. Select OFF to cancel the feature. To restore the factory settings Press RESET on the remote control while the VIDEO menu is selected. To restore each MODE to the factory setting, press RESET after - Sony KP-53HS10 | Operating Instructions - Page 40
use the projection TV as center speaker when you connect an amplifier with a Dolby Pro Logic decoder. (see "Connecting an Amplifier That Supports Dolby Pro Logic Decoder" on page 21) To restore the factory settings Press RESET on the remote control while the AUDIO menu is selected. * TruSurround - Sony KP-53HS10 | Operating Instructions - Page 41
on your projection TV will be lit. Press MENU to remote control to modify menu settings, refer to "Learning Menu Selection" on page 33. To select the CHANNEL SET UP menu: Display , Highlight , Select MENU CHANNEL SKIP - Skips unnecessary channels After AUTO PROGRAM, you can erase unnecessary TV - Sony KP-53HS10 | Operating Instructions - Page 42
You can view the channel that is selected with the CHANNEL SKIP menu in the center sub screen. You can also use CH +/- or 0-9 and ENTER buttons to VHF/UHF. VIDEO 1: Use this when you have connected external video equipment (e.g. AV receiver) and you want the projection TV's input fixed to it - Sony KP-53HS10 | Operating Instructions - Page 43
Selecting FAVORITE CHANNEL The FAVORITE CHANNEL feature of your projection TV enables easy access to the eight channels that you preset (or the last channel that you were watching). Your FAVORITE CHANNEL options can be set automatically or manually. The factory setting for FAVORITE CHANNEL is AUTO - Sony KP-53HS10 | Operating Instructions - Page 44
For detailed information on using the remote control to modify menu settings, refer to "Learning Menu Selection" on page 33. To select the SET UP Display , Highlight menu: , Select MENU PARENTAL CONTROL - Blocks programs unsuitable for children Allows you to block TV programs that you feel are - Sony KP-53HS10 | Operating Instructions - Page 45
connection) If you select TV OUT, the following pop-up menu appears. Select YES only if you have connected an AV receiver, with no other equipment, to your projection TV. You can always select the signal from the receiver by pressing TV/VIDEO once. SET UP PARENTAL CONTROL CAPTION VISION: CC1 - Sony KP-53HS10 | Operating Instructions - Page 46
PLAY switch the input mode from VIDEO1: OFF VIDEO2: OFF the TV to a Sony VCR VIDEO3: VIDEO4: OFF OFF (MDP or DVD) and start playing by only pressing 1 2 3 DVD/MDP the N (playback) button Move Select Exit MENU on the remote control. You have to set the VTR 1/ 2/3/DVD/MDP switch on the - Sony KP-53HS10 | Operating Instructions - Page 47
Select R.G.B when you connect a DTV receiver to the G/B/R/HD/VD jacks of VIDEO 5 (DTV) IN on the rear of the projection TV. Select Y PB PR when you connect a DTV receiver to the Y/PB/PR jacks of VIDEO 5 (DTV) IN. Note: • Picture color will be incorrect if wrong DTV INPUT is selected. ASPECT RATIO - Sony KP-53HS10 | Operating Instructions - Page 48
PARENTAL CONTROL menu to OFF, the PARENTAL CONTROL feature will be canceled and you can view all TV programs and movies shown on TV. 1 Select PARENTAL CONTROL from the SET UP menu. (see page 40) SET UP PARENTAL CONTROL CAPTION VISPIOASNS: WORD SELECT OUT: _ _ _ _ LANGUAGE:ENGLISH VIDEO LABEL - Sony KP-53HS10 | Operating Instructions - Page 49
program, follow the steps below. 1 Press ENTER to display the "Password" screen. 2 Enter your password using the 0-9 buttons. PARENTAL CONTROL will be canceled (PARENTAL LOCK set to OFF) until you turn your projection TV off. Selecting a Custom Rating in U.S.A. If you want to select the ratings - Sony KP-53HS10 | Operating Instructions - Page 50
to show that the programs that match the extender will be blocked again. TV RATING TV-Y _ TV-Y7 _ TV-G _ TV-PG - TV-14 - TV-MA - :FV _ :D - L - S - V _ :D - L - S - V - : L-S-V Select category Move Select Exit MENU 10 Repeat steps 8 and 9 for other extenders. All programs that match the ratings - Sony KP-53HS10 | Operating Instructions - Page 51
that match the ratings will be blocked. MOVIE RATING G - PG - PG-13 - R - NC-17 - X - Select rating Move Select Exit MENU 15 Press MENU to exit the menu. To block TV programs and/or movies for which a rating is not given (NR and N/A) For a description of the NR and N/A ratings, see page - Sony KP-53HS10 | Operating Instructions - Page 52
of each rating, see "Ratings in Canada" on page 51. 1 Select PARENTAL CONTROL from the SET UP menu. (see page 40) SET UP PARENTAL CONTROL CAPTION VISPIOASNS: WORD SELECT OUT: _ _ _ _ LANGUAGE:ENGLISH VIDEO LABEL DIRECT PLAY FREEZE MODE:NORMAL DTV INPUT: R. G. B Use [0-9] to enter - Sony KP-53HS10 | Operating Instructions - Page 53
SELECT OUT: _ _ _ _ LANGUAGE:ENGLISH VIDEO LABEL DIRECT PLAY FREEZE MODE:NORMAL DTV INPUT: R. G. B Use [0-9] to enter password Move Exit MENU 2 Enter your four digit password using the 0-9 buttons. The PARENTAL CONTROL menu appears. PARENTAL CONTROL PARENTAL LOCK: ON RATING: CHILD - Sony KP-53HS10 | Operating Instructions - Page 54
TV ratings: TV-Y, TV-Y7, TV-G, TV-PG, TV-14, and TV-NR 50 U.S. movie ratings U.S. movie ratings are for movies (including those shown on TV) rated according to the Motion Picture menu. U.S. TV ratings U.S. TV ratings are for TV programs rated according to the U.S. Television Parental Guidelines. TV - Sony KP-53HS10 | Operating Instructions - Page 55
flashes or sports. Note: • The TV-NR rating is shown as UNRATED in the menu. About the extenders of U.S. TV ratings TV-Y7, TV-PG, TV-14 and TV-MA nudity in these programs. Ratings in Canada Sony's predetermined ratings These are original ratings that Sony predetermined according to the viewer's age. - Sony KP-53HS10 | Operating Instructions - Page 56
videos, and variety programming. Note: • The E (Exempt) rating is not shown in the menu. Canadian French Language ratings The Canadian French Language Ratings are for TV children): Programming intended for a broad audience but contains light or occasional violence that could disturb young children. - Sony KP-53HS10 | Operating Instructions - Page 57
Code You can use the supplied remote control to operate Sony or non-Sony video equipment that has an infrared sensor. 1 Set the VTR 1/2/3/DVD/MDP switch to the input through which you would like to access your video equipment. The following Sony , 336, 337 331 (continued) 53 Additional Operations - Sony KP-53HS10 | Operating Instructions - Page 58
playback. Release to resume normal playback. Press TV/VTR. Operating an MDP using the remote control To turn On/Off To play To stop To pause To search the picture forward or backward To search a chapter forward or backward Press DVD/VTR (POWER). [Green Button] Press N. Press x. Press X. Press - Sony KP-53HS10 | Operating Instructions - Page 59
Code 801 (preset code for remote control) 802 802 If the remote control doesn't work Try repeating the set up procedures using the other codes listed for your equipment. To operate the projection TV Press TV (FUNCTION). Then use the projection TV control buttons to control the projection TV - Sony KP-53HS10 | Operating Instructions - Page 60
, then inform qualified Sony personnel or the above Direct Response Center of the number of flashes. No picture (screen not lit), no sound b Make sure the power cord is plugged in. b Operate with the buttons on both the projection TV and the remote control. b Check to see if the TV/VIDEO setting is - Sony KP-53HS10 | Operating Instructions - Page 61
directional outdoor antenna or a cable (when the problem is caused by reflections from nearby mountains or tall buildings). Cannot operate the menu b If the item you want to choose appears in gray, you cannot select it. b Press the projection TV's power button off and on again. Cannot receive any - Sony KP-53HS10 | Operating Instructions - Page 62
picture will be recorded with sound from the other program. Cannot play shooting games b Some shooting games which involve pointing a light beam at the TV screen with an electronic gun or rifle cannot be used with this projection TV. For details, see the instruction manual supplied with the video - Sony KP-53HS10 | Operating Instructions - Page 63
Projection lenses High performance, large diameter hybrid lens F1.1 Television system American TV standard Channel coverage VHF: 2-13/UHF: 14-69/CATV: 1-125 Antenna 75 ohm external terminal for VHF/UHF Screen size (measured diagonally) 53 inches (KP-53HS10) 61 inches (KP-61HS10) Inputs/outputs VIDEO - Sony KP-53HS10 | Operating Instructions - Page 64
Projection TV to amplifier that supports Dolby Pro Logic decoder 21 antenna 7 audio system 20 AV receiver 19 cable 7 cable box and cable 8 camcorder 15 DBS receiver 13 DBS receiver and VCR 14 DTV receiver 11, 12 DVD Player 17, 18 two VCRs 16 VCR 9, 10 CONTROL S feature 7 Convergence - Sony KP-53HS10 | Operating Instructions - Page 65
V VCR 9, 10 VCR manufacturer code numbers 53 VCR operation 54 VIDEO LABEL 42 VIDEO menu operations . . . . . 34 VOL +/- buttons 25 X XDS 26 Y Y/PB/PR 12, 18 Additional Information T TIMER menu operations . . . . . 36 TREBLE 35 TRINITONE 34 Troubleshooting 56 TV (FUNCTION) button 25 61 - Sony KP-53HS10 | Operating Instructions - Page 66
If, after reading this instruction manual, you have additional questions related to the use of your Sony projection TV, please call one of the following numbers (English only). Customers in the continental United States contact the Direct Response Center at: 1-800-222-SONY (7669) Customers in Canada
-
 1
1 -
 2
2 -
 3
3 -
 4
4 -
 5
5 -
 6
6 -
 7
7 -
8
-
9
-
10
-
11
-
12
-
13
-
14
-
15
-
16
-
17
-
18
-
19
-
20
-
21
-
22
-
23
-
24
-
25
-
26
-
27
-
28
-
29
-
30
-
31
-
32
-
33
-
34
-
35
-
36
-
37
-
38
-
39
-
40
-
41
-
42
-
43
-
44
-
45
-
46
-
47
-
48
-
49
-
50
-
51
-
52
-
53
-
54
-
55
-
56
-
57
-
58
-
59
-
60
-
61
-
62
-
63
-
64
-
65
-
66
 |
 |
4-074-163-
11
(1)
© 2000 Sony Corporation
C
o
l
or
r
r
r
R
e
ar
r
r
r
V
ide
de
de
deo
o
o
o
P
r
o
jec
ec
ec
ec
t
o
r
KP-53HS10
KP-61HS10
Operating Instructions