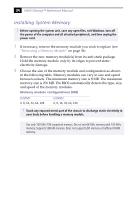
Sony PCV-L640 Reference Manual - Page 53
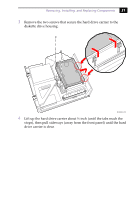
carrier down until the holes in the hard drive carrier align with
 |
View all Sony PCV-L640 manuals
Add to My Manuals
Save this manual to your list of manuals |
Page 53 highlights
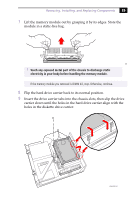
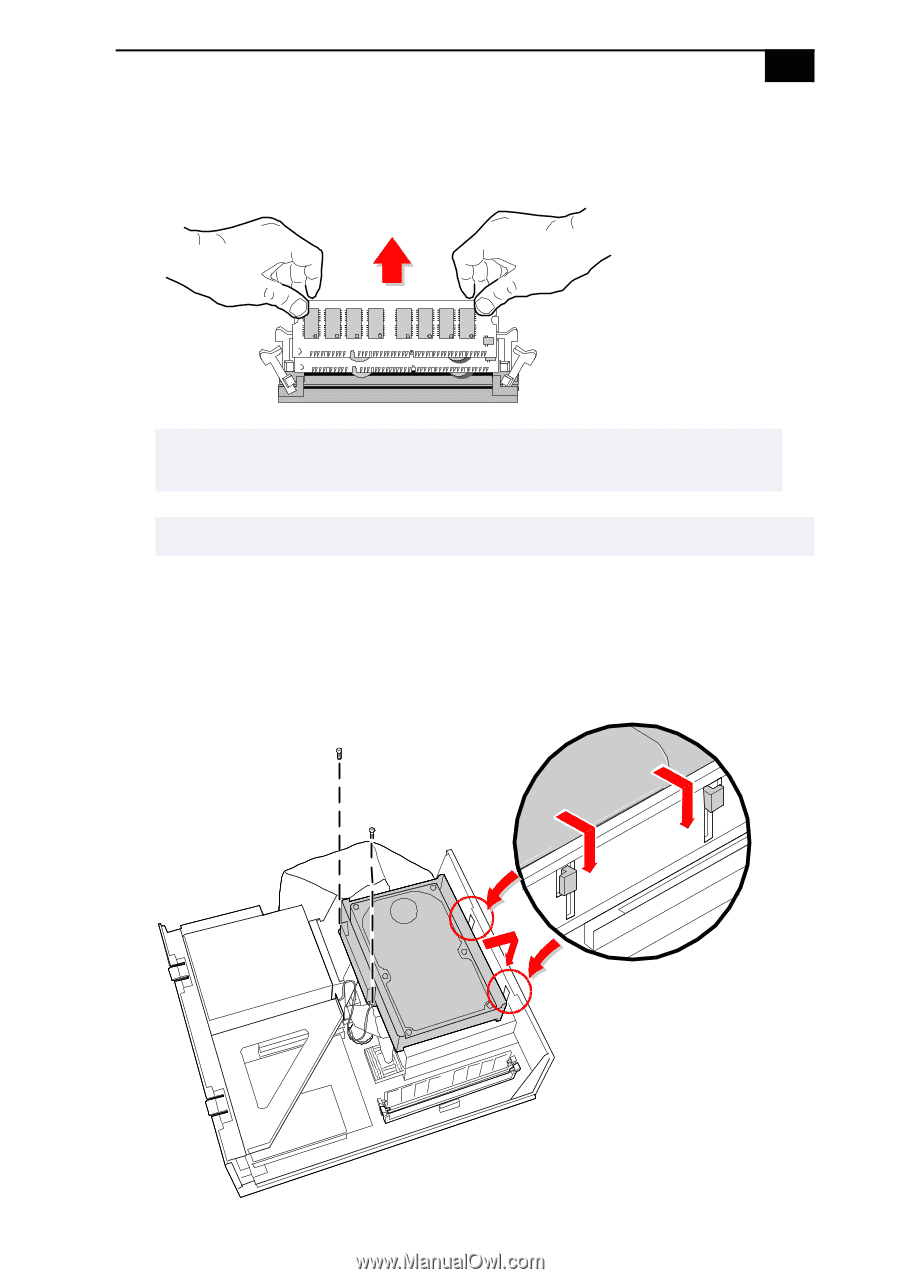
Removing, Installing, and Replacing Components 39 7 Lift the memory module out by grasping it by its edges. Store the module in a static-free bag. KY ! Touch any exposed metal part of the chassis to discharge static electricity in your body before handling the memory module. ✍ If the memory module you removed is DIMM #2, stop. Otherwise, continue. 8 Flip the hard drive carrier back to its normal position. 9 Insert the drive carrier tabs into the chassis slots, then slip the drive carrier down until the holes in the hard drive carrier align with the holes in the diskette drive carrier. MAN002B.VSD
-
 1
1 -
2
-
3
-
4
-
5
-
6
-
7
-
8
-
9
-
10
-
11
-
12
-
13
-
14
-
15
-
16
-
17
-
18
-
19
-
20
-
21
-
22
-
23
-
24
-
25
-
26
-
27
-
28
-
29
-
30
-
31
-
32
-
33
-
34
-
35
-
36
-
37
-
38
-
39
-
40
-
41
-
42
-
43
-
44
-
45
-
46
-
47
-
 48
48 -
 49
49 -
 50
50 -
 51
51 -
 52
52 -
 53
53 -
 54
54 -
 55
55 -
 56
56 -
 57
57 -
 58
58 -
59
-
60
-
61
-
62
-
63
-
64
-
65
-
66
-
67
-
68
-
69
-
70
-
71
-
72
-
73
-
74
-
75
-
76
-
77
-
78
-
79
-
80
-
81
-
82
-
83
-
84
-
85
-
86
-
87
-
88
-
89
-
90
-
91
-
92
-
93
-
94
-
95
-
96
-
97
-
98
-
99
-
100
-
101
-
102
-
103
-
104
-
105
-
106
-
107
-
108
-
109
-
110
-
111
-
112
-
113
-
114
-
115
-
116
-
117
-
118
-
119
-
120
 |
 |
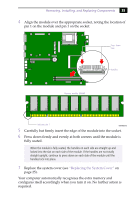
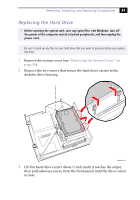
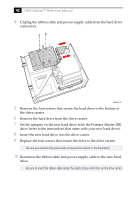
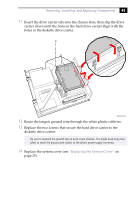
Removing, Installing, and Replacing Components
39
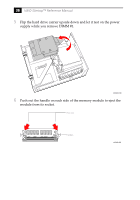
7
Lift the memory module out by grasping it by its edges. Store the
module in a static-free bag.
8
Flip the hard drive carrier back to its normal position.
9
Insert the drive carrier tabs into the chassis slots, then slip the drive
carrier down until the holes in the hard drive carrier align with the
holes in the diskette drive carrier.
!
Touch any exposed metal part of the chassis to discharge static
electricity in your body before handling the memory module.
If the memory module you removed is DIMM #2, stop. Otherwise, continue.
KY
MAN002B.VSD