Sony RDR-HX900 Operating Instructions - Page 53
Recording From a VCR or Similar Device, Press TOOLS and select Line Audio
 |
UPC - 027242644328
View all Sony RDR-HX900 manuals
Add to My Manuals
Save this manual to your list of manuals |
Page 53 highlights
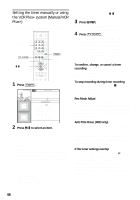
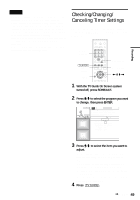
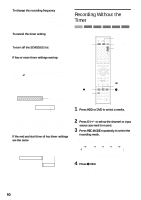
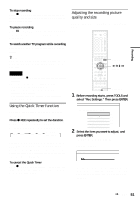
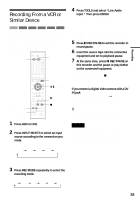
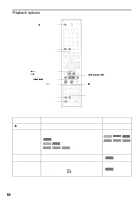
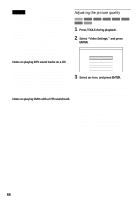
Recording Recording From a VCR or Similar Device HDD +RW -RWVR -RWVideo +R -R You can record from a connected VCR or similar device. To connect a VCR or similar device, see "Connecting a VCR or Similar Device" (page 29). Use the DV IN jack on the front panel if the equipment has a DV output jack (i.LINK jack). HDD 123 456 789 0 DVD TOOLS M/m, ENTER REC MODE INPUT SELECT X REC PAUSE x REC STOP 1 Press HDD or DVD. If you select DVD, insert a recordable DVD. 2 Press INPUT SELECT to select an input source according to the connection you made. The front panel display changes as follows: Channel * number L1 L2 L3 DV 4 Press TOOLS and select "Line Audio Input." Then press ENTER. "Main/Sub": Records two different sound tracks when recording to the HDD or to a DVD-RW (VR mode). "Stereo" (default): Records stereo sound only. Select this when recording to discs other than the HDD or DVD-RWs (VR mode). 5 Press X REC PAUSE to set this recorder to record pause. 6 Insert the source tape into the connected equipment and set to playback pause. 7 At the same time, press X REC PAUSE on this recorder and the pause or play button on the connected equipment. Recording starts. To stop recording, press x REC STOP on this recorder. If you connect a digital video camera with a DV IN jack See "DV/Digital8 Dubbing (DV t HDD/DVD)" (page 77) for an explanation of how to record from the DV IN jack. z Hint You can adjust the settings for the recording picture before recording. See "Adjusting the recording picture quality and size" (page 51). Notes • When recording a video game image, the screen may not be clear. • Any program that contains a Copy-Never copy guard signal cannot be recorded. The recorder continues to record, but a blank screen will be recorded. * Does not appear when "Set Top Box Control" is set to "On." 3 Press REC MODE repeatedly to select the recording mode. The recording mode changes as follows: HQ HSP SP LP EP SLP 53
-
 1
1 -
2
-
3
-
4
-
5
-
6
-
7
-
8
-
9
-
10
-
11
-
12
-
13
-
14
-
15
-
16
-
17
-
18
-
19
-
20
-
21
-
22
-
23
-
24
-
25
-
26
-
27
-
28
-
29
-
30
-
31
-
32
-
33
-
34
-
35
-
36
-
37
-
38
-
39
-
40
-
41
-
42
-
43
-
44
-
45
-
46
-
47
-
 48
48 -
 49
49 -
 50
50 -
 51
51 -
 52
52 -
 53
53 -
 54
54 -
 55
55 -
 56
56 -
 57
57 -
 58
58 -
59
-
60
-
61
-
62
-
63
-
64
-
65
-
66
-
67
-
68
-
69
-
70
-
71
-
72
-
73
-
74
-
75
-
76
-
77
-
78
-
79
-
80
-
81
-
82
-
83
-
84
-
85
-
86
-
87
-
88
-
89
-
90
-
91
-
92
-
93
-
94
-
95
-
96
-
97
-
98
-
99
-
100
-
101
-
102
-
103
-
104
-
105
-
106
-
107
-
108
-
109
-
110
-
111
-
112
-
113
-
114
-
115
-
116
-
117
-
118
-
119
-
120
 |
 |
