Sony RDR-HX900 Operating Instructions - Page 67
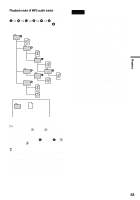
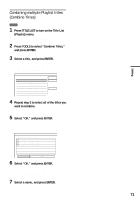
Press TOOLS and select Disc Map, and, Select OK, and press ENTER.
 |
UPC - 027242644328
View all Sony RDR-HX900 manuals
Add to My Manuals
Save this manual to your list of manuals |
Page 67 highlights
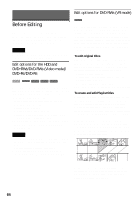
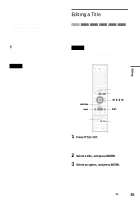
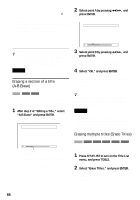
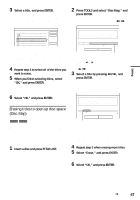
Editing 3 Select a title, and press ENTER. A check mark appears in the check box next to the selected title. To clear the check mark, press ENTER again. To clear all of check marks, select "Reset All." Erase Titles Select the titles to erase. 1 2ch 2 5ch 1:00PM - 2:00PM 8:00PM - 9:00PM 3 12ch 9:00AM - 9:30AM 4 3ch 5 25ch 8:00PM - 8:30PM 8:00PM - 8:30PM 9/15 9/17 9/25 9/25 10/15 OK Cancel Reset All • When the title is protected, the display asks for confirmation. To continue, select "Change," and when the protection display appears, select "Off." To cancel, select "Close." 4 Repeat step 3 to select all of the titles you want to erase. 5 When you finish selecting titles, select "OK," and press ENTER. The list of the titles to be erased appears for confirmation. To change the selection, select "Change," and repeat from step 3. 6 Select "OK," and press ENTER. The titles are erased. Erasing titles to open up disc space (Disc Map) +RW -RWVideo When recording on a DVD+RW or DVD-RW (Video mode), the recorder searches for the largest open space and records there. Before you start, check the disc status by using Disc Map, and erase titles to create a space large enough for the recording. 1 Insert a disc and press TITLE LIST. 2 Press TOOLS and select "Disc Map," and press ENTER. The Disc Map appears. To check the open space, select the space by pressing
-
 1
1 -
2
-
3
-
4
-
5
-
6
-
7
-
8
-
9
-
10
-
11
-
12
-
13
-
14
-
15
-
16
-
17
-
18
-
19
-
20
-
21
-
22
-
23
-
24
-
25
-
26
-
27
-
28
-
29
-
30
-
31
-
32
-
33
-
34
-
35
-
36
-
37
-
38
-
39
-
40
-
41
-
42
-
43
-
44
-
45
-
46
-
47
-
48
-
49
-
50
-
51
-
52
-
53
-
54
-
55
-
56
-
57
-
58
-
59
-
60
-
61
-
 62
62 -
 63
63 -
 64
64 -
 65
65 -
 66
66 -
 67
67 -
 68
68 -
 69
69 -
 70
70 -
 71
71 -
 72
72 -
73
-
74
-
75
-
76
-
77
-
78
-
79
-
80
-
81
-
82
-
83
-
84
-
85
-
86
-
87
-
88
-
89
-
90
-
91
-
92
-
93
-
94
-
95
-
96
-
97
-
98
-
99
-
100
-
101
-
102
-
103
-
104
-
105
-
106
-
107
-
108
-
109
-
110
-
111
-
112
-
113
-
114
-
115
-
116
-
117
-
118
-
119
-
120
 |
 |
