Sony SCD-C2000ES Operating Instructions - Page 21
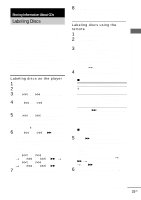
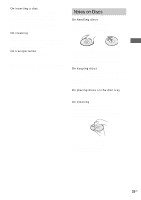
Storing Information About CDs, Labeling Discs, - Disc Name
 |
UPC - 027242686793
View all Sony SCD-C2000ES manuals
Add to My Manuals
Save this manual to your list of manuals |
Page 21 highlights
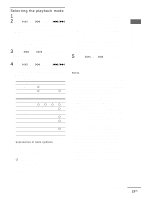
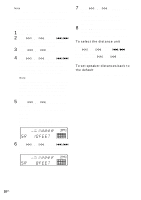
Storing Information About CDs Storing Information About CDs Labeling Discs - Disc Name The player can store the information called "Disc Name", up to 100 discs (for the Hybrid disc, each layer is correspond to the Disc Name). Once you have stored the disc name for a disc, the player automatically recalls what you have stored whenever you select that disc. You can label discs using up to 12 characters and have the player display the disc name each time you select the disc. Note that you cannot change the disc title of a TEXT disc. Labeling discs on the player 1 Insert or select the disc. 2 Press MENU. 3 Turn l AMS L until "DISC NAME" appears in the display. 4 Press l AMS L. "NAME INPUT" appears, then the flashing cursor appears. 5 Turn l AMS L until the character you want appears in the display. The following characters can be selected. A - Z, 0 - 9 space) 6 Press l AMS L (or M) to select the character. The flashing cursor appears to indicate the next space to be input. Example: To input AA Turn l AMS L until "A" appears. t Press l AMS L (or M). t Turn l AMS L until "A" appears. t Press l AMS L (or M). 7 Repeat Steps 5 and 6 to input more characters. 8 Press MENU to store the disc name. Repeat Steps 1 through 8 to assign disc names to other discs. Labeling discs using the remote 1 Insert or select the disc. 2 Press NAME INPUT. The flashing cursor appears. 3 Press CAPS repeatedly to select the desired character type. Each time you press the button, the display changes cyclically as follows: "INPUT ABC" (capital letters and symbols) y "INPUT 123" (numbers) 4 Press the numeric button to input characters. x When "INPUT ABC" is selected To select , +, - A - Z Do the following: Press the numeric button 1* repeatedly. Press the numeric button 2-9 (the button corresponding to the desired character) repeatedly. * If you press > repeatedly after pressing the numeric button 1, the following symbols can be selected space) If you press SPACE, you can select space directly. x When "INPUT 123" is selected Press the desired numeric button. 5 Press M to select the character. The flashing cursor appears to indicate the next space to be input. Example: To input AA Press the numeric button 2 once. t Press M. t Press the numeric button 2 once. t Press M. 6 Repeat Steps 3 through 5 to input more characters. continued 21US
-
 1
1 -
2
-
3
-
4
-
5
-
6
-
7
-
8
-
9
-
10
-
11
-
12
-
13
-
14
-
15
-
 16
16 -
 17
17 -
 18
18 -
 19
19 -
 20
20 -
 21
21 -
 22
22 -
 23
23 -
 24
24 -
 25
25 -
 26
26 -
27
-
28
-
29
-
30
-
31
-
32
-
33
-
34
-
35
-
36
-
37
-
38
-
39
-
40
-
41
-
42
-
43
-
44
-
45
-
46
-
47
-
48
-
49
-
50
-
51
-
52
-
53
-
54
-
55
-
56
-
57
-
58
-
59
-
60
 |
 |