Sony STR-DH520 Operating Instructions - Page 65
Additional Information, There is severe hum or noise. - specifications
 |
UPC - 027242809369
View all Sony STR-DH520 manuals
Add to My Manuals
Save this manual to your list of manuals |
Page 65 highlights
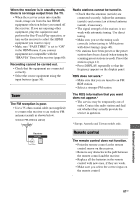
There is no sound from a specific equipment. • Check that the equipment is connected correctly to the audio input jacks for that equipment. • Check that the cord(s) used for the connection is (are) fully inserted into the jacks on both the receiver and the equipment. • Check the setting of "AUDIO.OUT" in the HDMI menu (page 60). • Check that the equipment is connected correctly to the HDMI jack for that equipment. • You cannot listen to the Super Audio CD by connecting HDMI. • Depending on the playback equipment, you may need to set up the HDMI setting of the equipment. Refer to the operating instructions supplied with each equipment. • Be sure to use a High Speed HDMI cable when you view images or listen to sound, especially for the 1080p, Deep Color (Deep Colour) or 3D transmission. • Check the INPUT MODE (page 51). • Check that the "A. DIRECT" is not selected. • Check that the selected digital audio input jack is not reassigned to other inputs (page 51). There is no sound, no matter which equipment is selected, or only a very low-level sound is heard. • Check that all connecting cords are inserted to their input/output jacks for the respective jacks of the receiver, speakers and the equipment. • Check that both the receiver and all equipment are turned on. • Check that MASTER VOLUME is not set to "VOL MIN". • Check that headphones are not connected. • Press MUTING or on the remote control to cancel the muting function. • Try pressing the input button on the remote control or turning INPUT SELECTOR on the receiver to select the equipment of your choice (page 36). • The protective device on the receiver has been activated. Turn off the receiver, eliminate the short-circuit problem, and turn on the power again. There is severe hum or noise. • Check that the speakers and equipment are connected securely. • Check that the connecting cords are away from a transformer or motor, and at least 3 meters (10 feet) away from a TV set or fluorescent light. • Move your audio equipment away from the TV. • The plugs and jacks are dirty. Wipe them with a cloth slightly moistened with alcohol. The left and right sounds are unbalanced or reversed. • Check that the speakers and equipment are connected correctly and securely. • Adjust the level parameters using the LEVEL menu. When the receiver is in standby mode, there is no sound output from the TV. • When the receiver enters into standby mode, sound are from the last HDMI equipment selection before you turned off the receiver. If you are enjoying other equipment, play the equipment and perform the One-Touch Play operation, or turn on the receiver to select the HDMI equipment you want to enjoy. • Make sure "PASS.THRU" is set to "ON" in the HDMI menu if you connect equipment not compatible with the "BRAVIA" Sync to the receiver (page 60). Additional Information continued 65GB
-
 1
1 -
2
-
3
-
4
-
5
-
6
-
7
-
8
-
9
-
10
-
11
-
12
-
13
-
14
-
15
-
16
-
17
-
18
-
19
-
20
-
21
-
22
-
23
-
24
-
25
-
26
-
27
-
28
-
29
-
30
-
31
-
32
-
33
-
34
-
35
-
36
-
37
-
38
-
39
-
40
-
41
-
42
-
43
-
44
-
45
-
46
-
47
-
48
-
49
-
50
-
51
-
52
-
53
-
54
-
55
-
56
-
57
-
58
-
59
-
 60
60 -
 61
61 -
 62
62 -
 63
63 -
 64
64 -
 65
65 -
 66
66 -
 67
67 -
 68
68 -
 69
69 -
 70
70 -
71
-
72
 |
 |