Sony VGX-XL2A User Guide (Computer Component) - Page 132
Restore C: Drive, I understand, WARNING, THIS COULD BE THE, SAME DISC
 |
View all Sony VGX-XL2A manuals
Add to My Manuals
Save this manual to your list of manuals |
Page 132 highlights
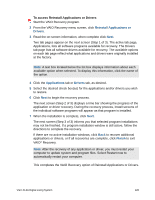
Restore C: Drive The Restore C: Drive option restores the C: drive to its original factory condition. This includes all factory installed software. The time to complete the restore can take up to an hour depending on the amount of software being restored and the speed of your computer. WARNING - Restore C: Drive deletes all personal files and settings, and any software installed on the C: drive after the computer was purchased. The Restore C: Drive screen provides a link to Reinstall Applications or Drivers, which you can use for attempting to solve issues using a less invasive solution. Note - The link to Reinstall Applications of Drivers, located on the Restore C: Drive screen, will only be available if you restart your computer from Windows. Before performing any restore or recovery options, go to the Sony online support Web site at www.esupport.sony.com and review your modelspecific support page. Look for software driver updates, or check for knowledge base solutions that may help solve your computer's problems. To access Restore C: Drive 1 Start the VAIO® Recovery program. See Start VAIO Recovery on page 3. 2 From the VAIO® Recovery menu screen, click Restore C: Drive. 3 Read the on-screen information (Step 1 of 4), then select the I understand check box. The Next button will be unavailable until the check box is selected. 4 Click Next. If required, your computer restarts and displays the screen Restore C: Drive (Step 2 of 4). A time bar displays showing the progress of the first part of the C: drive recovery. Note - If you started your computer from the recovery discs, a message may display requesting that you insert additional recovery discs. When complete, you are asked to remove the disc and insert disc 1. THIS COULD BE THE SAME DISC. Click OK. The program continues and prepares to restart. A message displays asking you to remove the disc. Click OK to continue. The computer restarts and displays the Restore C: Drive (Step 3 of 4) screen. This screen displays the progress of the last part of restoring the C: Drive to its original factory configuration, and the individual install screens of each software program as it is installed. 129 VGX-XL2A Digital Living System
-
 1
1 -
2
-
3
-
4
-
5
-
6
-
7
-
8
-
9
-
10
-
11
-
12
-
13
-
14
-
15
-
16
-
17
-
18
-
19
-
20
-
21
-
22
-
23
-
24
-
25
-
26
-
27
-
28
-
29
-
30
-
31
-
32
-
33
-
34
-
35
-
36
-
37
-
38
-
39
-
40
-
41
-
42
-
43
-
44
-
45
-
46
-
47
-
48
-
49
-
50
-
51
-
52
-
53
-
54
-
55
-
56
-
57
-
58
-
59
-
60
-
61
-
62
-
63
-
64
-
65
-
66
-
67
-
68
-
69
-
70
-
71
-
72
-
73
-
74
-
75
-
76
-
77
-
78
-
79
-
80
-
81
-
82
-
83
-
84
-
85
-
86
-
87
-
88
-
89
-
90
-
91
-
92
-
93
-
94
-
95
-
96
-
97
-
98
-
99
-
100
-
101
-
102
-
103
-
104
-
105
-
106
-
107
-
108
-
109
-
110
-
111
-
112
-
113
-
114
-
115
-
116
-
117
-
118
-
119
-
120
-
121
-
122
-
123
-
124
-
125
-
126
-
 127
127 -
 128
128 -
 129
129 -
 130
130 -
 131
131 -
 132
132 -
 133
133 -
 134
134 -
 135
135 -
 136
136 -
 137
137 -
138
-
139
-
140
-
141
-
142
-
143
-
144
-
145
-
146
-
147
-
148
-
149
-
150
-
151
-
152
-
153
-
154
-
155
-
156
-
157
-
158
-
159
-
160
-
161
-
162
-
163
-
164
-
165
-
166
-
167
-
168
-
169
-
170
-
171
-
172
-
173
-
174
-
175
-
176
-
177
-
178
-
179
-
180
-
181
-
182
 |
 |
