Stihl HT 101 Product Instruction Manual - Page 18
Mounting the Bar and, Chain - sprocket
 |
View all Stihl HT 101 manuals
Add to My Manuals
Save this manual to your list of manuals |
Page 18 highlights
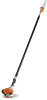
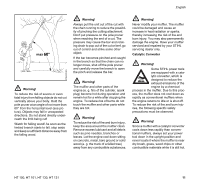
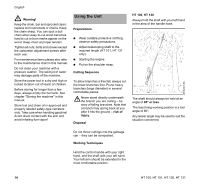
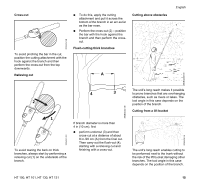
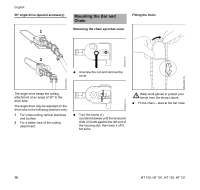
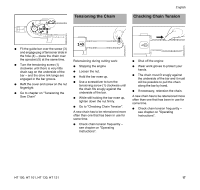
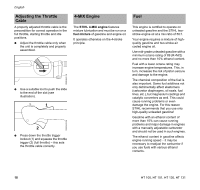
English 30° angle drive (special accessory) 1 Mounting the Bar and Chain Removing the chain sprocket cover Fitting the chain 390BA042 KN 2 N Unscrew the nut and remove the cover. 390BA003 KN 390BA053 KN The angle drive keeps the cutting attachment at an angle of 30° to the drive tube. The angle drive may be adjusted on the drive tube to the following positions only: 1 For cross-cutting vertical branches and bushes. 2 For a better view of the cutting attachment. 1 2 N Turn the screw (1) counterclockwise until the tensioner slide (2) butts against the left end of the housing slot, then back it off 5 full turns. 390BA043 KN Wear work gloves to protect your hands from the sharp cutters. N Fit the chain - start at the bar nose. 16 HT 100, HT 101, HT 130, HT 131
-
 1
1 -
2
-
3
-
4
-
5
-
6
-
7
-
8
-
9
-
10
-
11
-
12
-
 13
13 -
 14
14 -
 15
15 -
 16
16 -
 17
17 -
 18
18 -
 19
19 -
 20
20 -
 21
21 -
 22
22 -
 23
23 -
24
-
25
-
26
-
27
-
28
-
29
-
30
-
31
-
32
-
33
-
34
-
35
-
36
-
37
-
38
-
39
-
40
-
41
-
42
-
43
-
44
-
45
-
46
-
47
-
48
-
49
-
50
-
51
-
52
-
53
-
54
-
55
-
56
-
57
-
58
-
59
-
60
-
61
-
62
-
63
-
64
-
65
-
66
-
67
-
68
-
69
-
70
-
71
-
72
-
73
-
74
-
75
-
76
-
77
-
78
-
79
-
80
-
81
-
82
-
83
-
84
-
85
-
86
-
87
-
88
-
89
-
90
-
91
-
92
-
93
-
94
-
95
-
96
-
97
-
98
-
99
-
100
-
101
-
102
-
103
-
104
-
105
-
106
-
107
-
108
 |
 |
