Sub-Zero BI-36S Built-In Installation Guide - Page 17
Built-In Installation, Position the Unit, Water Line Connection
 |
View all Sub-Zero BI-36S manuals
Add to My Manuals
Save this manual to your list of manuals |
Page 17 highlights
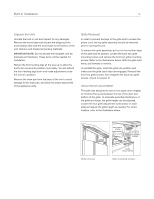
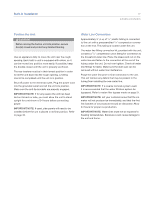
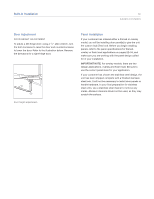
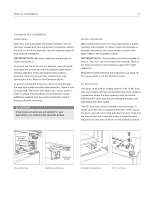
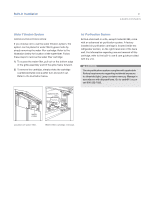
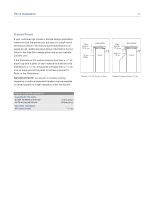
Built-In Installation 17 subzero.com/specs Position the Unit Before moving the built-in unit into position, secure door(s) closed and protect any finished flooring. Use an appliance dolly to move the unit near the rough opening. Each built-in unit is equipped with rollers, so it can be moved into position more easily. If possible, keep the door(s) closed until the unit is properly anchored. The rear levelers must be in their lowest position in order to roll the unit back into the rough opening. Leveling cannot be completed until the unit is in position. Shut off power to the electrical outlet. Plug the power cord into the grounded outlet and roll the unit into position. Make sure the anti-tip brackets are properly engaged. IMPORTANT NOTE: If for any reason the unit has been laid on its back or side, you must allow the unit to stand upright for a minimum of 24 hours before connecting power. IMPORTANT NOTE: If used, side panels will need to be installed before the unit is placed in its final position. Refer to page 35. Water Line Connection Approximately 3' (.9 m) of 1/4" plastic tubing is connected to the unit with a preassembled 1/4" compression connection at the end. This tubing is located under the unit. The water line fitting connection kit, provided with the unit, contains a 1/4" compression union fitting for connection to the household water line. Place the sleeve and nut on the water line and fasten to the connection at the end of the tubing under the unit. Do not over tighten. Check all water line fittings for leaks. Make sure the drain pan can be removed without water line interference. Purge the water line prior to final connection to the unit. This will remove any debris that may be present in the tubing from installing the new water line. IMPORTANT NOTE: If a reverse osmosis system used, it is recommended that the water filtration system be bypassed. Refer to water filter bypass mode on page 21. IMPORTANT NOTE: Let your customer know that the ice maker will not produce ice immediately, and that the first few batches of ice produced should be discarded. Allow 24 hours for proper ice production. IMPORTANT NOTE: Water lines must not be exposed to freezing temperatures. Exposure could cause damage to the unit and home.
-
 1
1 -
2
-
3
-
4
-
5
-
6
-
7
-
8
-
9
-
10
-
11
-
 12
12 -
 13
13 -
 14
14 -
 15
15 -
 16
16 -
 17
17 -
 18
18 -
 19
19 -
 20
20 -
 21
21 -
 22
22 -
23
-
24
-
25
-
26
-
27
-
28
-
29
-
30
-
31
-
32
-
33
-
34
-
35
-
36
-
37
-
38
-
39
-
40
 |
 |
