TP-Link 10GE T1700G-28TQ V1 Installation Guide - Page 14
Power On Sequence of the Stack Switches
 |
View all TP-Link 10GE manuals
Add to My Manuals
Save this manual to your list of manuals |
Page 14 highlights
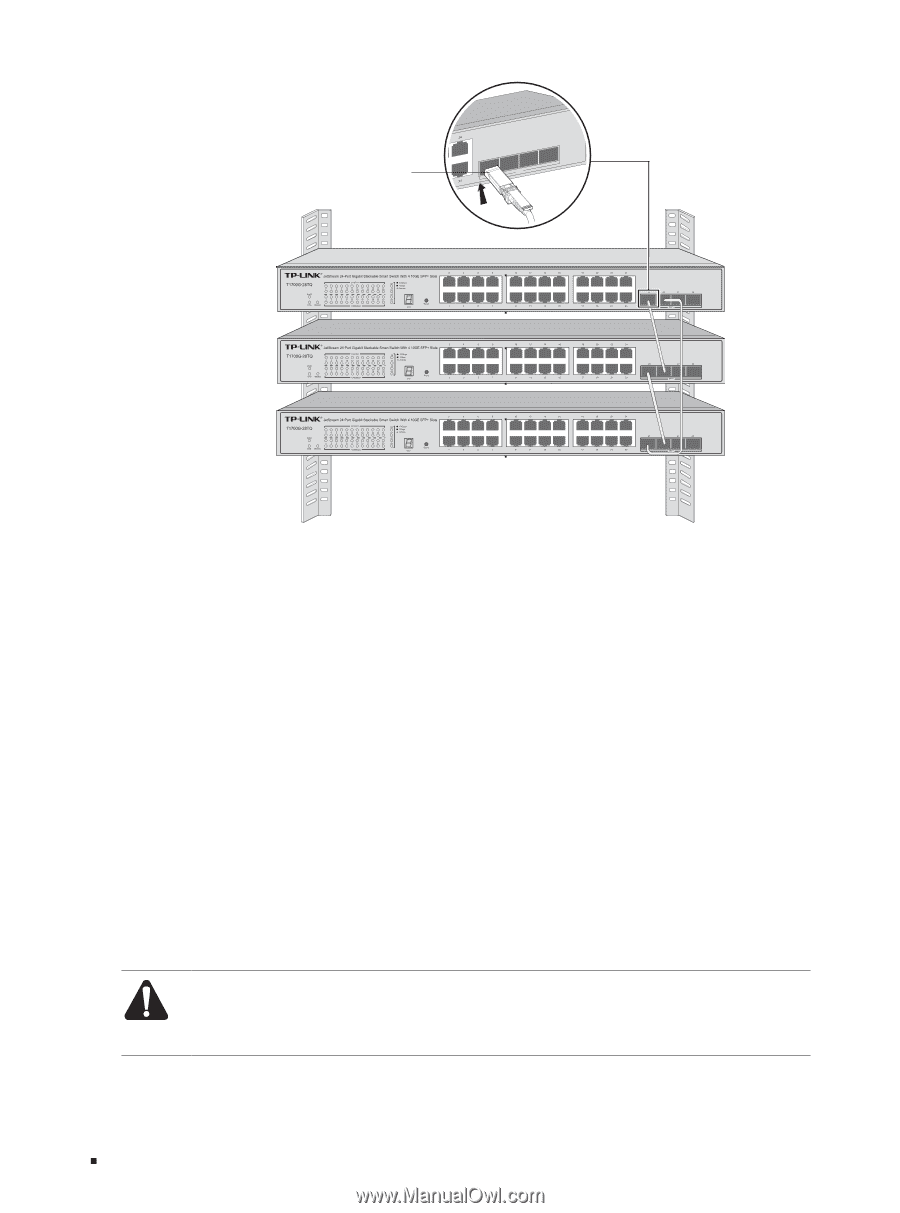
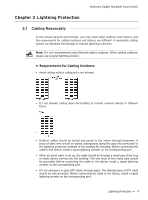
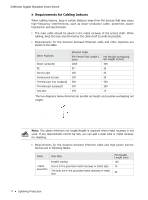
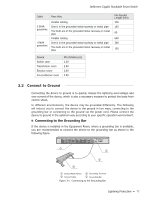
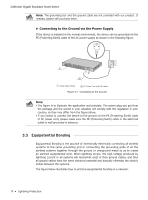
JetStream Gigabit Stackable Smart Switch SFP+ cable 28 27 26 25 SFP+ Figure 2-4 Stacking Using SFP+ Port Power On Sequence of the Stack Switches Since the sequence in which the switches are first powered on might affect the switch that becomes the stack master, please consider the following guidelines before powering on the switches in the stack: 1. If you want a particular switch to become the stack master, power on this switch first. After 1 minute, power on the other switches in the stack. That earliest startup switch will remain the stack master until the next master re-election. 2. If you have no preference as to which switch becomes the stack master, power on all the switches in the stack within 1 minute. The switches will participate in a election to select a master. The Master LED of the selected switch will be on. The switches powered on after 1 minutes don't participate in the election, and they will become member switches. 3. You can access to any member of the stack via Web/SSH/Telnet connection, thus to manage all the switches in the stack. For more information about stack topology and master election, please refer to "Stack" chapter in the User Guide on the Resource CD. Caution: In the process of using TP-LINK SFP+ Cables, please never bend them into a radius of 45mm (1.77 inch) or less, because it may permanently damage the SFP+ Cables. 09 Installation
-
 1
1 -
2
-
3
-
4
-
5
-
6
-
7
-
8
-
 9
9 -
 10
10 -
 11
11 -
 12
12 -
 13
13 -
 14
14 -
 15
15 -
 16
16 -
 17
17 -
 18
18 -
 19
19 -
20
-
21
-
22
-
23
-
24
-
25
-
26
-
27
-
28
 |
 |