TP-Link TL-WPA7510 KIT TL-WPA7510 KITEU V1 User Guide - Page 7
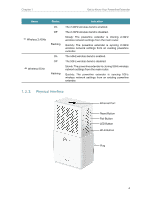
Ethernet Port, Reset, Pair Button, LED Button, Wi-Fi Button
 |
View all TP-Link TL-WPA7510 KIT manuals
Add to My Manuals
Save this manual to your list of manuals |
Page 7 highlights
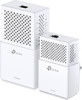
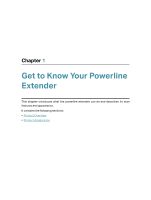
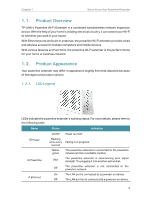
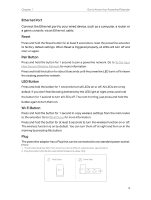
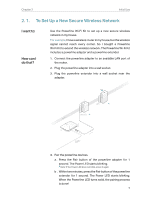
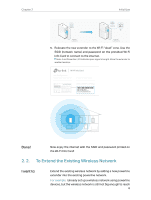
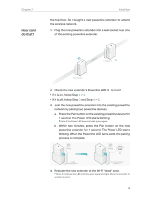
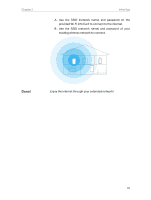
Chapter 1 Get to Know Your Powerline Extender Ethernet Port Connect the Ethernet port to your wired device, such as a computer, a router or a game console, via an Ethernet cable. Reset Press and hold the Reset button for at least 5 seconds to reset the powerline extender to factory default settings. When Reset is triggered properly, all LEDs will turn off and start on again. Pair Button Press and hold the button for 1 second to join a powerline network. Go to To Set Up a New Secure Wireless Network for more information. Press and hold the button for about 8 seconds until the powerline LED turns off to leave the existing powerline network. LED Button Press and hold the button for 1 second to turn all LEDs on or off. All LEDs are on by default. If you don't feel like being bothered by the LED light at night, press and hold the button for 1 second to turn all LEDs off. The next morning, just press and hold the button again to turn them on. Wi-Fi Button Press and hold the button for 1 second to copy wireless settings from the main router to the extender. Go to Wi-Fi Clone for more information. Press and hold the button for at least 5 seconds to turn the wireless function on or off. The wireless function is on by default. You can turn them off at night and then on in the morning by pressing this button. Plug The powerline adapter has a Plug that can be connected to any standard power socket. Note: 1. The provided plug may differ from the picture due to different regional power specifications. 2. Plug the product directly into a wall socket instead of a power strip. Wall Outlet Power Strip 5
-
 1
1 -
 2
2 -
 3
3 -
 4
4 -
 5
5 -
 6
6 -
 7
7 -
 8
8 -
 9
9 -
 10
10 -
 11
11 -
 12
12 -
13
-
14
-
15
-
16
-
17
-
18
-
19
-
20
-
21
-
22
-
23
-
24
-
25
-
26
-
27
-
28
-
29
-
30
-
31
-
32
-
33
-
34
-
35
-
36
-
37
-
38
-
39
 |
 |