TRENDnet TEW-MP1U User's Guide - Page 7
Setup - wireless g print server
 |
UPC - 710931600322
View all TRENDnet TEW-MP1U manuals
Add to My Manuals
Save this manual to your list of manuals |
Page 7 highlights
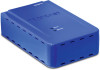
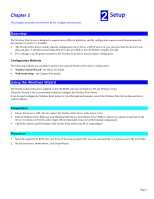
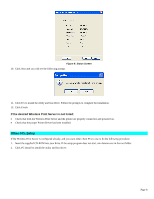
Chapter 2 This chapter provides an overview of the configuration process. 2 Setup Overview The Wireless Print Server is designed to support many different platforms, and the configuration required would depend upon the environment in which it is installed. • The Wireless Print Server usually requires configuration, but if there's a DHCP server on your network, then the device is just plug-and-play. A Windows-based setup Wizard is also provided on the CD-ROM to simplify this task. • PCs wishing to use the printer attached to the Wireless Print Server always require configuration. Configuration Methods The following methods are available to perform the required Wireless Print Server configuration: • Windows-based Wizard - see below for details. • Web-based setup - see Chapter 4 for details. Using the Windows Wizard The Windows-based Wizard is supplied on the CD-ROM, and runs on Windows XP and Windows Vista. Using this Wizard is the recommended method to configure the Wireless Print Server. It can be used configure the Wireless Print Server for your Network environment, even if the Wireless Print Server does not have a valid IP address. Preparation • Ensure the power is OFF. Do not connect the Wireless Print Server while power is On. • Find the Default Server Name for your Wireless Print Server. The Default Server Name is shown on a sticker on the base of the device. It consists of 8 letters and/or digits. Record this name; it may be needed during configuration. • Check the wireless and IP settings of the Access Point which your PC is connecting to. Procedure 1. Insert the supplied CD-ROM into your drive. If the setup program does not start automatically, run Autorun.exe in the root folder. 2. On the first screen, shown below, click Setup Wizard. Page 5
-
 1
1 -
 2
2 -
 3
3 -
 4
4 -
 5
5 -
 6
6 -
 7
7 -
 8
8 -
 9
9 -
 10
10 -
 11
11 -
 12
12 -
13
-
14
-
15
-
16
-
17
-
18
-
19
-
20
-
21
-
22
 |
 |