Thermador HMIB42WS Installation instructions - Page 13
Installation Instructions
 |
View all Thermador HMIB42WS manuals
Add to My Manuals
Save this manual to your list of manuals |
Page 13 highlights
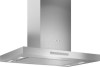
Installation Instructions Installation Determine installation height 81/4" (209) 183/8" (467) 30" (762) min over a electric cooktop 30" (762) min over a gas cooktop The igure above indicates a typical installation of the hood. An optional chimney extension kit to reach 9'-12' (274 to 366 mm) may be purchased. Add or subtract chimney extensions as appropriate to accommodate ceiling height and recommended hood height. For gas cooktop & range installations: Mount the hood so the bottom is at least 30" (76.2 cm) above the cooking surface. For electric/induction cooktop & range installations: Mount the hood so the bottom is at least 30" (76.2 cm) above the cooking surface. NOTICE: The hood could incur some damage from heat if a THERMADOR MASTERPIECE® series cooktop is operated with multiple burners at high settings under a hood that is installed at minimum clearances. Ceiling support structures • This vent hood is heavy. Adequate structure and support must be provided in all types of installations. • At the hood location, install 2"x 4" cross framing between ceiling joists as shown (2"x 4" are required to support the weight of the hood). • Arrange cross framing in the ceiling to suit the existing structure. • Your ceiling joists will be like one of the following: Example A NOTE: Top view ceiling joists parallel to front of hood 101⁄16" (25.5 cm) install cross- framing symmetrically over duct/cooktop Centerline 16" (40.6 cm) joist spacing 7 1⁄16" (17.9cm) Ø 8 1⁄4" (21 cm) duct 2 x 4 cross framing NOTE: Top view ceiling joists parallel to front of hood 16" (40.6 cm) joist spacing Align duct to Hood front center of cooktop Cooktop outline Example B 101⁄16" (25.5 cm) install cross- framing symmetrically over duct/cooktop Centerline 7 1⁄16" (17.9cm) Ø 8 1⁄4" (21 cm) duct 2 x 4 cross framing Align duct to Hood front center of cooktop Cooktop outline NOTE: Top view ceiling joists parallel to front of hood Example C Centerline 101⁄16" (25.5 cm) install cross-framing symmetrically over duct/cooktop 2 x 4 cross framing 7 1⁄16" (17.9cm) Ø 8 1⁄4" (21 cm) duct Installation Instructions 16" (40.6 cm) joist spacing Hood front Align duct to center of cooktop Cooktop outline English | 13 |
-
 1
1 -
2
-
3
-
4
-
5
-
6
-
7
-
 8
8 -
 9
9 -
 10
10 -
 11
11 -
 12
12 -
 13
13 -
 14
14 -
 15
15 -
 16
16 -
 17
17 -
 18
18 -
19
-
20
-
21
-
22
-
23
-
24
-
25
-
26
-
27
-
28
-
29
-
30
-
31
-
32
-
33
-
34
-
35
-
36
-
37
-
38
-
39
-
40
-
41
-
42
-
43
-
44
-
45
-
46
-
47
-
48
-
49
-
50
-
51
-
52
-
53
-
54
-
55
-
56
-
57
-
58
-
59
-
60
-
61
-
62
-
63
-
64
 |
 |
