Thermador HMIB42WS Installation instructions - Page 20
Recirculating Kit optional
 |
View all Thermador HMIB42WS manuals
Add to My Manuals
Save this manual to your list of manuals |
Page 20 highlights
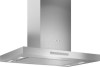
3. Plug the wire connector assembly supplied with the blower housing to the mating cable connector from the range hood. A BC A. Hood assembly connector B. Plastic cable holders C. Cable holder screws Mounting the lower duct covers 1. Place the lower duct covers over the hood assembly. 2. Assembly the two pieces over the upper duct cover assembly. • Slide the edge of the duct cover under the clip located in the opposite duct cover. • Push them until you hear a click. The bulges on the edge of the duct covers has to enter in the clip slots. 3. Slide the lower duct cover assembly down to the base of the hood. Recirculating Kit (optional) When used in recirculation mode, To Reduce the Risk of Fire and Shock use only conversion kit Model RECHMIB. If it is not possible to vent cooking fumes and vapors to the outside, the hood can be used in the non-vented (recirculating) version, using the recirculating kit . Fumes and vapors are recycled through the grid. See optional accessories section. Installing the air delector: 1. Assemble the air delector with the upper horizontal support with 2 assembly screws pèr side. 2. Measure length of 8" (20.3 cm) vent needed to connect the transition to the delector. NOTE: Flexible Vent may needed. NOTE: Vent should it up inside delector 1" (2.5 cm) minimum. 3. Install vent between the transition and the delector. NOTE: To make vent installation easier, temporarily remove the delector from the chimney support bracket and replace after vent section is in place. 4. Seal all connections with vent clamps. English | 20 | Installation Instructions
-
 1
1 -
2
-
3
-
4
-
5
-
6
-
7
-
8
-
9
-
10
-
11
-
12
-
13
-
14
-
 15
15 -
 16
16 -
 17
17 -
 18
18 -
 19
19 -
 20
20 -
 21
21 -
 22
22 -
 23
23 -
 24
24 -
 25
25 -
26
-
27
-
28
-
29
-
30
-
31
-
32
-
33
-
34
-
35
-
36
-
37
-
38
-
39
-
40
-
41
-
42
-
43
-
44
-
45
-
46
-
47
-
48
-
49
-
50
-
51
-
52
-
53
-
54
-
55
-
56
-
57
-
58
-
59
-
60
-
61
-
62
-
63
-
64
 |
 |
