Thermador HMIB42WS Installation instructions - Page 14
Mounting the hood structure
 |
View all Thermador HMIB42WS manuals
Add to My Manuals
Save this manual to your list of manuals |
Page 14 highlights
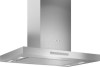
Mounting the hood structure 1. Place the template in the ceiling considering the instructions for ceiling support structures. NOTE: Always consider the front of hood legend when playing the template on the ceiling. It will deine the control's location. 5. Install the lower vertical supports to the lower horizontal support with 8 - 4.2 x 8 mm screws. A B 2. Mark with a pencil the hole locations for screws and duct in the ceiling. A. Lower horizontal support B. 8 - 4.2 x 8 mm screws 6. Install the 4 upper vertical supports with 16 - 4.2 x 8 mm screws. A 3. Install the upper duct cover brackets on one of the horizontal supports. B 4. Fix the the upper horizontal support (the one with the upper duct cover brackets) with 4 - 5 x 45 mm screws. A. 4- Upper vertical supports B. 16 - 4.2 x 8 mm screws English | 14 | Installation Instructions
-
 1
1 -
2
-
3
-
4
-
5
-
6
-
7
-
8
-
 9
9 -
 10
10 -
 11
11 -
 12
12 -
 13
13 -
 14
14 -
 15
15 -
 16
16 -
 17
17 -
 18
18 -
 19
19 -
20
-
21
-
22
-
23
-
24
-
25
-
26
-
27
-
28
-
29
-
30
-
31
-
32
-
33
-
34
-
35
-
36
-
37
-
38
-
39
-
40
-
41
-
42
-
43
-
44
-
45
-
46
-
47
-
48
-
49
-
50
-
51
-
52
-
53
-
54
-
55
-
56
-
57
-
58
-
59
-
60
-
61
-
62
-
63
-
64
 |
 |
